


Notice your child lighting up when they create? Here are seven simple, practical ways to nurture their creative spark — without the pressure to "improve" the unique voice they were already born with.

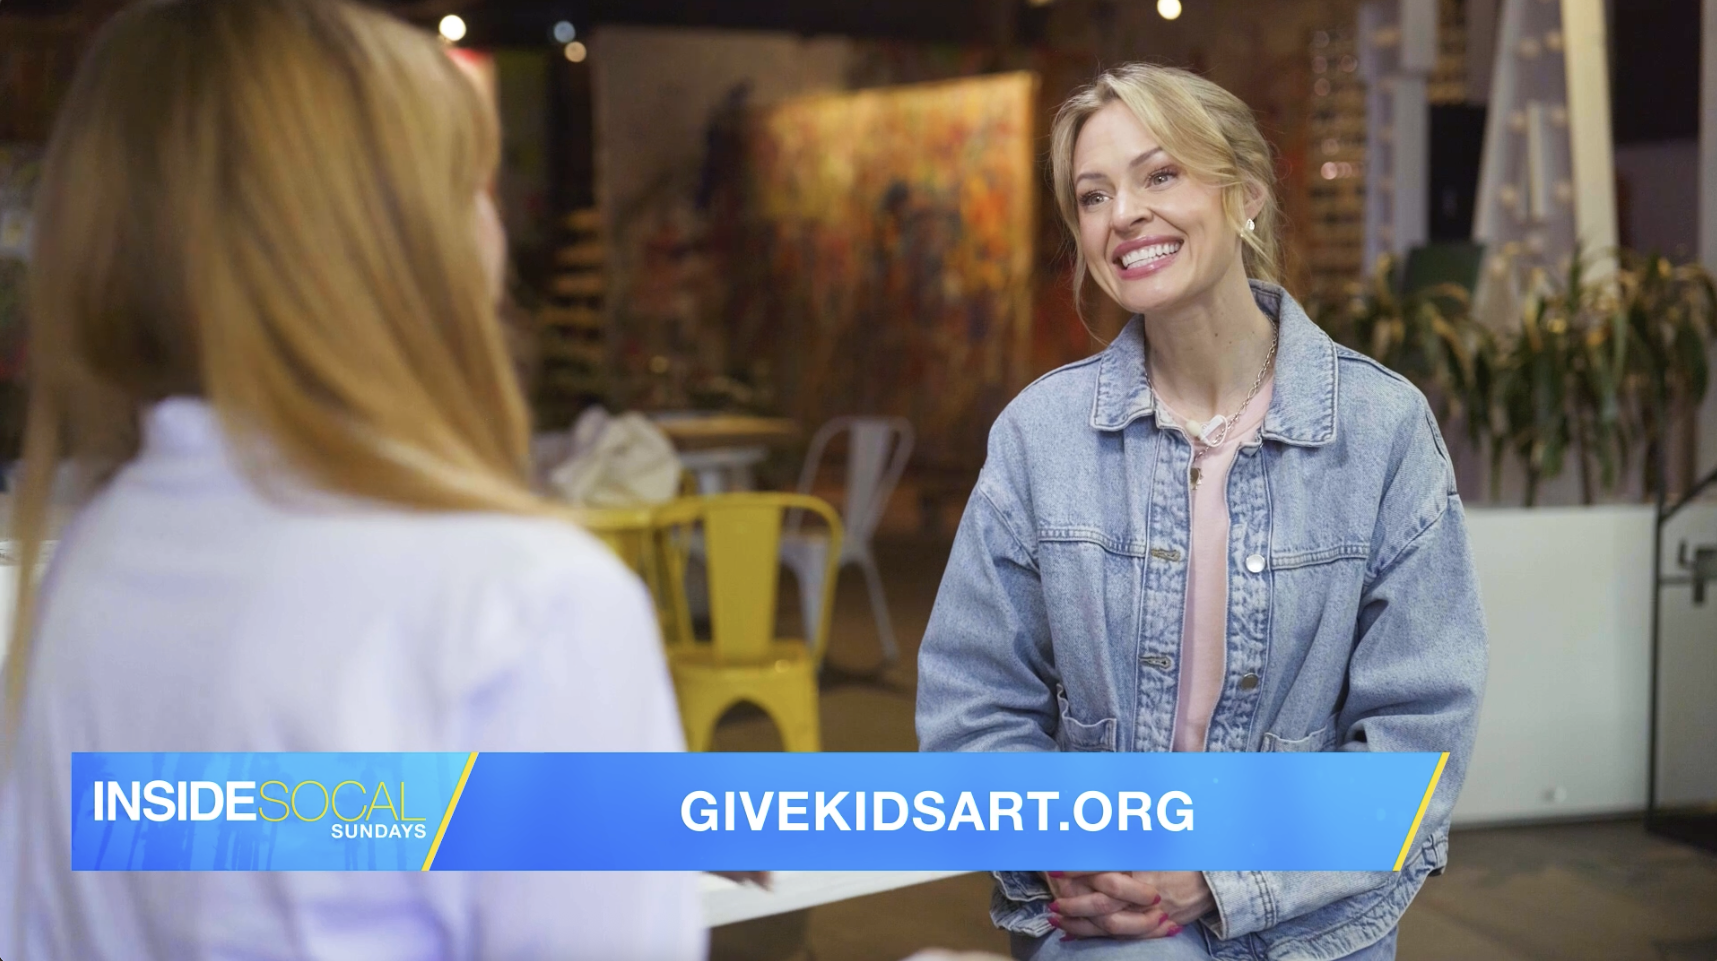
Give Kids Art was recently spotlighted on CBS Los Angeles' Inside SoCal with Erica Olsen, where we had the incredible opportunity to share our story and the impact art has on children in underserved communities.
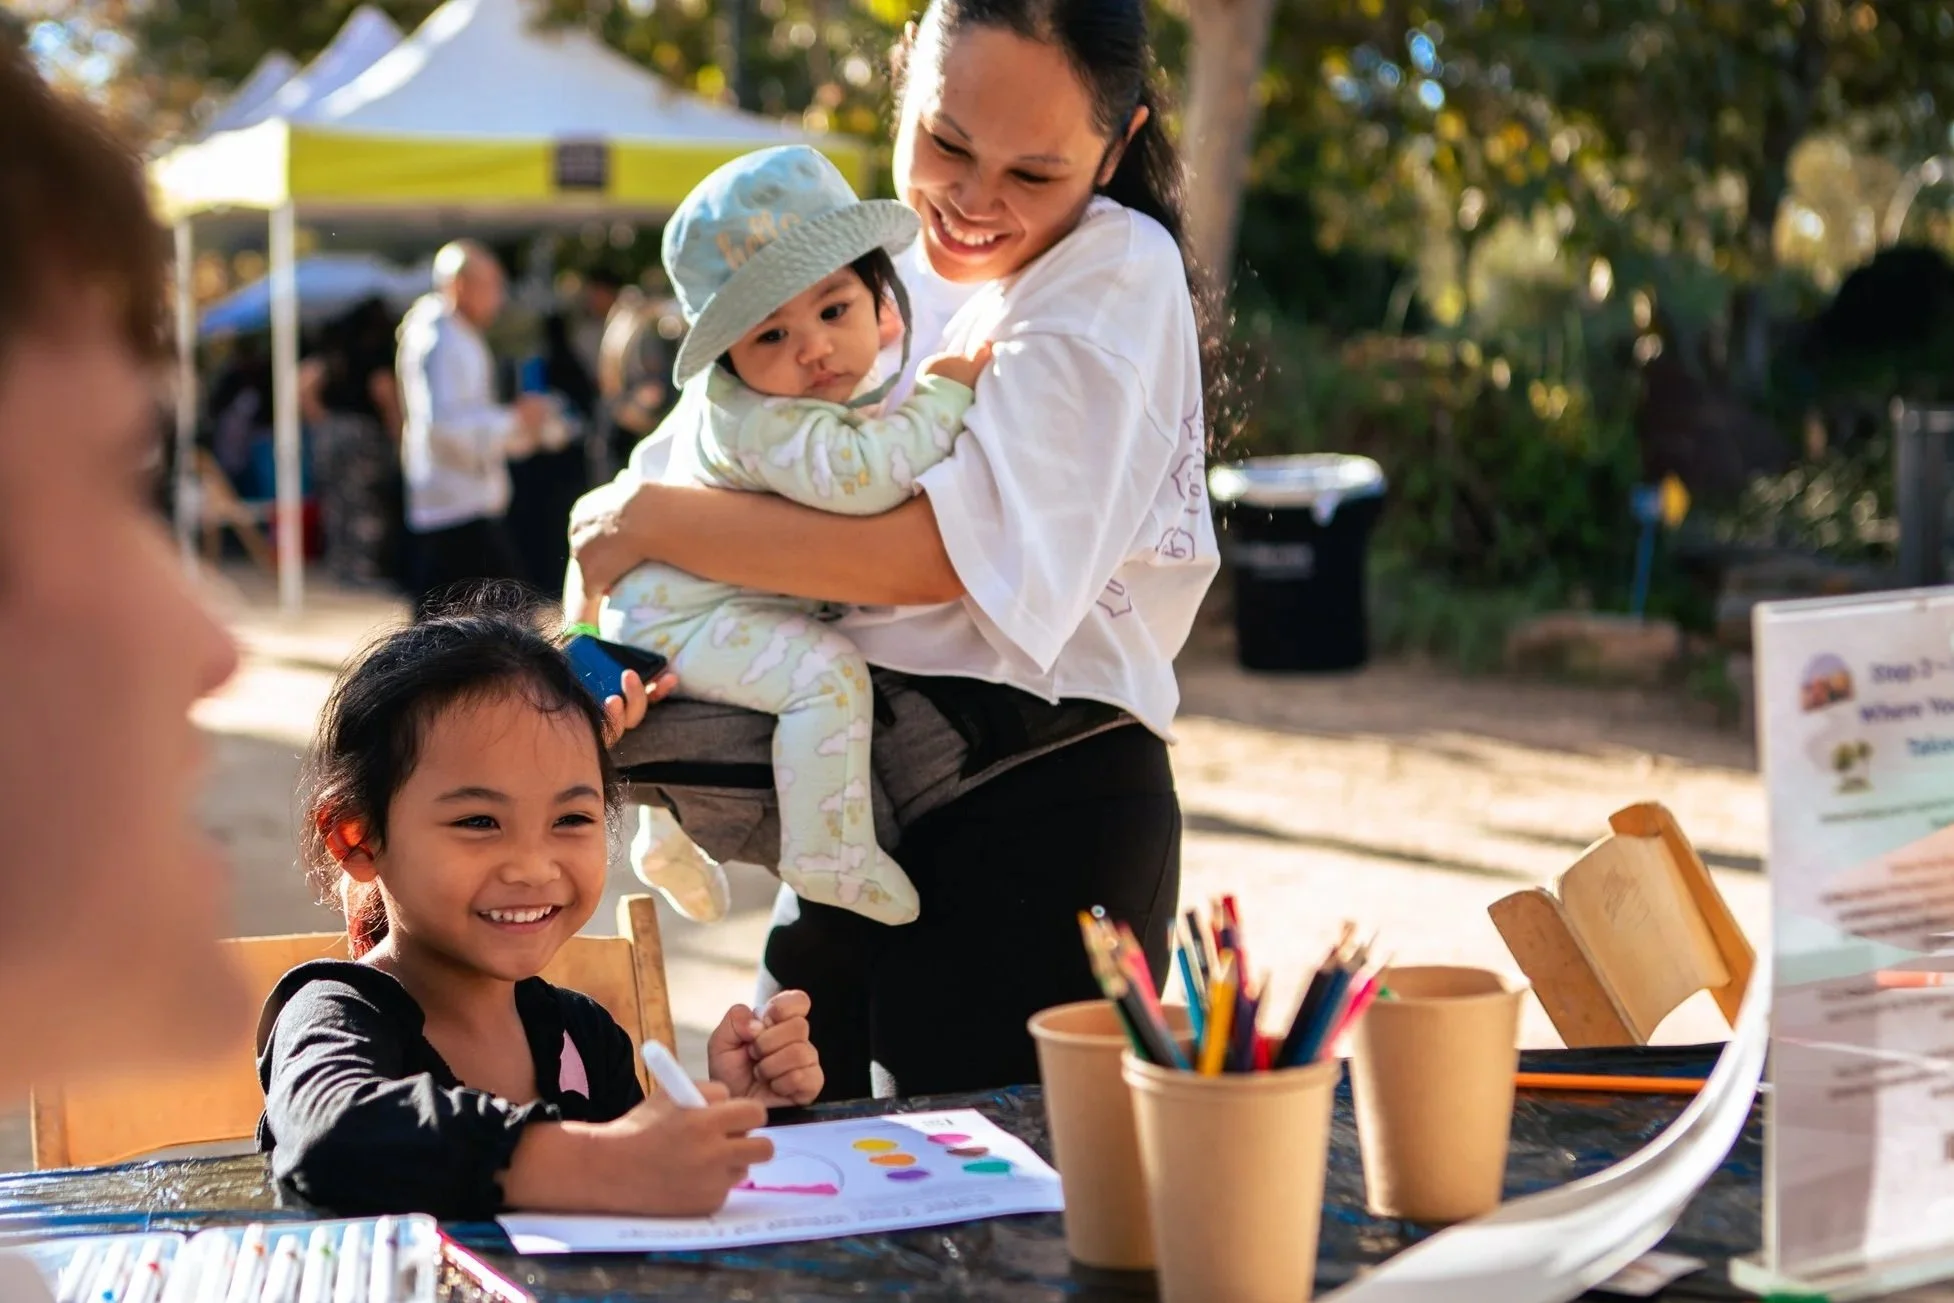
We joined over 60 amazing organizations for a day of connection and creativity with the Natural History Museum. Read about how we shared a little Give Kids Art magic through one of our favorite activities.
“We delight in the beauty of the butterfly, but rarely admit the changes it has gone through to achieve that beauty.”
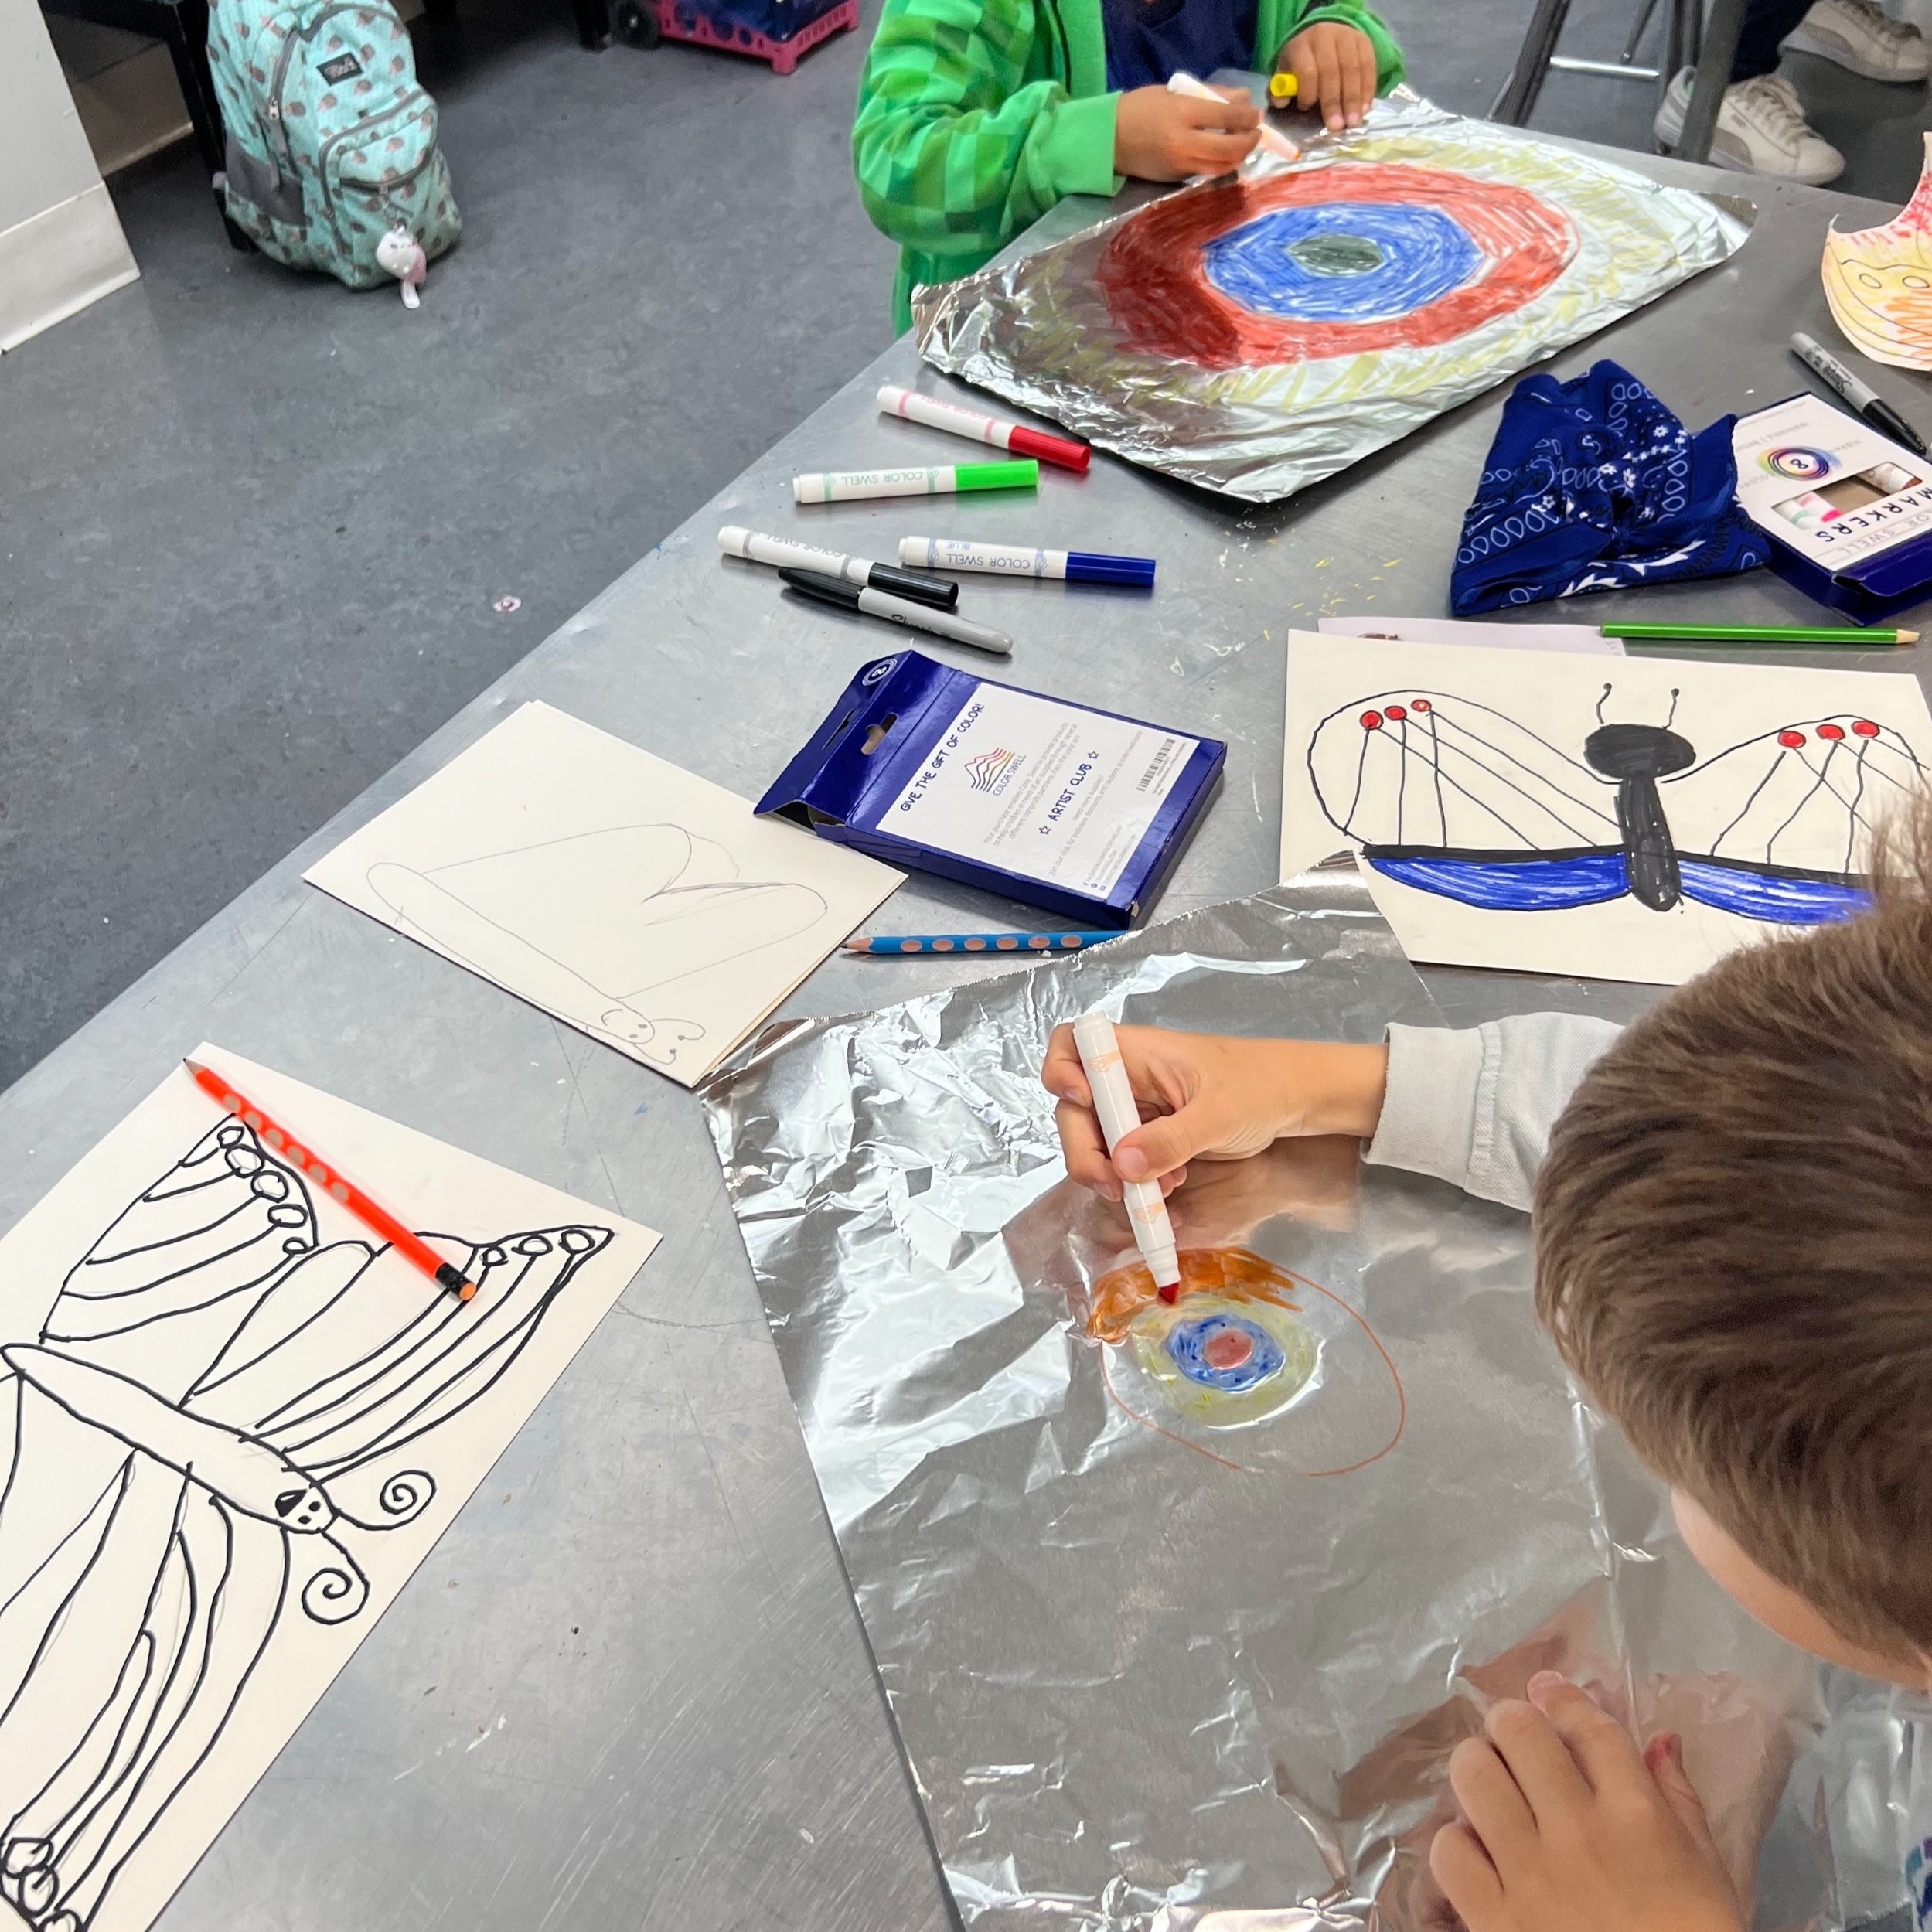
We adjusted one of our favorite springtime art activities to incorporate an easy, fun art technique for kids to explore – aluminum foil marker printmaking! This process can also be used to introduce conversations on metamorphosis, change, and what we can and cannot control. The aluminum foil marker printing technique also helps us immediately practice and embrace this process of change!
At minimum, you will need a piece of paper, pencil, permanent marker (Sharpie recommended), washable colored markers, a sheet of aluminum foil, and a spray bottle! Ideally, the spray bottle needs to be able to mist water. You can recycle old cleaning supply spray bottles that have been thoroughly cleaned and rinsed. We have also found that travel-sized spray bottles, which can be purchased at CVS or Dollar Tree, work well.
If you’re trying this with a group, allocate 10-15 minutes for the introductions, warm-up, and art activity discussion. The specific recommended warm-up activity will depend on the age of the children, their needs, etc. as well as how often you’ve engaged with them. However, if it makes sense, you can try a quick feelings check-in with your participants. Ask your artists to take a moment to check-in with themselves: “How are you feeling? If you were a butterfly right now, what colors would you be?” (Hint: they can use the color(s) later in their art!).
In-Person Option: Go around your group and ask each participant to share their butterfly color(s) for how they are feeling today. Let them know that they can always “pass” and share later. You could pass a ball, stuffed animal, talking stick, etc. or simply sit in a circle and share clockwise.
Zoom Alternative: If not everyone can share their screen or use the microphone, you could have each participant edit their Zoom name to include their first name, color(s).
Both: You can also present an image or chart of various colorful butterflies and ask the artists to pick a butterfly (or butterflies) for how they’re feeling, by sharing verbally or pointing to the images.
If you’re trying this activity for yourself, check in with yourself too!
After your initial introductions and warm-up, you can transition into a conversation about butterflies, including some fun facts. For instance, did you know that “no two of the world's more than 12,000 butterfly species look quite alike” (source)? Then, you can move onto their various symbolic meanings. If you’re working with your kids or a class, open up the group for brainstorming and discussion. Ask the participants,“Do butterflies mean or represent anything special to you?” Try writing down all the thoughts on a physical or digital board for all to see. For our group, we brainstormed and shared different meanings and then focused on the process of metamorphosis and change. We walked through the stages of metamorphosis for a butterfly: Eggs > Caterpillar > Chrysalis > Butterfly. With certain groups, after explaining the process, we collectively try a movement activity where the participants mimic the facilitator growing from an egg through the metamorphosis stages and into a big, beautiful butterfly.
We also introduced some inspiring quotes on change, including one by Maya Angelou, to emphasize that while change is constant and scary, it also can lead to unexpectedly beautiful outcomes. So we must embrace the change and the journey because we never know where it will take us. It might turn us into a beautiful butterfly!
Wrap up with the idea that we’re now going to create our own unique, beautiful butterflies and explore change through a fun print-making process using aluminum foil.
Pull out one piece of watercolor or mixed media paper (regular paper is ok too if that’s what you have!), and tell yourself or your participants that you’re going to first draw using pencil. The paper can be oriented vertically or horizontally.
Proceed to follow the initial drawing prompt and activity instructions in the slides below:
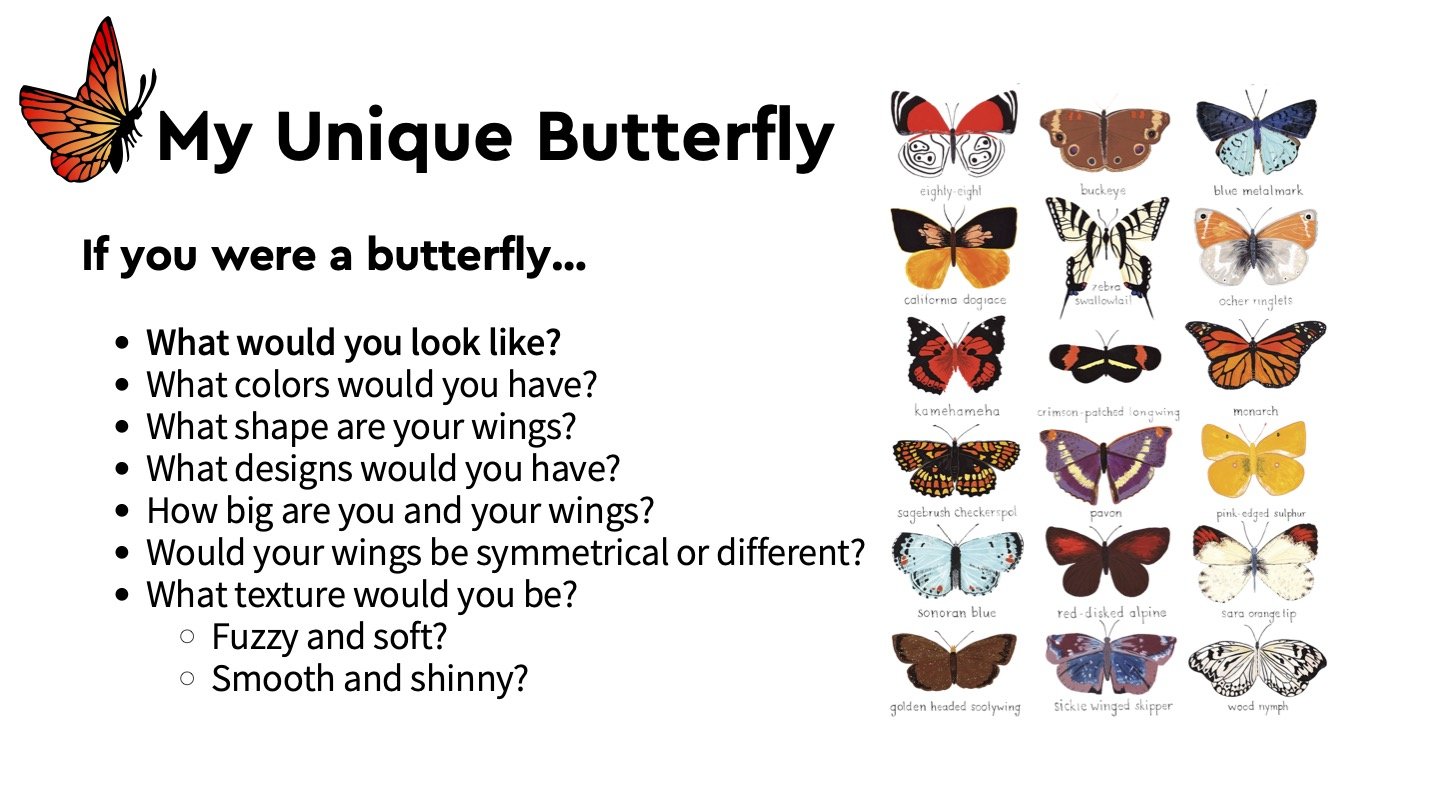
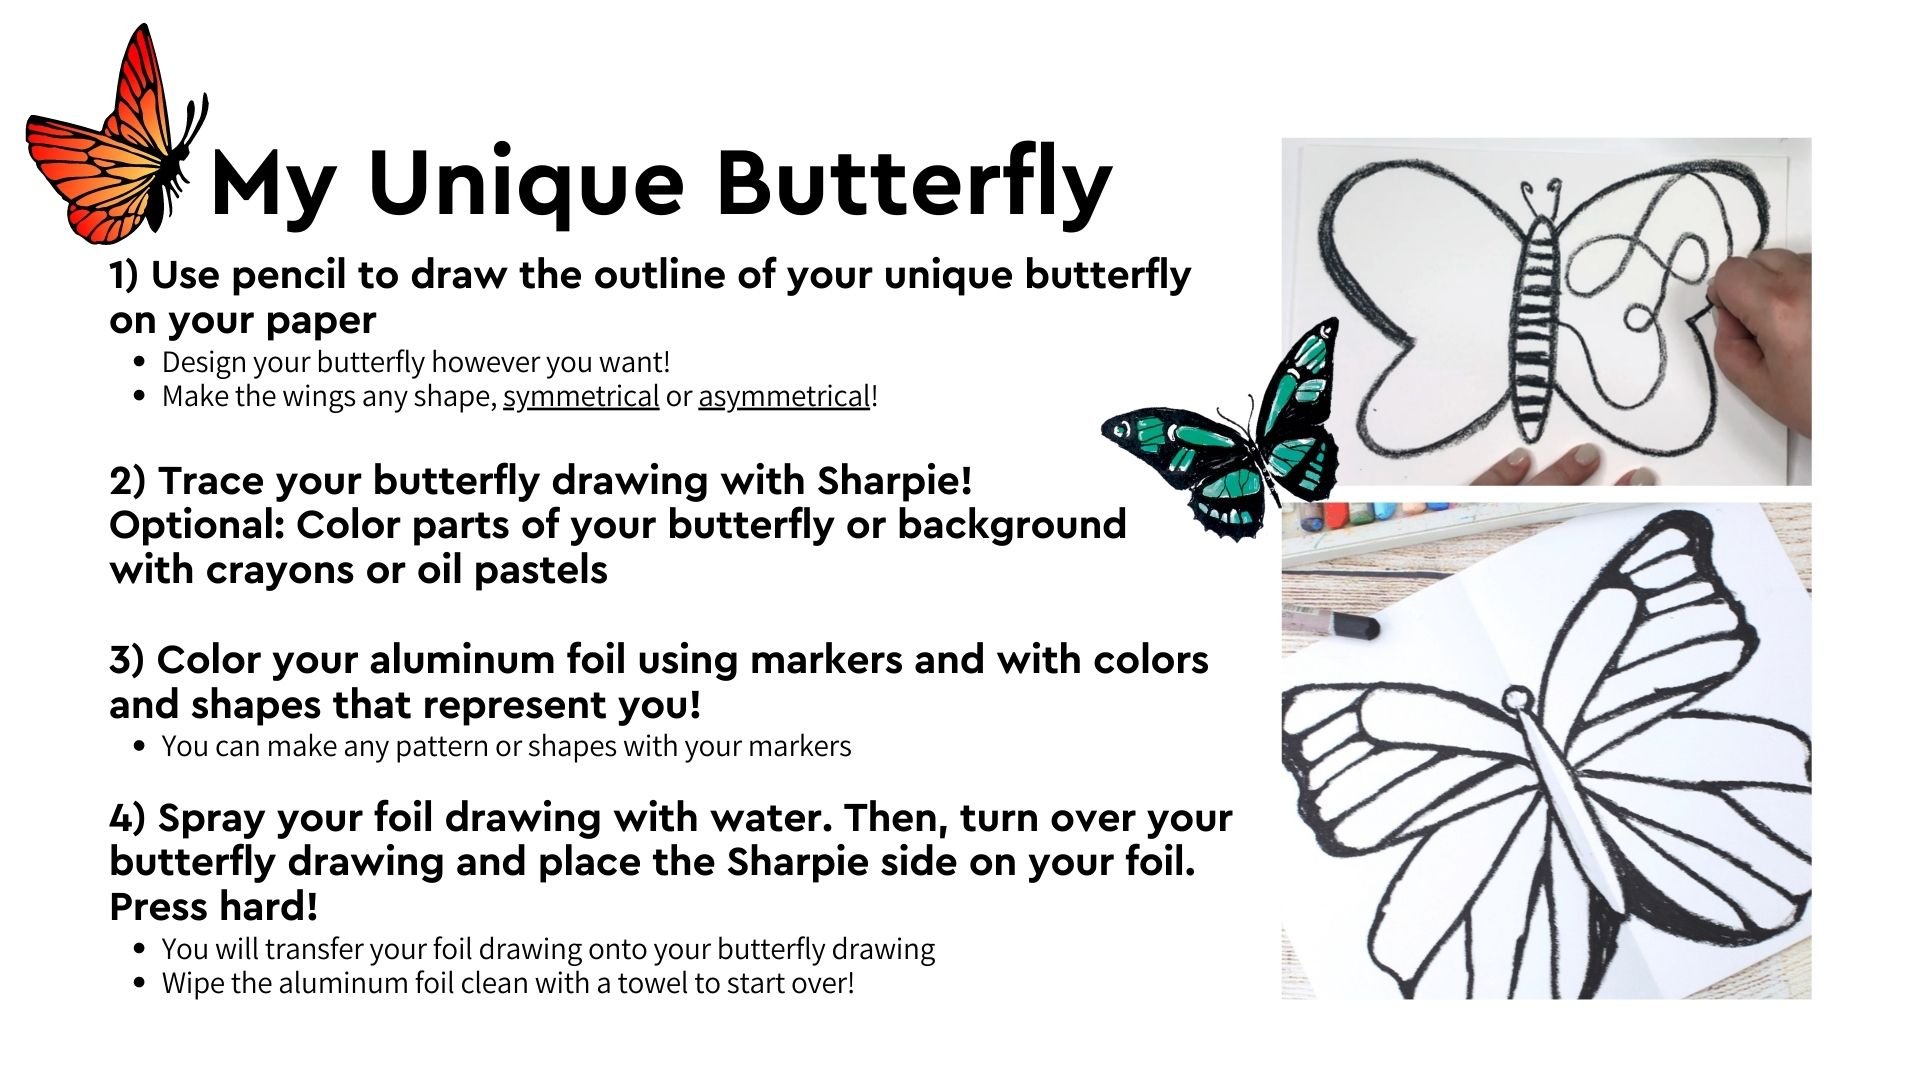
As the artists draw their unique butterflies, the facilitator can introduce the terms of symmetry and asymmetry and give the artists the option of drawing their butterfly wings the same or different on both sides.
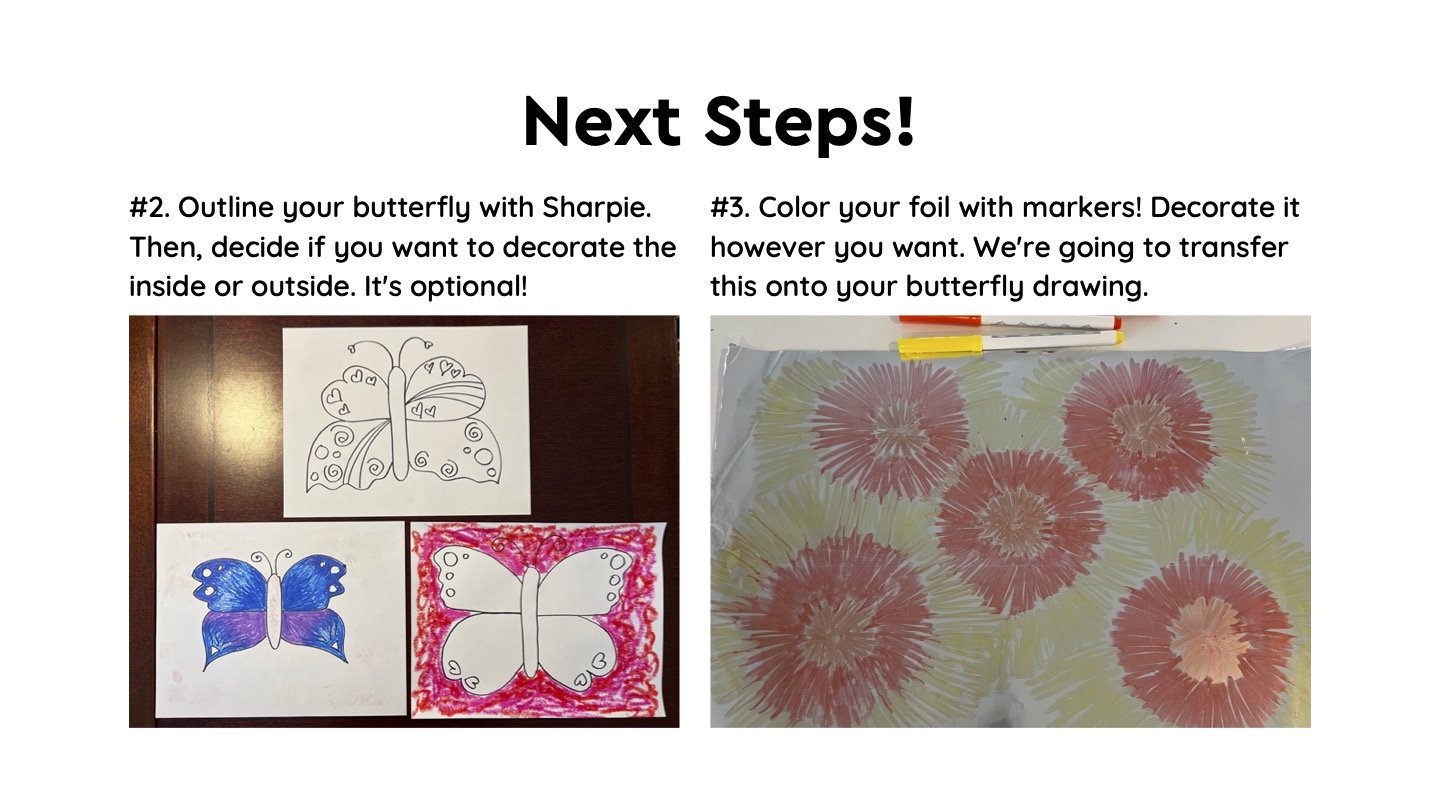
Once the artists look like they are wrapping up their drawings, the next step is to outline their butterfly with a permanent marker or pen (Sharpie recommended). For young ones, “outlining” can be explained as tracing or drawing over the pencil with the permanent marker.
For older artists, we also give them the option of coloring inside and/or around their butterfly using crayons or oil pastels. By integrating these other drawing materials, you can combine the activity with a discussion on Crayon Resist Technique (see here for details) or Wax Resist Technique.
If artists are insistent on not wanting to draw a butterfly, see if they might be interested in drawing a “robot butterfly” or creating another type of bug.
If an artist finishes the drawing quickly or feels lost in what to do or where to start, take a look at what they’ve done so far and ask them questions! For instance, “I see that you really put thought into what your butterfly looks like, and I’m wondering if you would like to try one of the options and decorate the area around your butterfly to show where your butterfly is? Where does your butterfly want to live or like to go?”
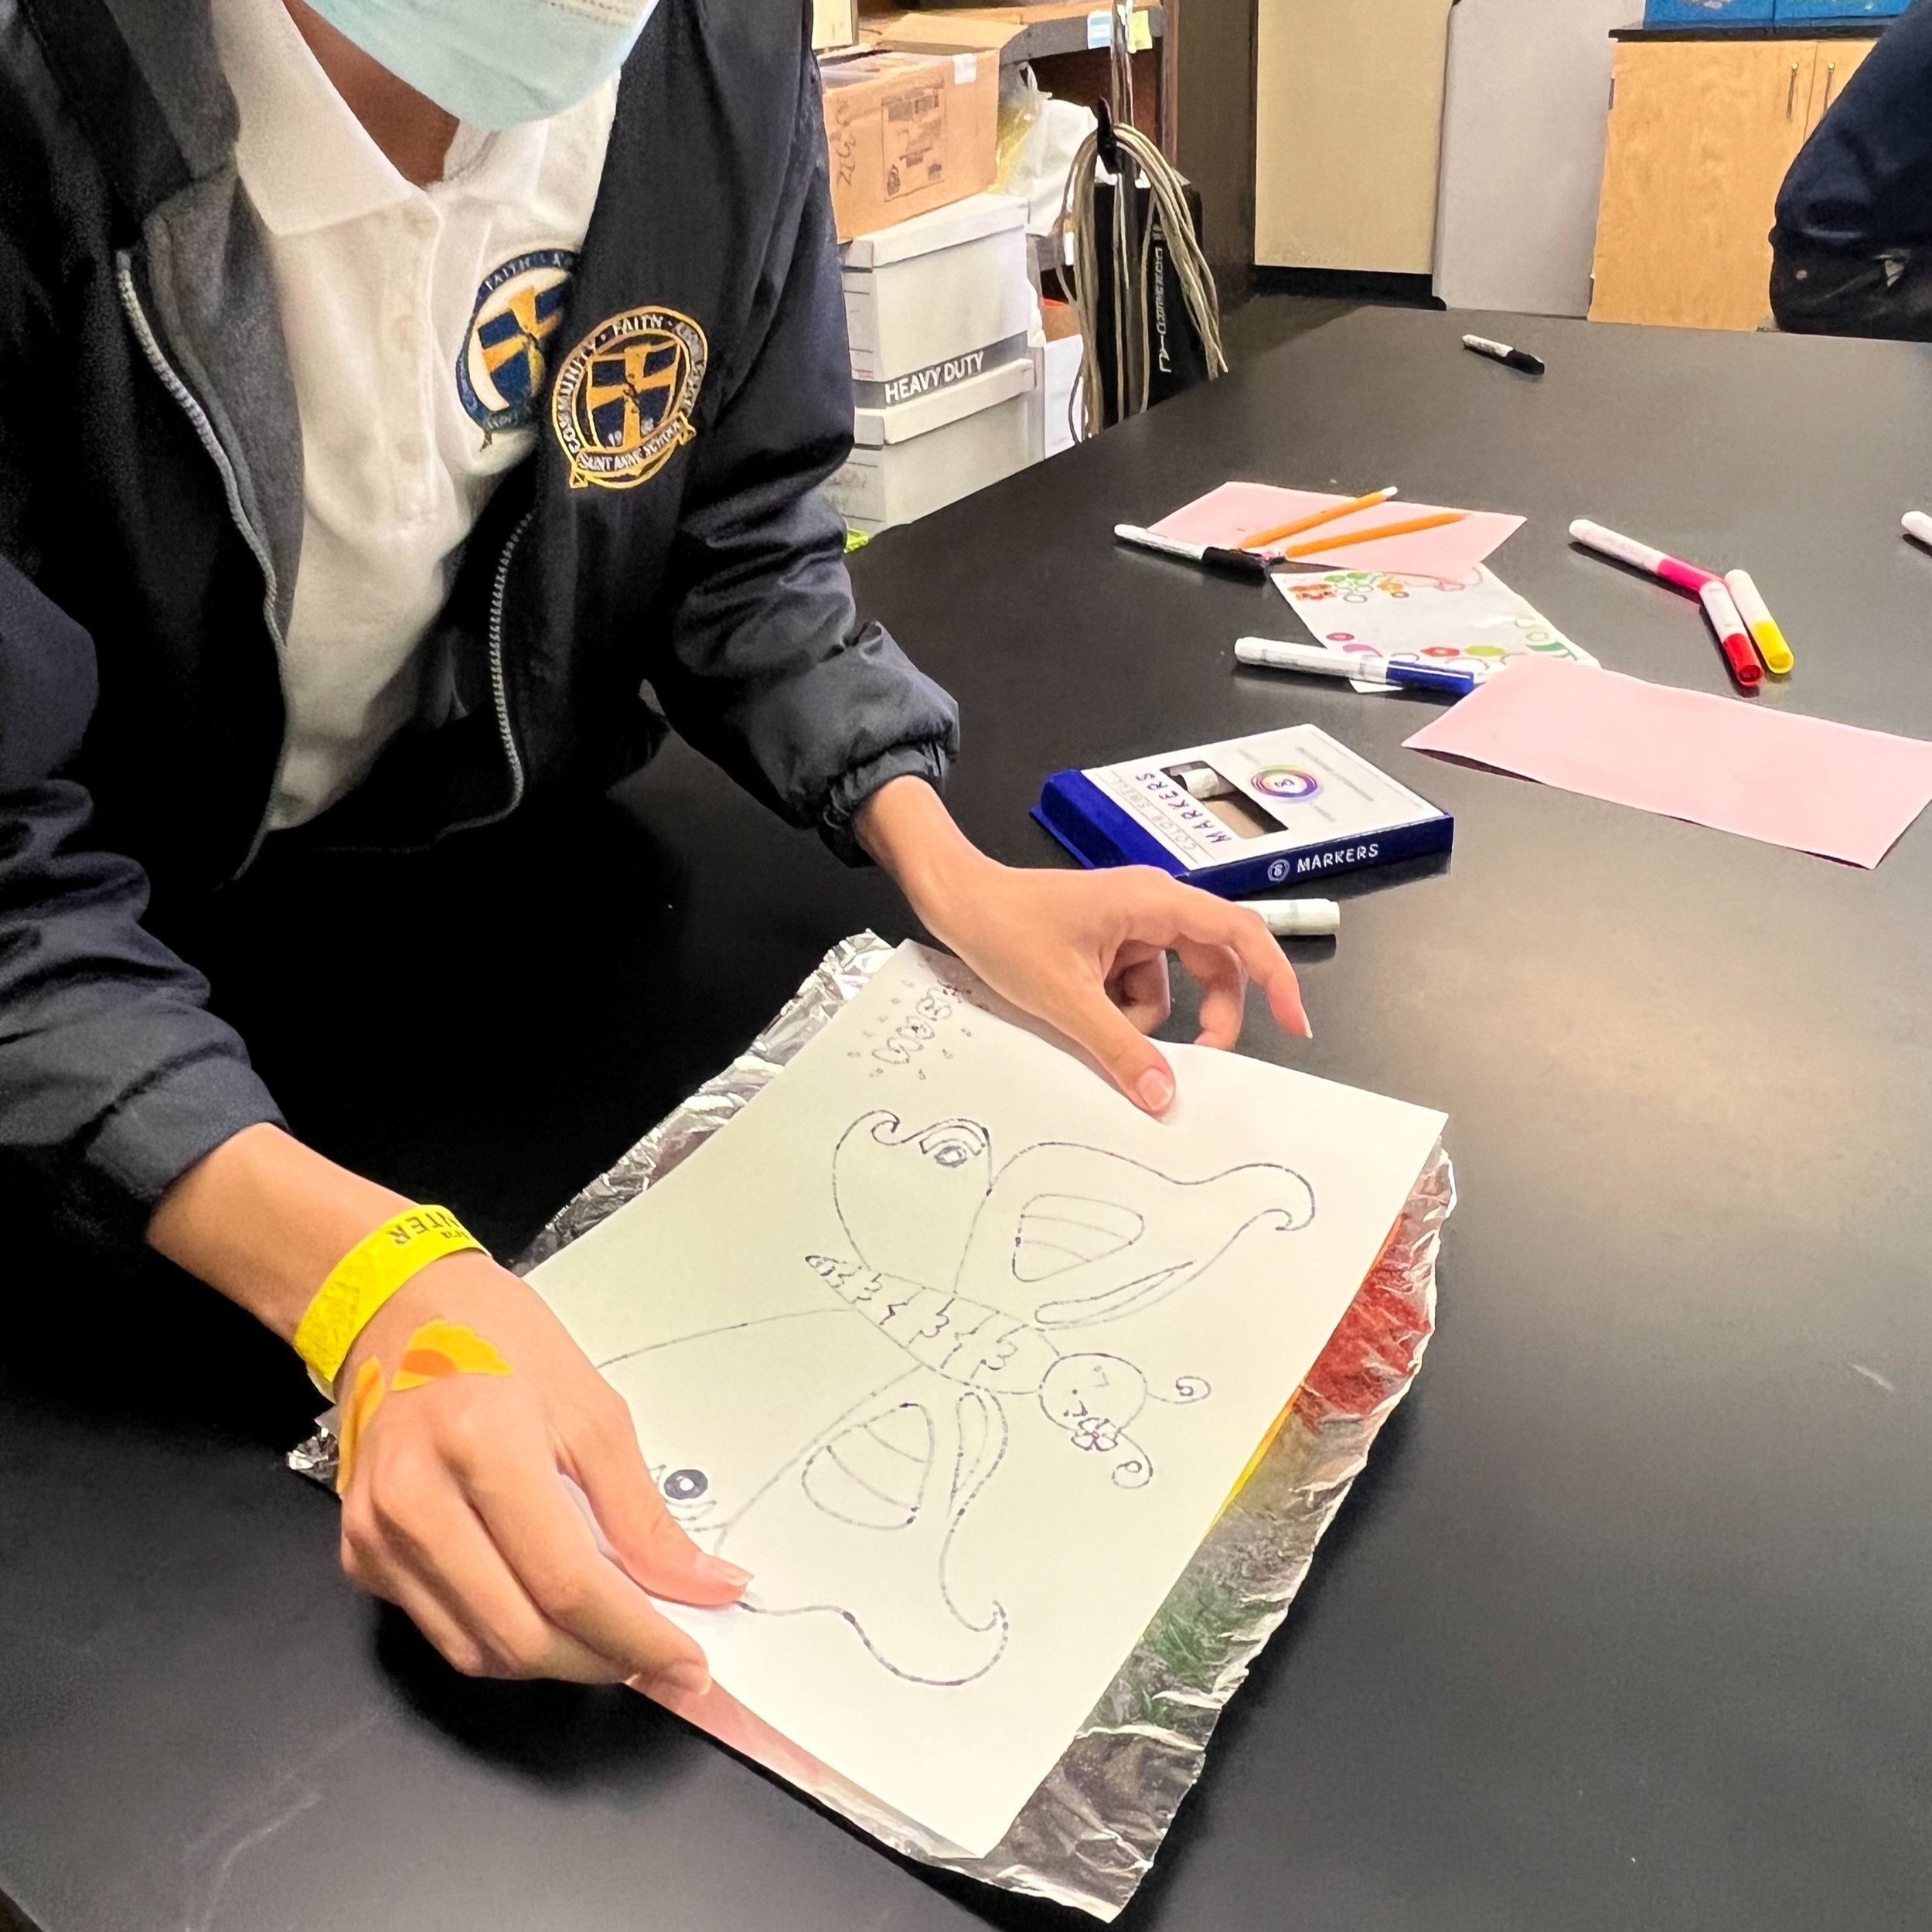
Once the artists look like they have finished, take a moment to have all artists look up, so the foil printmaking process can be explained with image examples. It’s recommended that the facilitator demonstrate the foil marker transfer process quickly for them in person too.
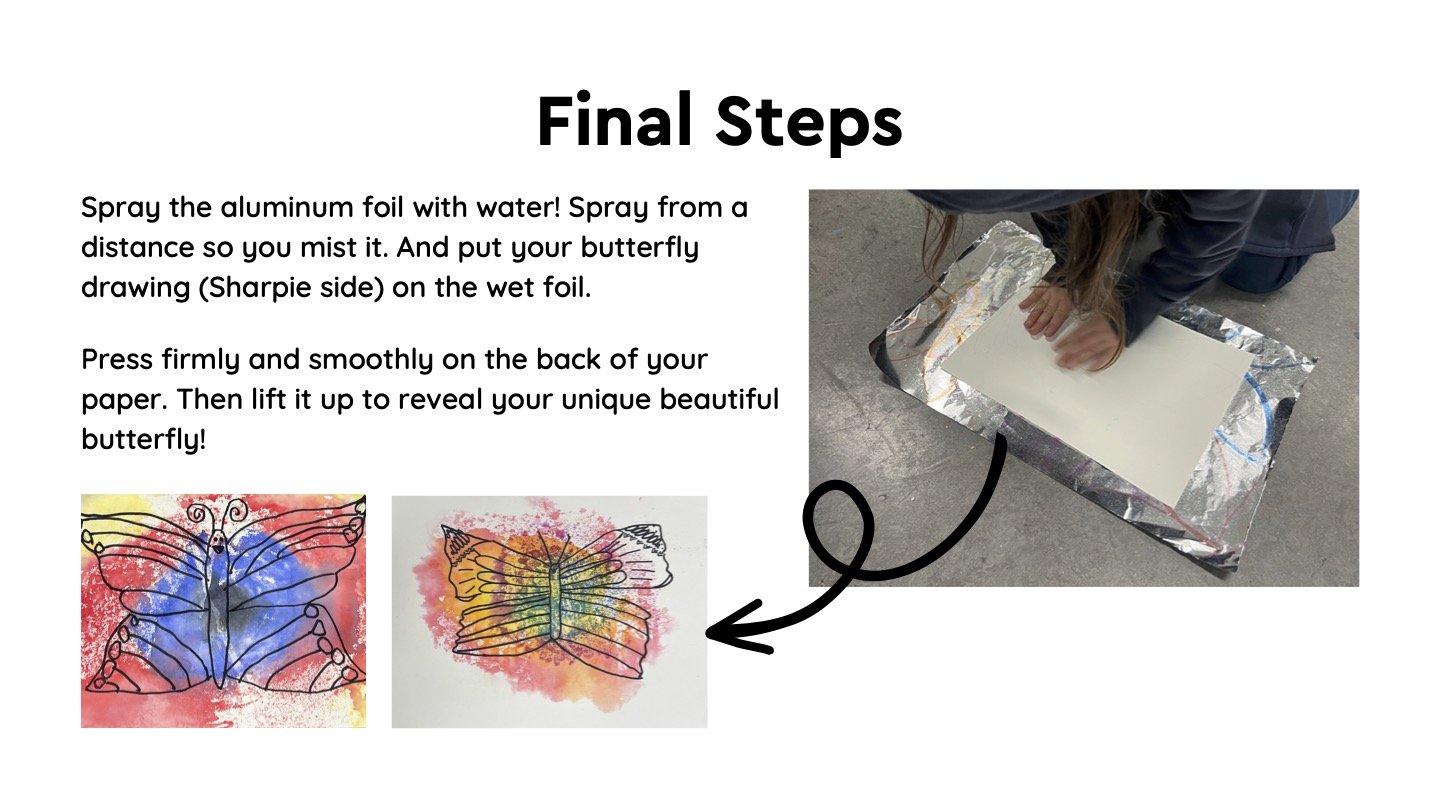
For the next step, the artists must use washable markers to decorate their aluminum foil. Encourage the artists to cover an area, larger than the size of their drawing paper, with colored marker. When they are ready for the transfer printing process, the facilitator can decide if they will be the ones to mist the aluminum foil with water or if the artists are capable of trying it themselves. If you allow the artists to try it themselves, let them know first that the closer they spray, the more their colors will mix together to create a tie-dye effect.
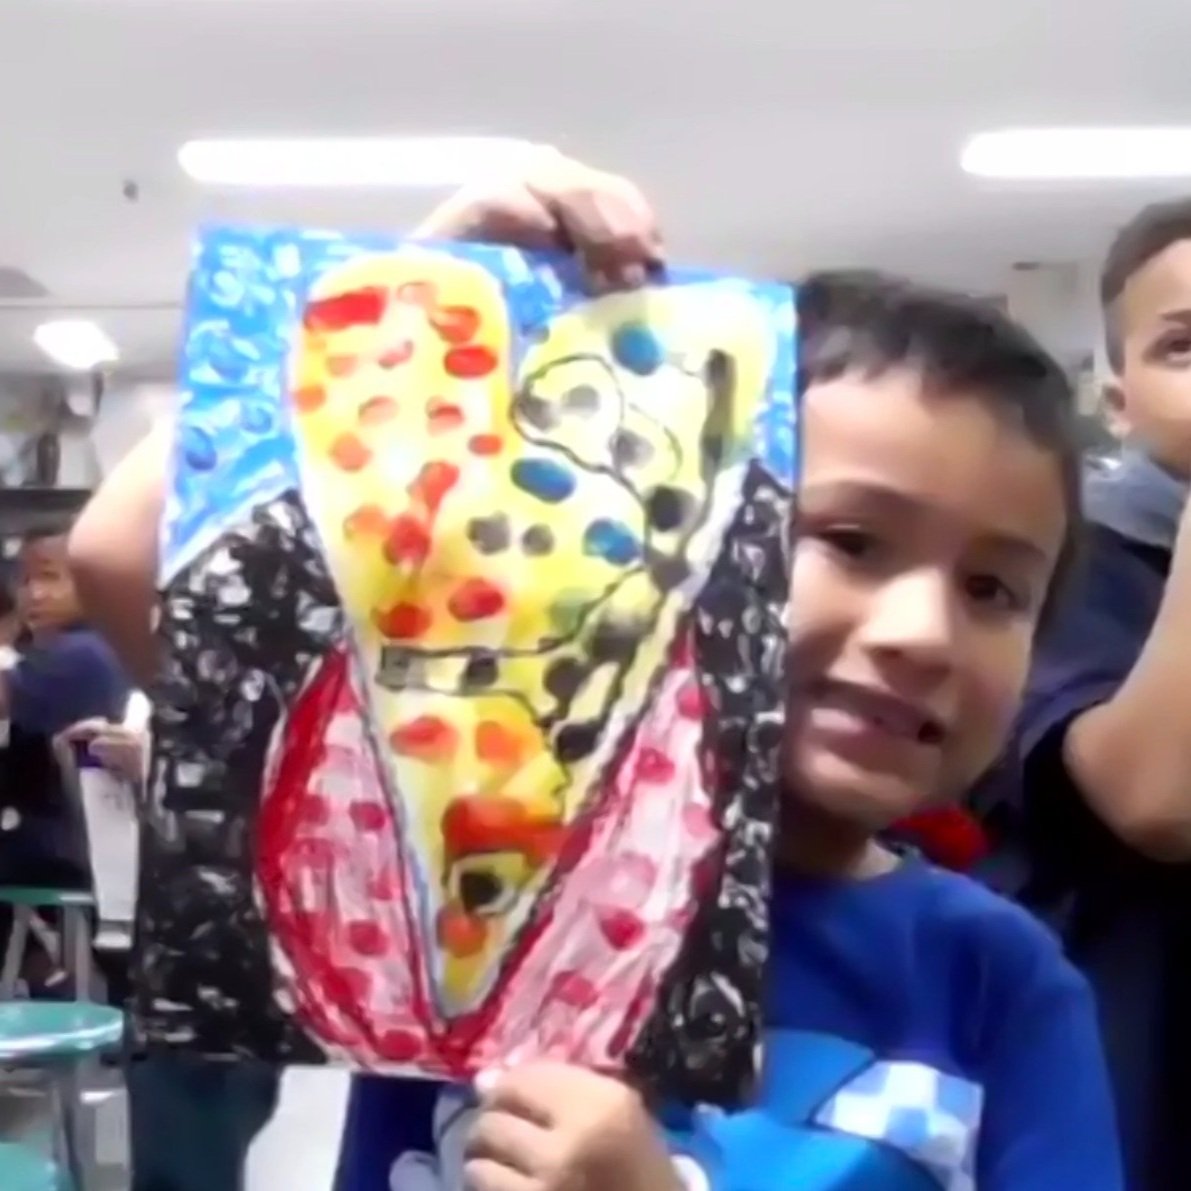
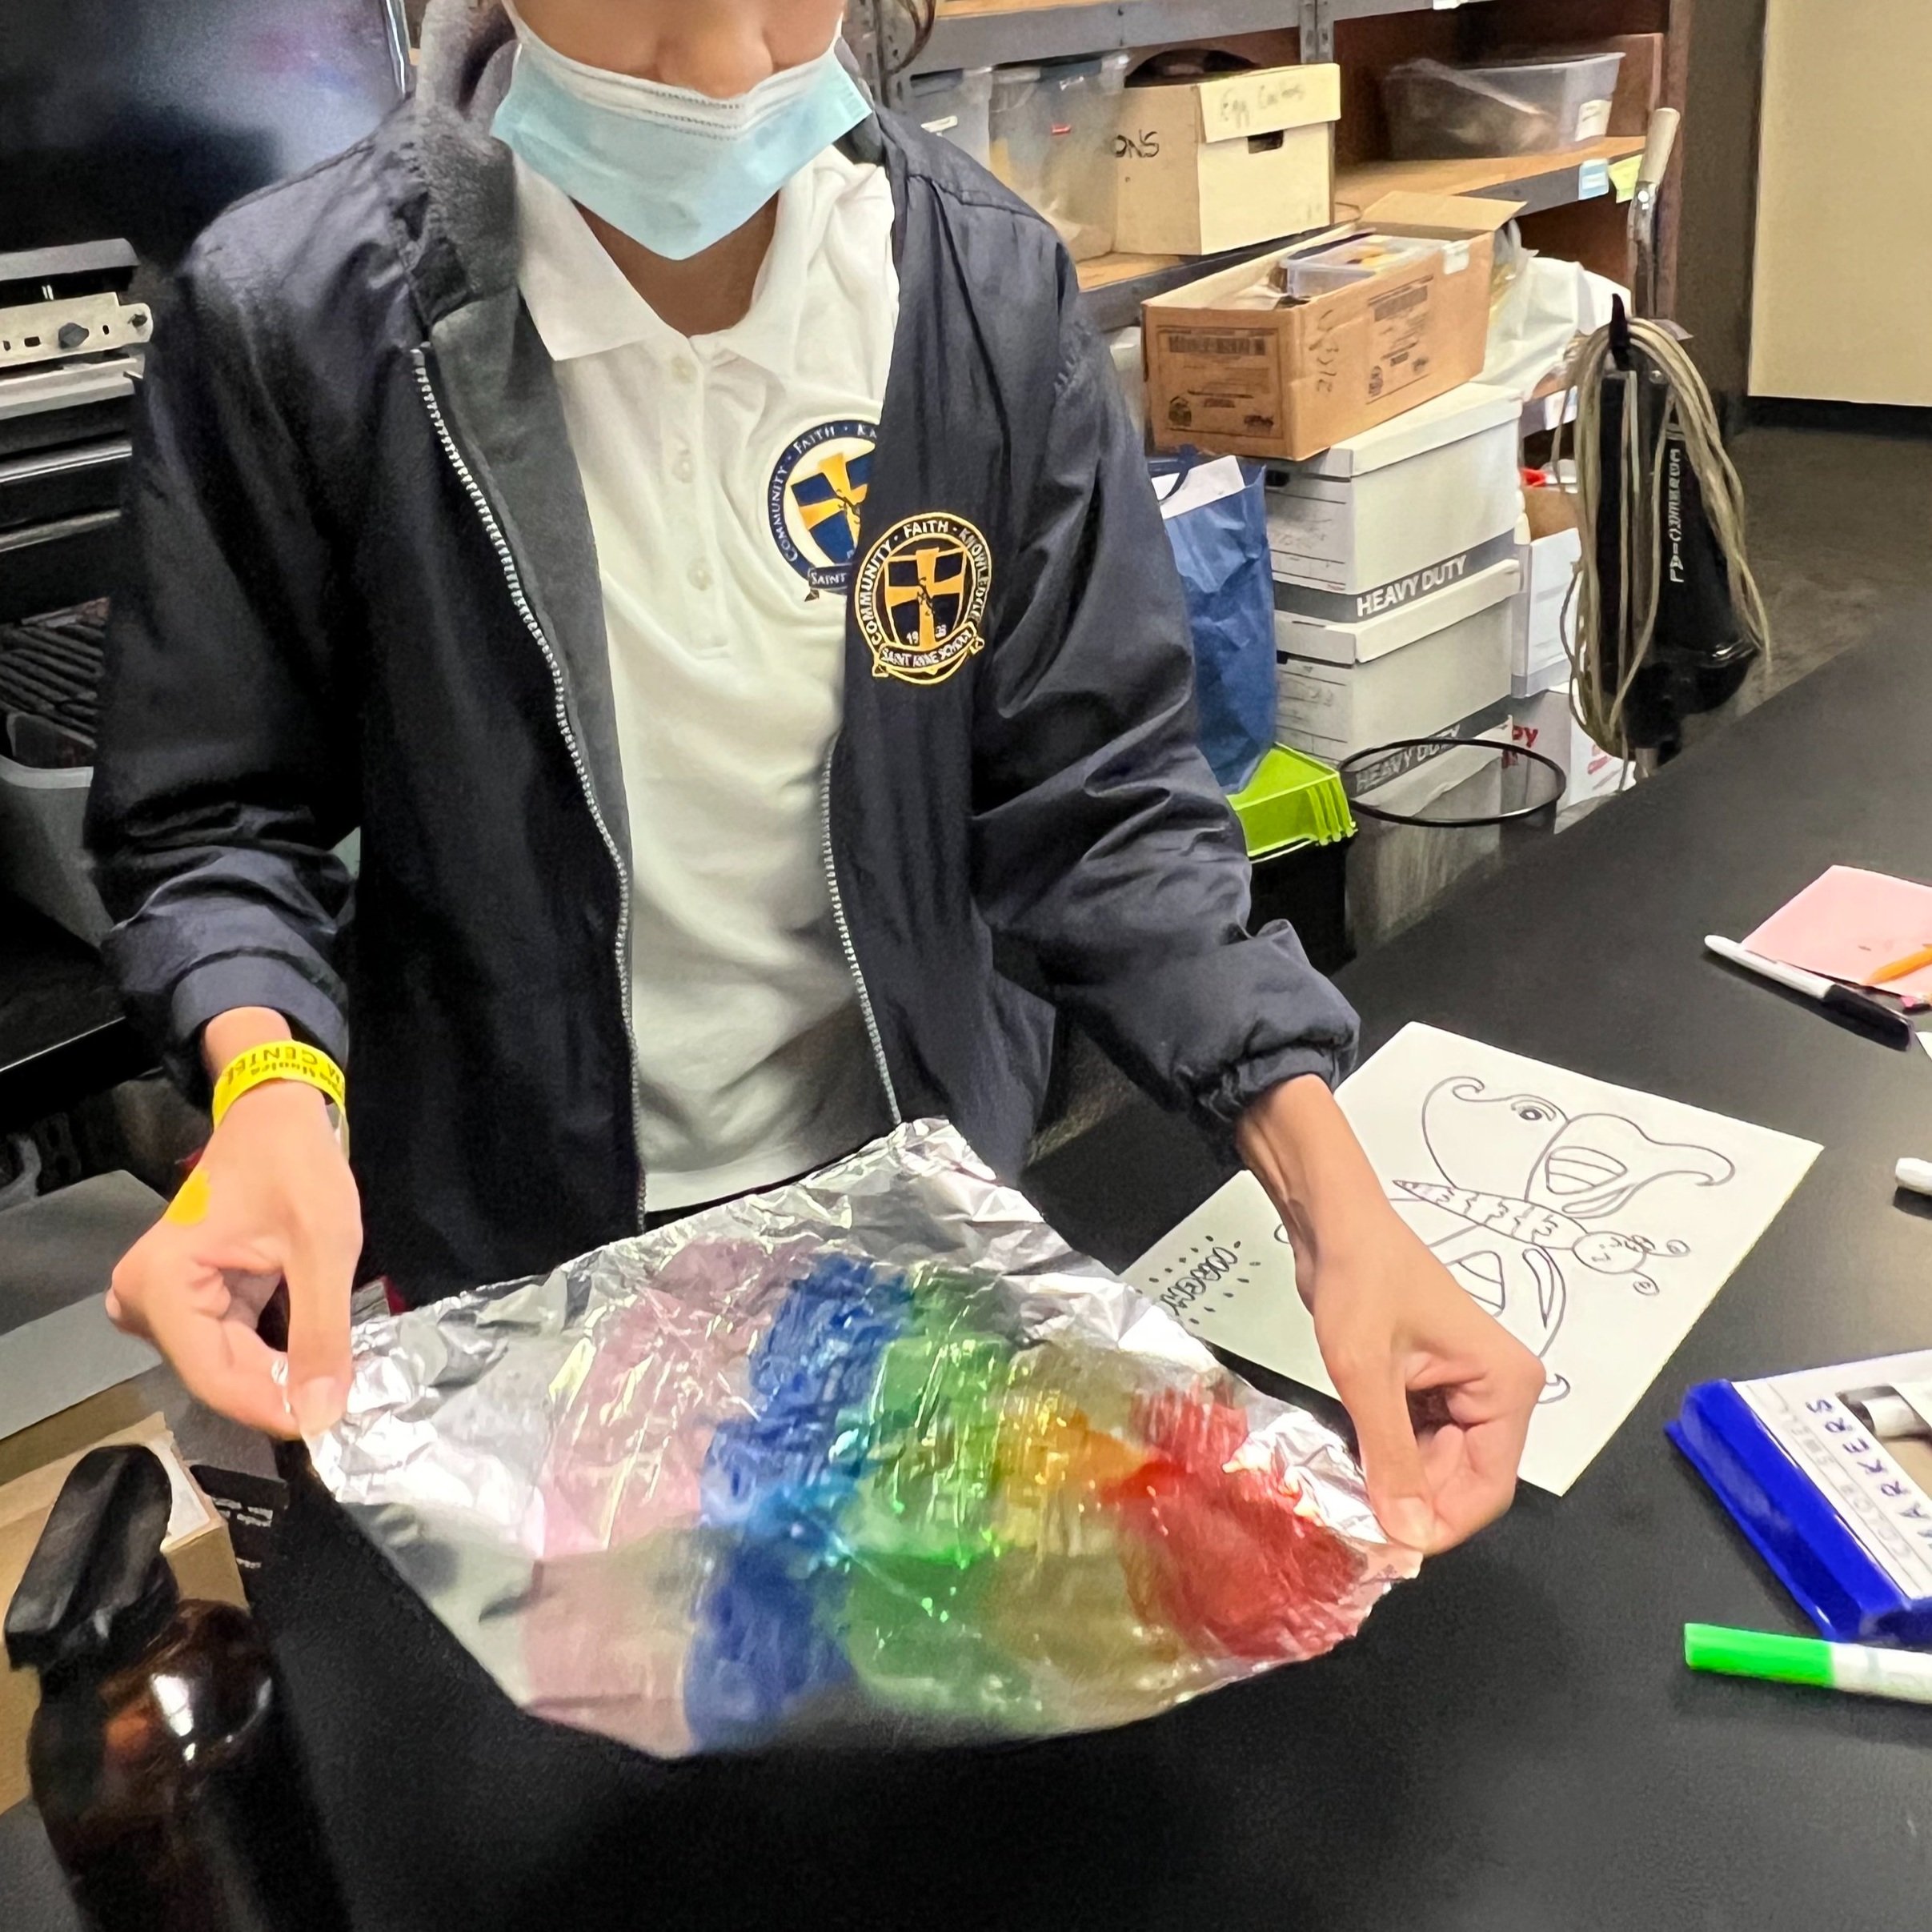
Here is an example of one artist showing the foil marker transfer printmaking process:
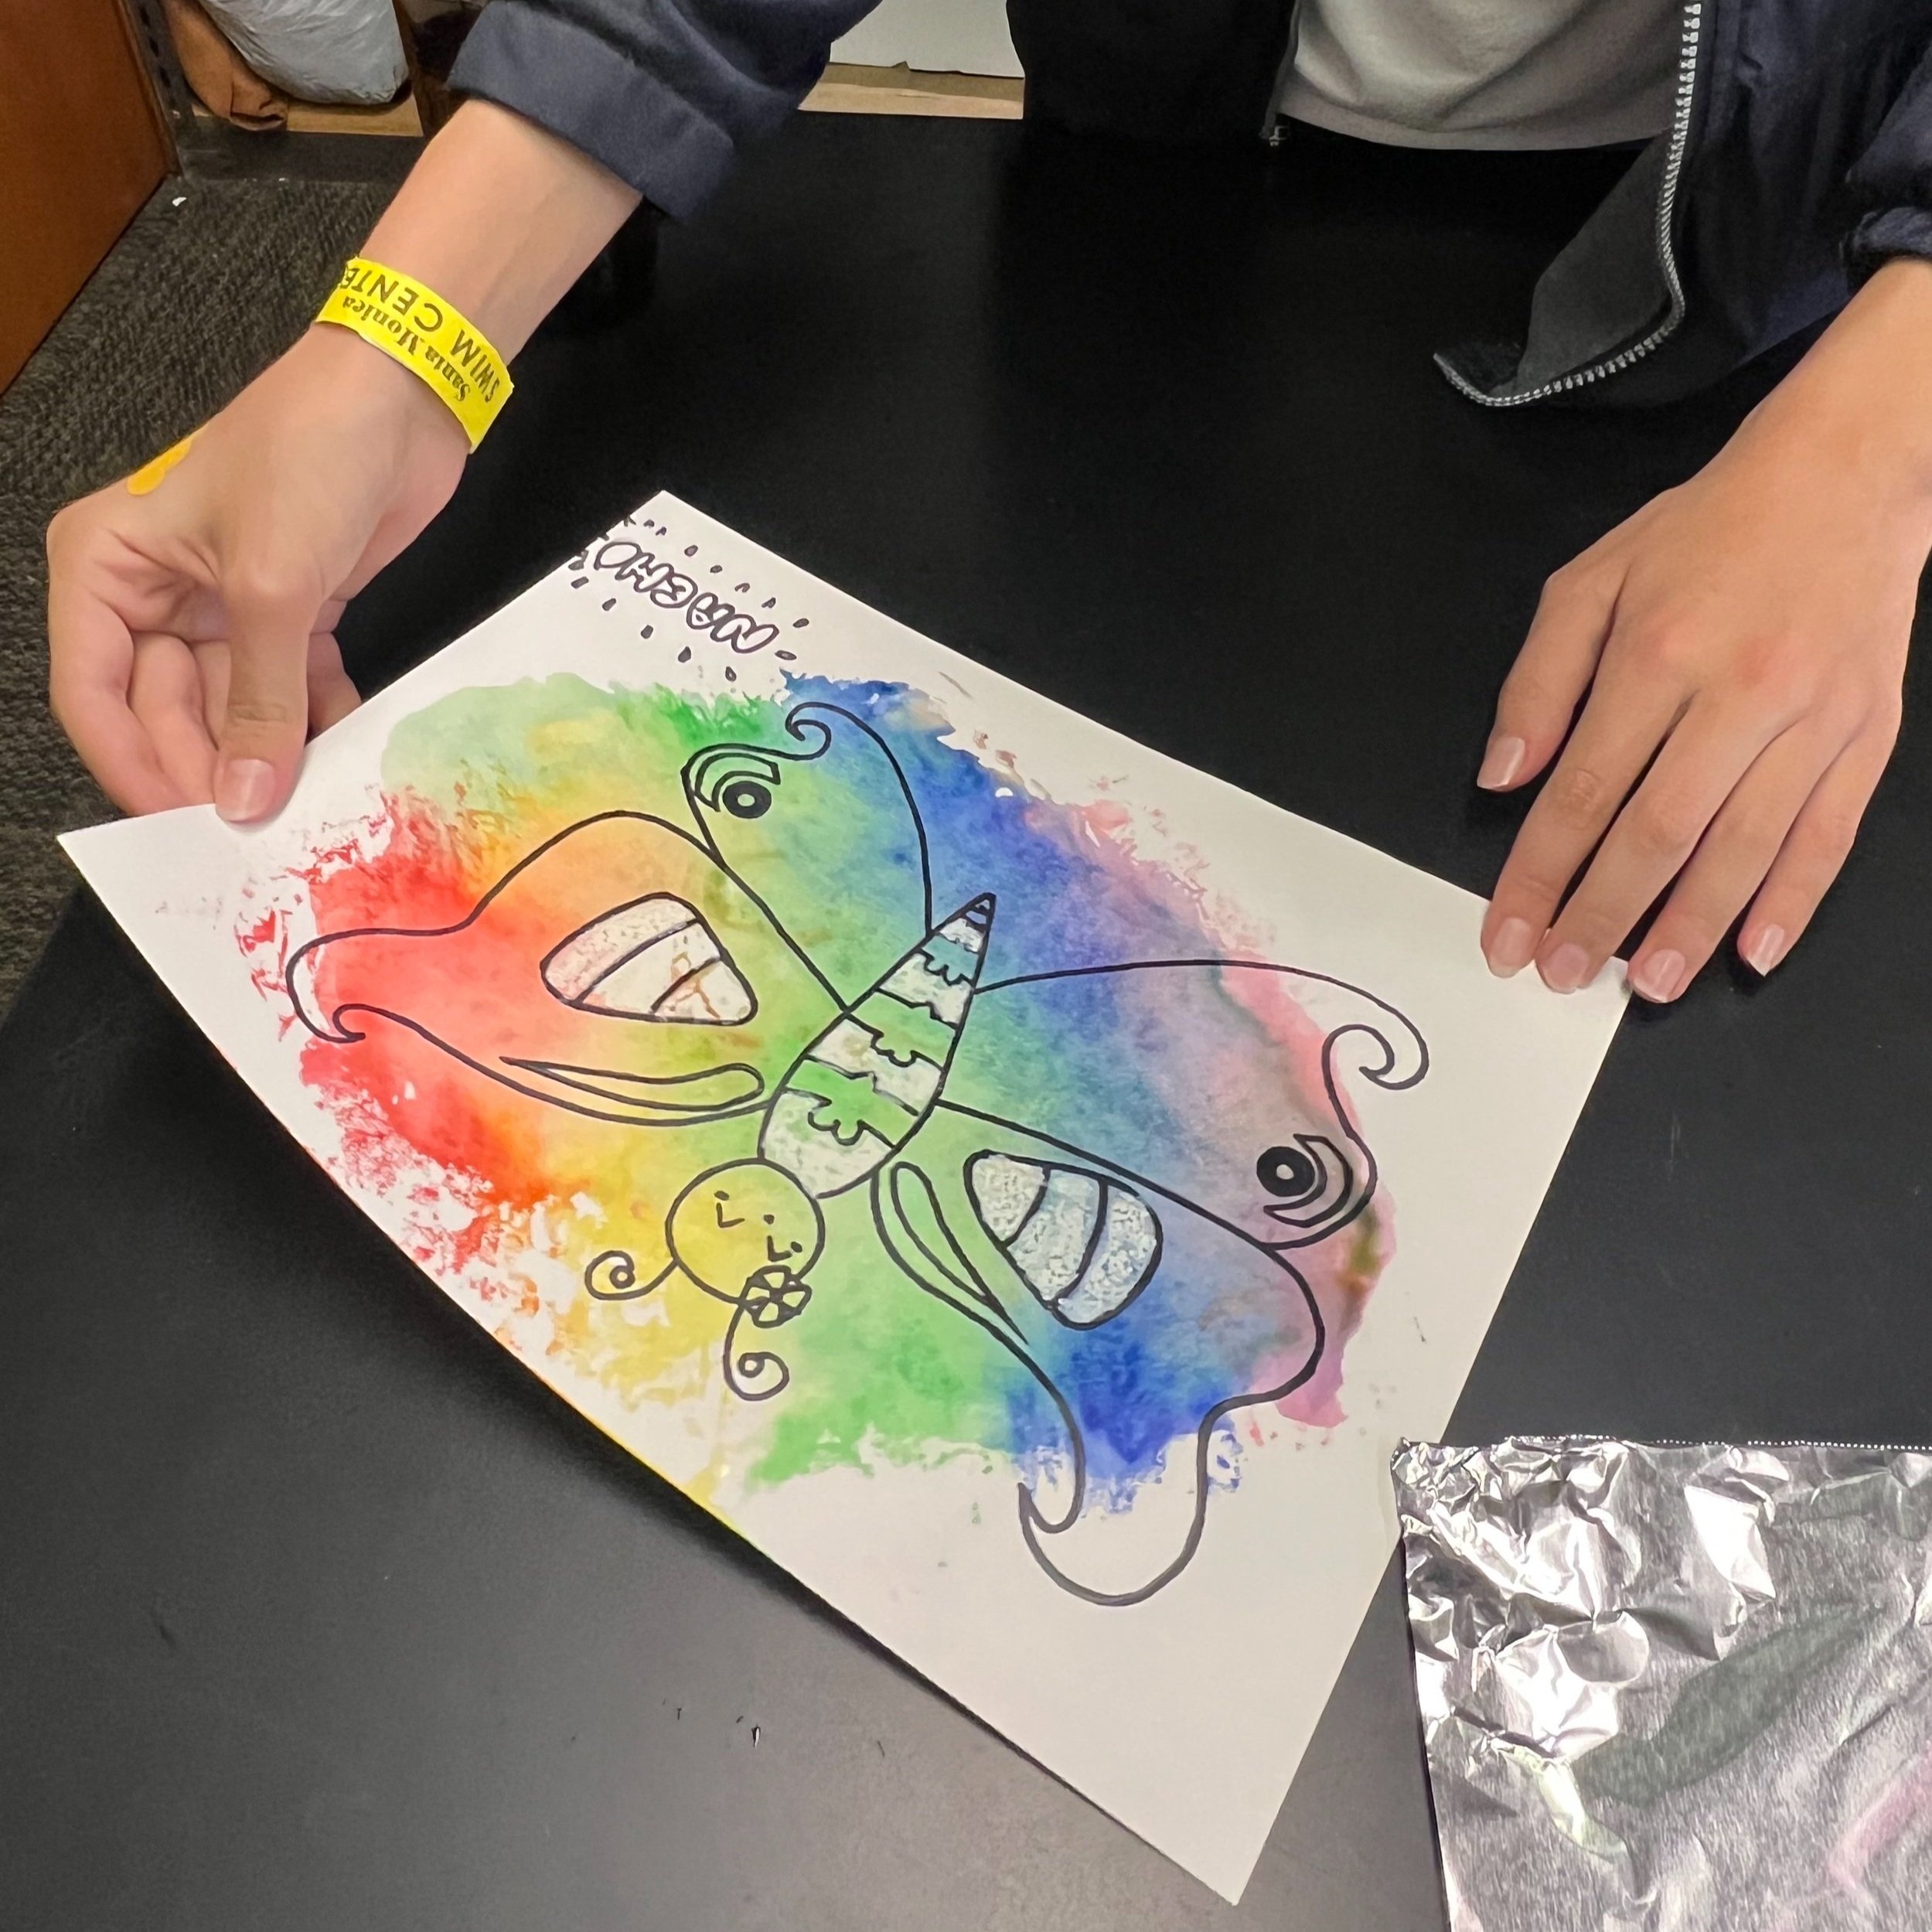
As each butterfly is revealed, notice the artist’s reaction and ask them, “How do you like your butterfly? Did it turn out how you thought it might look? Would you do or try anything differently?”
For some artists, you may suggest the option of cutting out their butterfly (after the foil marker transfer), and then gluing it onto another piece of construction or printed paper.
If artists finish quickly, they can try creating another piece of art by playing with the foil transfer printmaking process. They can simply wipe their aluminum foil clean and start over!

This art activity has a lot of flexibility, so you can adjust the examples for younger or older children with different skill levels.
You can also adjust this activity to work during another time of year by switching out the subject. For instance, in the fall season, you can follow a similar prompt, substituting butterflies for fall foliage leaves.
As artists wrap up their creations, ask them to take a quiet moment, observe their artwork, and see if they notice or learned anything. You can also take time now to ask, “How do you like your unique butterfly? What did you learn during the foil printing process?”
When everyone is done with the activity, you can invite each participant to share their artwork and tell you about it and what they noticed or learned, if they would like to do so. If they don’t feel quite comfortable sharing or are shy, you can propose they share just a glimpse of their artwork visually. Or if they don’t want to share at all, you can ask them if they can simply share what colors they used to create their butterfly or if they did or did not enjoy the foil printing process, either verbally or in the chat (and you, the facilitator, can read it).
Once the artwork is dry, you can hang or frame it to remind you of the beautiful process of change! If you’re working with a group of participants, you can ask everyone to hold up their artwork, even if it’s not complete, so that you can share all of your unique butterflies. It’s fun to take a moment and observe all the different colors, shapes, and designs used too. You can also have participants send photos of their artwork or upload it externally to create a digital collaborative piece.
Try this activity for yourself, with your kids at home, or those children that you support through volunteering or your work endeavors. Comment below to let us know how it goes. You can also post and tag us in your drawings @GiveKidsArt – we love to see their creations!
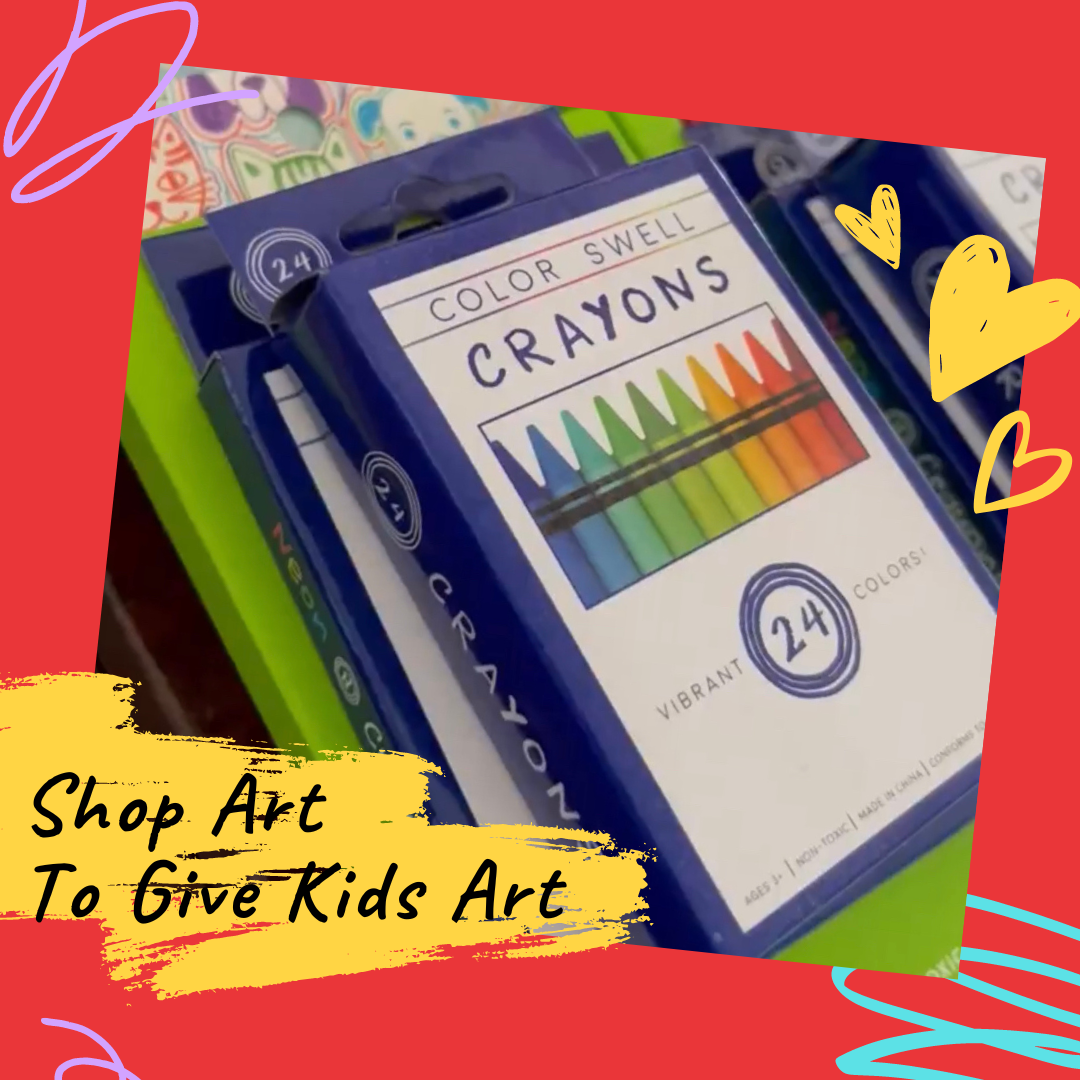
We love using Color Swell art materials in our Art Kits and for our art programs, and we used their washable marker sets for this art activity! We have tried most of their art materials and love them all. They are great quality, while also being affordable and they offer bulk quantities. Plus, it’s a better deal to purchase on their website.
“Great things are done by a series of small things brought together.”
We developed a new art activity inspired by #GivingTuesday, for one of our Zoom art program sessions that we held on the same day, and we’re excited to share it with you. It’s a thoughtful, introspective activity, that works at any time of year and especially resonates during the holiday season.
You can also facilitate or try this activity using any type of art supplies – crayons, colored pencils, markers, oil pastels, watercolor paints, acrylic paints, etc. – and you can even combine it with other techniques, such as the Crayon Resist Technique (see here for details) or Wax Resist Technique. At minimum, you will need a piece of paper, pencil and/or pen (Sharpie recommended), and your preferred art medium to add color!
If you’re trying this with a group, allocate 10-15 minutes for the introductions, warm-up, and art activity discussion. The specific recommended warm-up activity will depend on the age of the children, their needs, etc. as well as how often you’ve engaged with them. However, if it makes sense, you can try a quick feelings check-in with your participants. Ask your artists to take a moment to check-in with themselves: “How are you feeling? If you could pick a color for this feeling, what would it be?” (Hint: they’ll use this color in their art!).
In-Person Option: Go around your group and ask each participant to share their color for how they are feeling today. Let them know that they can always pass and share later.
Zoom Alternative: If not everyone can share their screen or use the microphone, you could have each participant edit their Zoom name to include their first name, color.
Both: You can also ask the artists to pick up a color for how they’re feeling (i.e. color of marker) and on the count of three, you all hold them up together.
If you’re trying this activity for yourself, check in with yourself too!
After your initial introductions and warm-up, you can briefly discuss or contemplate the concept of generosity and how we can give to others. If you’re working with your kids or a class, open up the group for brainstorming and discussion. For our group, we defined generosity as “giving good things to others freely” which gives us the power to make a positive change in the lives of others. Ask participants to share different ways we can give to others, including things like our time, talents, kindness, etc. Try writing down all the thoughts on a physical or digital board for all to see. Afterwards, ask them if they can think of a time when someone showed them generosity or they showed it to someone else. This a good sharing and growth opportunity!
Wrap up with the idea that we’re now going to explore our own giving hearts.
Pull out one piece of watercolor or mixed media paper (regular paper is ok too if that’s what you have!), and tell yourself or your participants that you’re going to draw one large heart on the piece of paper, oriented vertically or horizontally. To draw this heart, we’re first going to pick a color for how we’re feeling (remember, we already did this in the warm-up!). For our activity, we chose to use oil pastels for this first part. We also used this as an opportunity to go over a couple ways to draw a heart and opened it up to the artists to share any other ways they draw hearts.
Proceed to follow the instructions in these slides:

For our group of artists, since we had been engaged together weekly for a while at this point, we chose to add to this activity by introducing the technique of Pointillism, or as we describe it, “art using lots of dots.” In general, artists can try creating with pointillism using any material, as long as they can make a dot! We chose to do the activity with watercolor paints, so the artists could use their fingertips, q-tips, the eraser on a pencil, or whatever else that creatively could form a dot on the page. Most artists chose to use their fingers and try coloring in their hearts with dots for the first part.
Participants can test their use of dots and how overlapping colors of dots can trick the mind to blend the overlapping spots into a fuller range of tones.
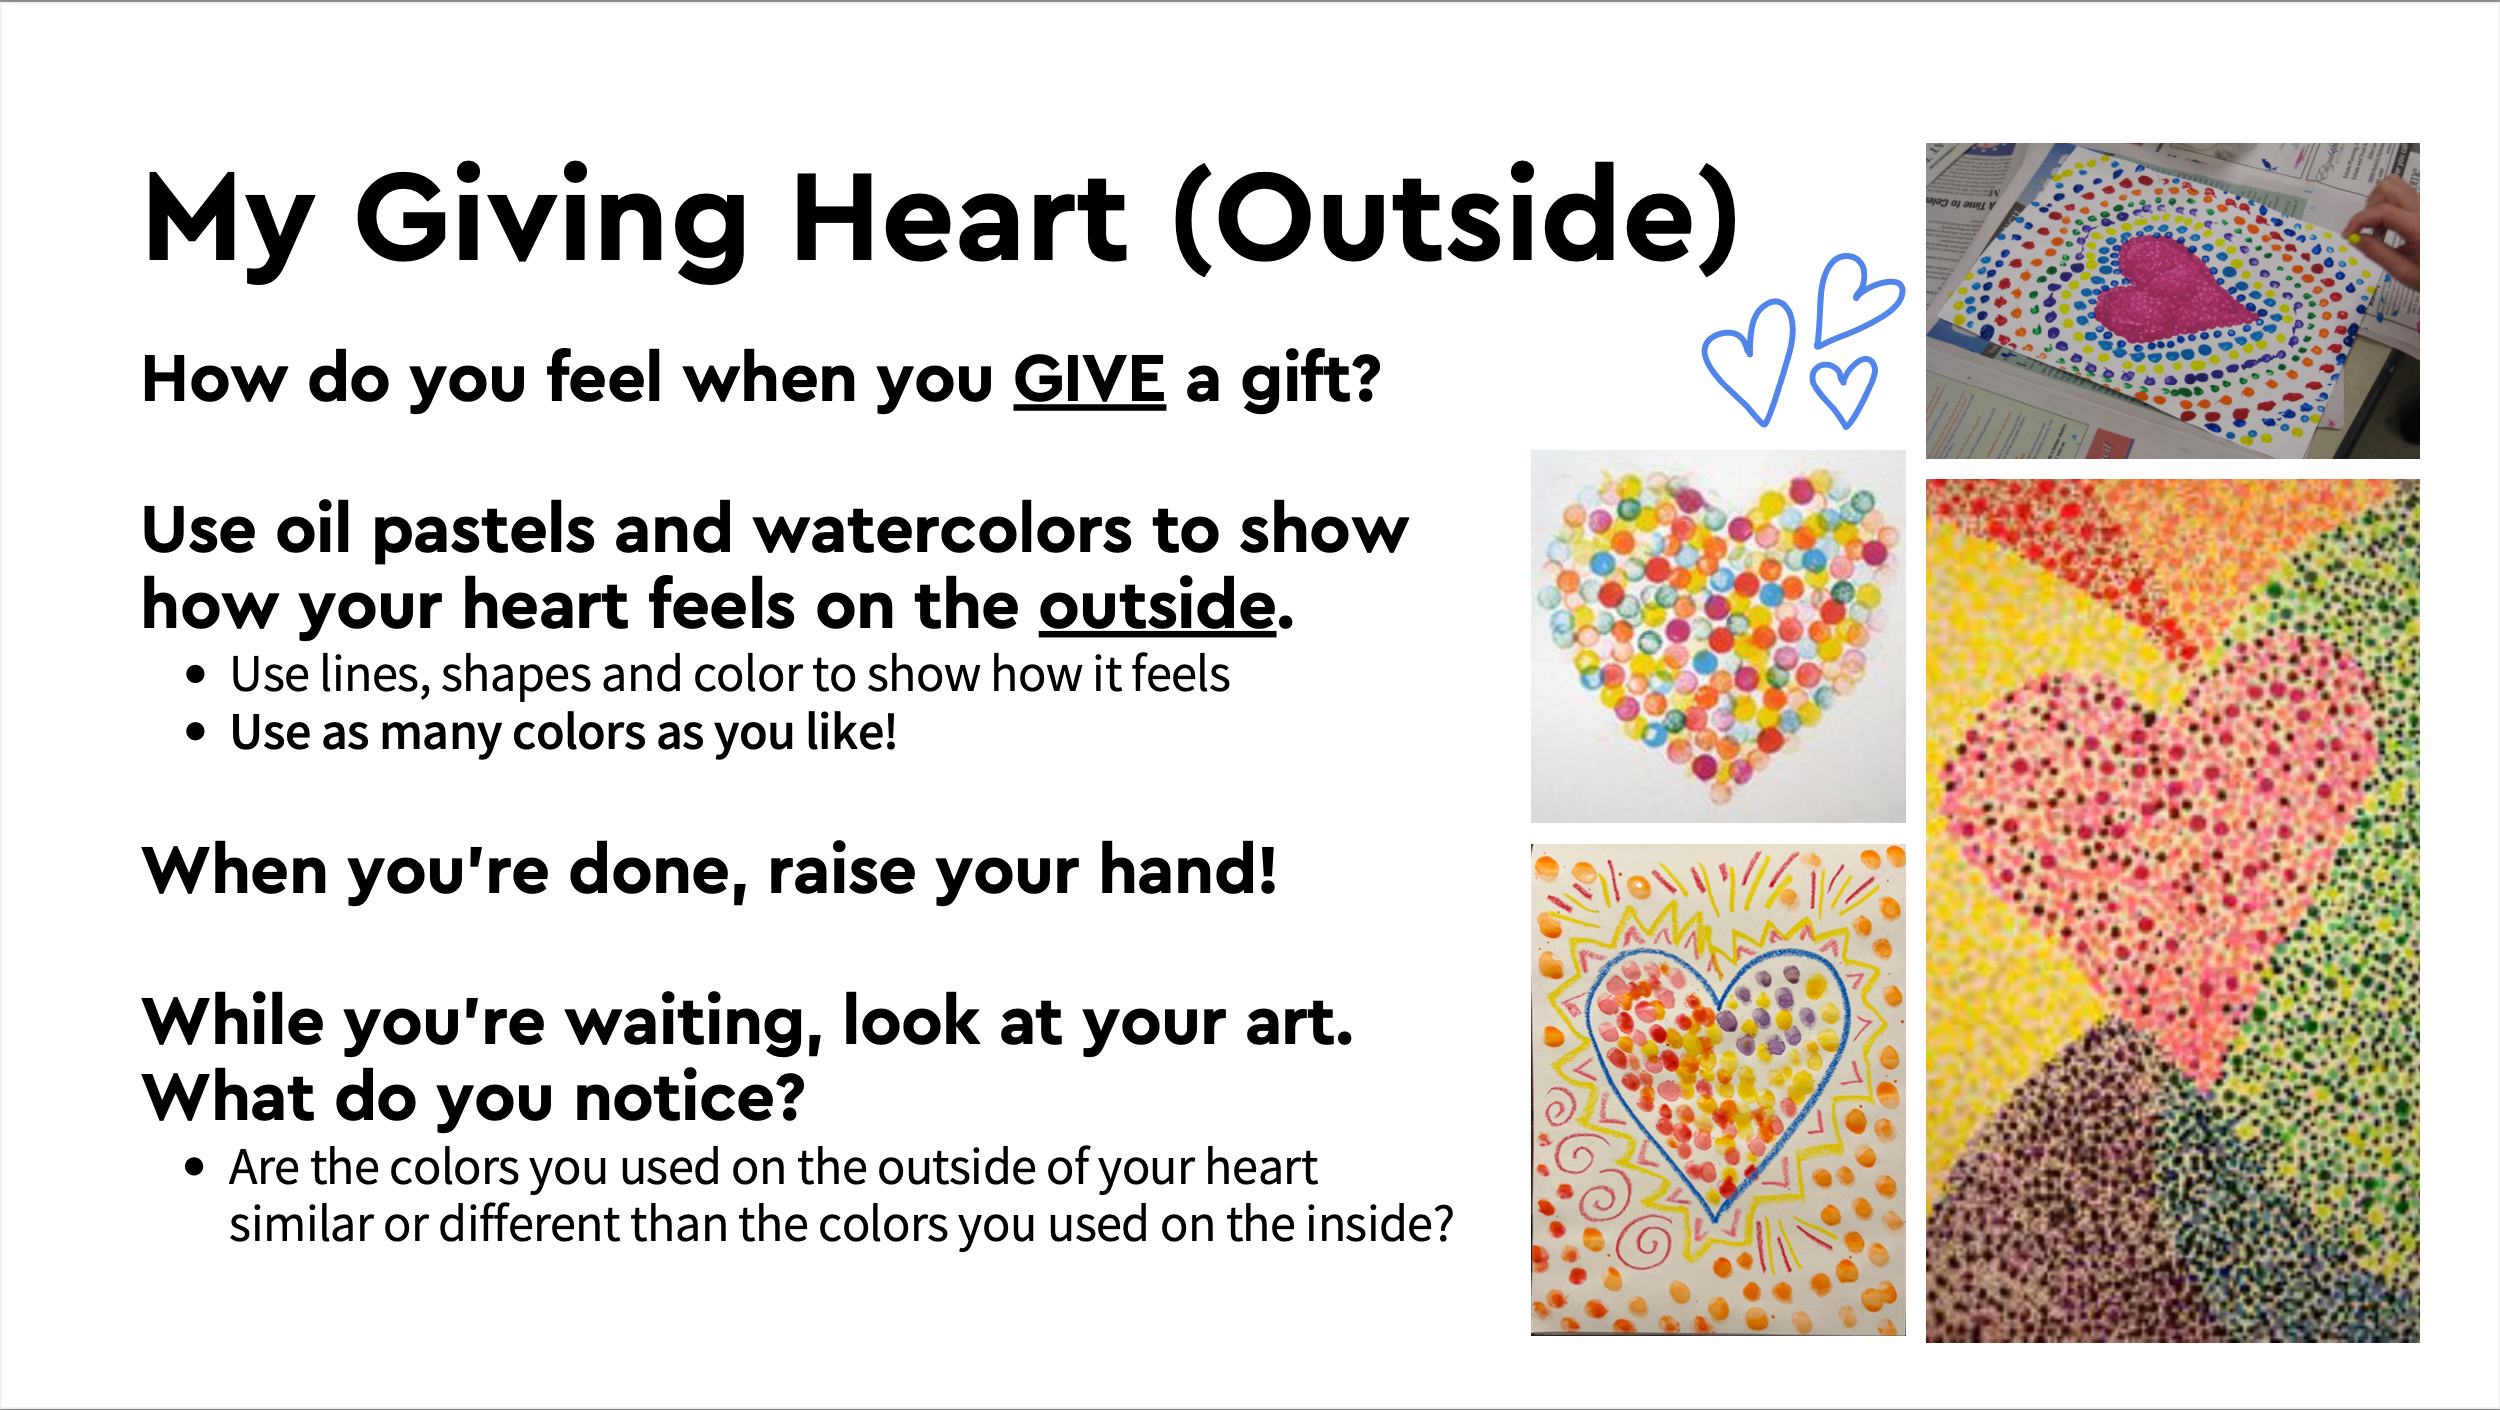
As shown on the slide, for the second part, the artists were encouraged to explore line, shape, and color to show how their hearts feel when giving gifts.
Here is an example of one of the drawings from our activity:

This activity has a lot of flexibility, so you can adjust the examples for younger or older children with different skill levels.
As artists wrap up their creations, ask them to take a quiet moment, observe their artwork, and see if they notice anything. Ask, “Are the colors you used on the outside of your heart similar or different than the colors you used on the inside?”
When everyone is done with the activity, you can invite each participant to share their artwork and tell you about it and what they noticed, if they would like to do so. If they don’t feel quite comfortable sharing or are shy, you can propose they share just a glimpse of their artwork visually. Or if they don’t want to share at all, you can ask them if they can simply share if they tried painting with dots and if they liked it, either verbally or in the chat (and you, the facilitator, can read it).
Once the artwork is dry, you can hang or frame it to remind you of your giving heart! If you’re working with a group of participants, you can ask everyone to hold up their artwork, even if it’s not complete, so that you can share all of your giving hearts. It’s fun to take a moment and observe all the different colors, shapes, and approaches used too. You can also have participants send photos of their artwork or upload it externally to create a digital collaborative piece.
Try this activity for yourself, with your kids at home, or those children that you support through volunteering or your work endeavors. Comment below to let us know how it goes. You can also post and tag us in your drawings @GiveKidsArt – we love to see their creations!
We love using Color Swell art materials in our Art Kits and for our art programs, especially their watercolor paint sets. We originally found them on Amazon and have ordered their crayons, markers, paints, and oil pastels. They are great quality, while also being affordable and they offer bulk quantities. Plus, it’s a better deal to purchase on their website.
“Imagine all the people living life in peace. You may say I’m a dreamer, but I’m not the only one. I hope someday you’ll join us, and the world will be as one.”
We recently had the honor of working with the English department at Pearson Online Academy to offer an Art Workshop, inspired by the poem or song “Imagine” by John Lennon, to their high school students. And now we’re sharing this inspiring activity with all of you, so we can all be dreamers with John and imagine a better world together.
You can facilitate or try this activity using any type of art supplies – crayons, colored pencils, markers, oil pastels, watercolor paints, acrylic paints, etc. – and you can even combine it with other techniques like the Crayon Resist Technique (see here for details). At minimum, you will need a piece of paper, pencil and/or pen (Sharpie recommended), and your preferred art medium to add color!
Allocate 10-15 minutes for a warmup. The specific recommended warm-up activity will depend on the age of the children, their needs, etc. However, here are some quick ideas for groups of participants:
Go around your group and ask each child to share their name and one adjective to describe themselves. You can create a virtual or visual circle, ask for volunteers, or use the chat. You could have the participants draw their name and adjective or write it. Zoom Idea: You could have them each participant edit their Zoom name to include their first name, adjective if not everyone can share their screen.
Do a quick feelings check-in with the participants. Use an image and have the students volunteer to share their answers or put their answer in the chat. Here’s a Beatles themed feelings check-in image that is a little more “advanced” for older children.

After your initial introductions and warm-up, you can briefly discuss the history of The Beatles and the world at the time John wrote the song (1971).
To warm up to the main art activity, you can review “Imagine” by John Lennon, taking a moment to listen to the full song while reviewing the lyrics. Before you play the song, ask yourself or your participants, “If there was one word to describe what John is imaging in his poem, what do you think it is?” Then play the song. At the end, use this as an opportunity for everyone to share their thoughts on the lyrics and their one word, knowing that there is no right or wrong answer. You can mention that the song has become an international anthem of peace and imagination.
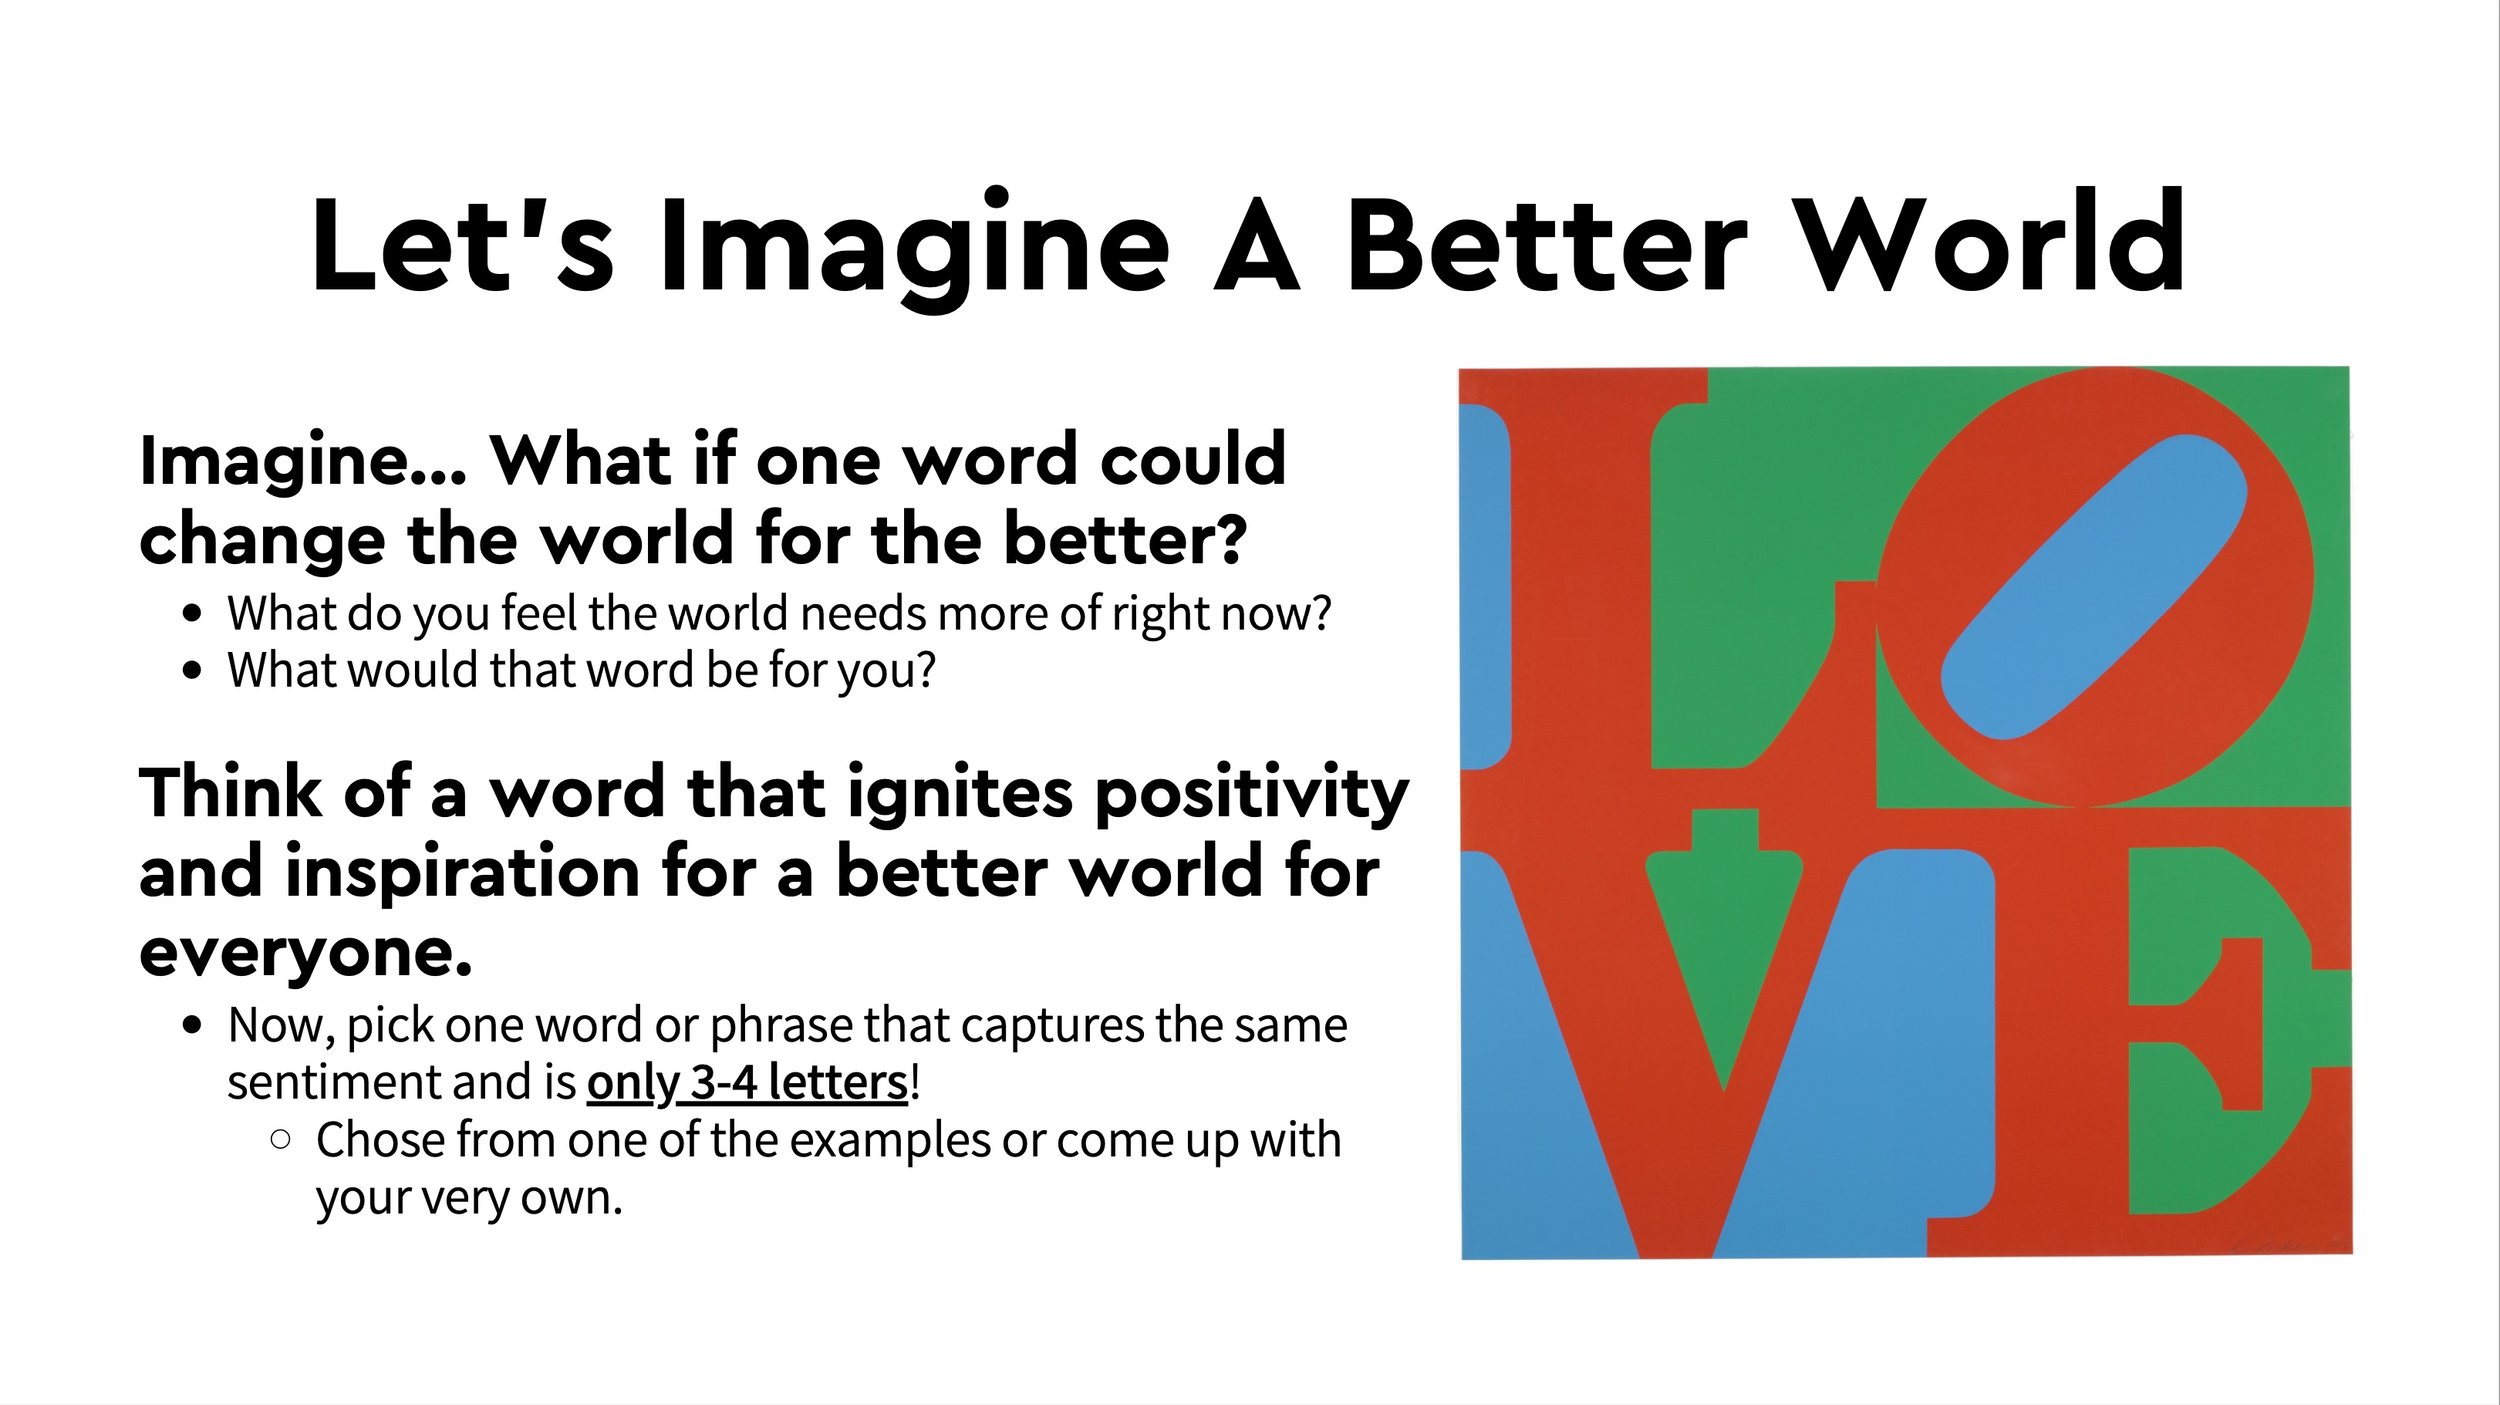
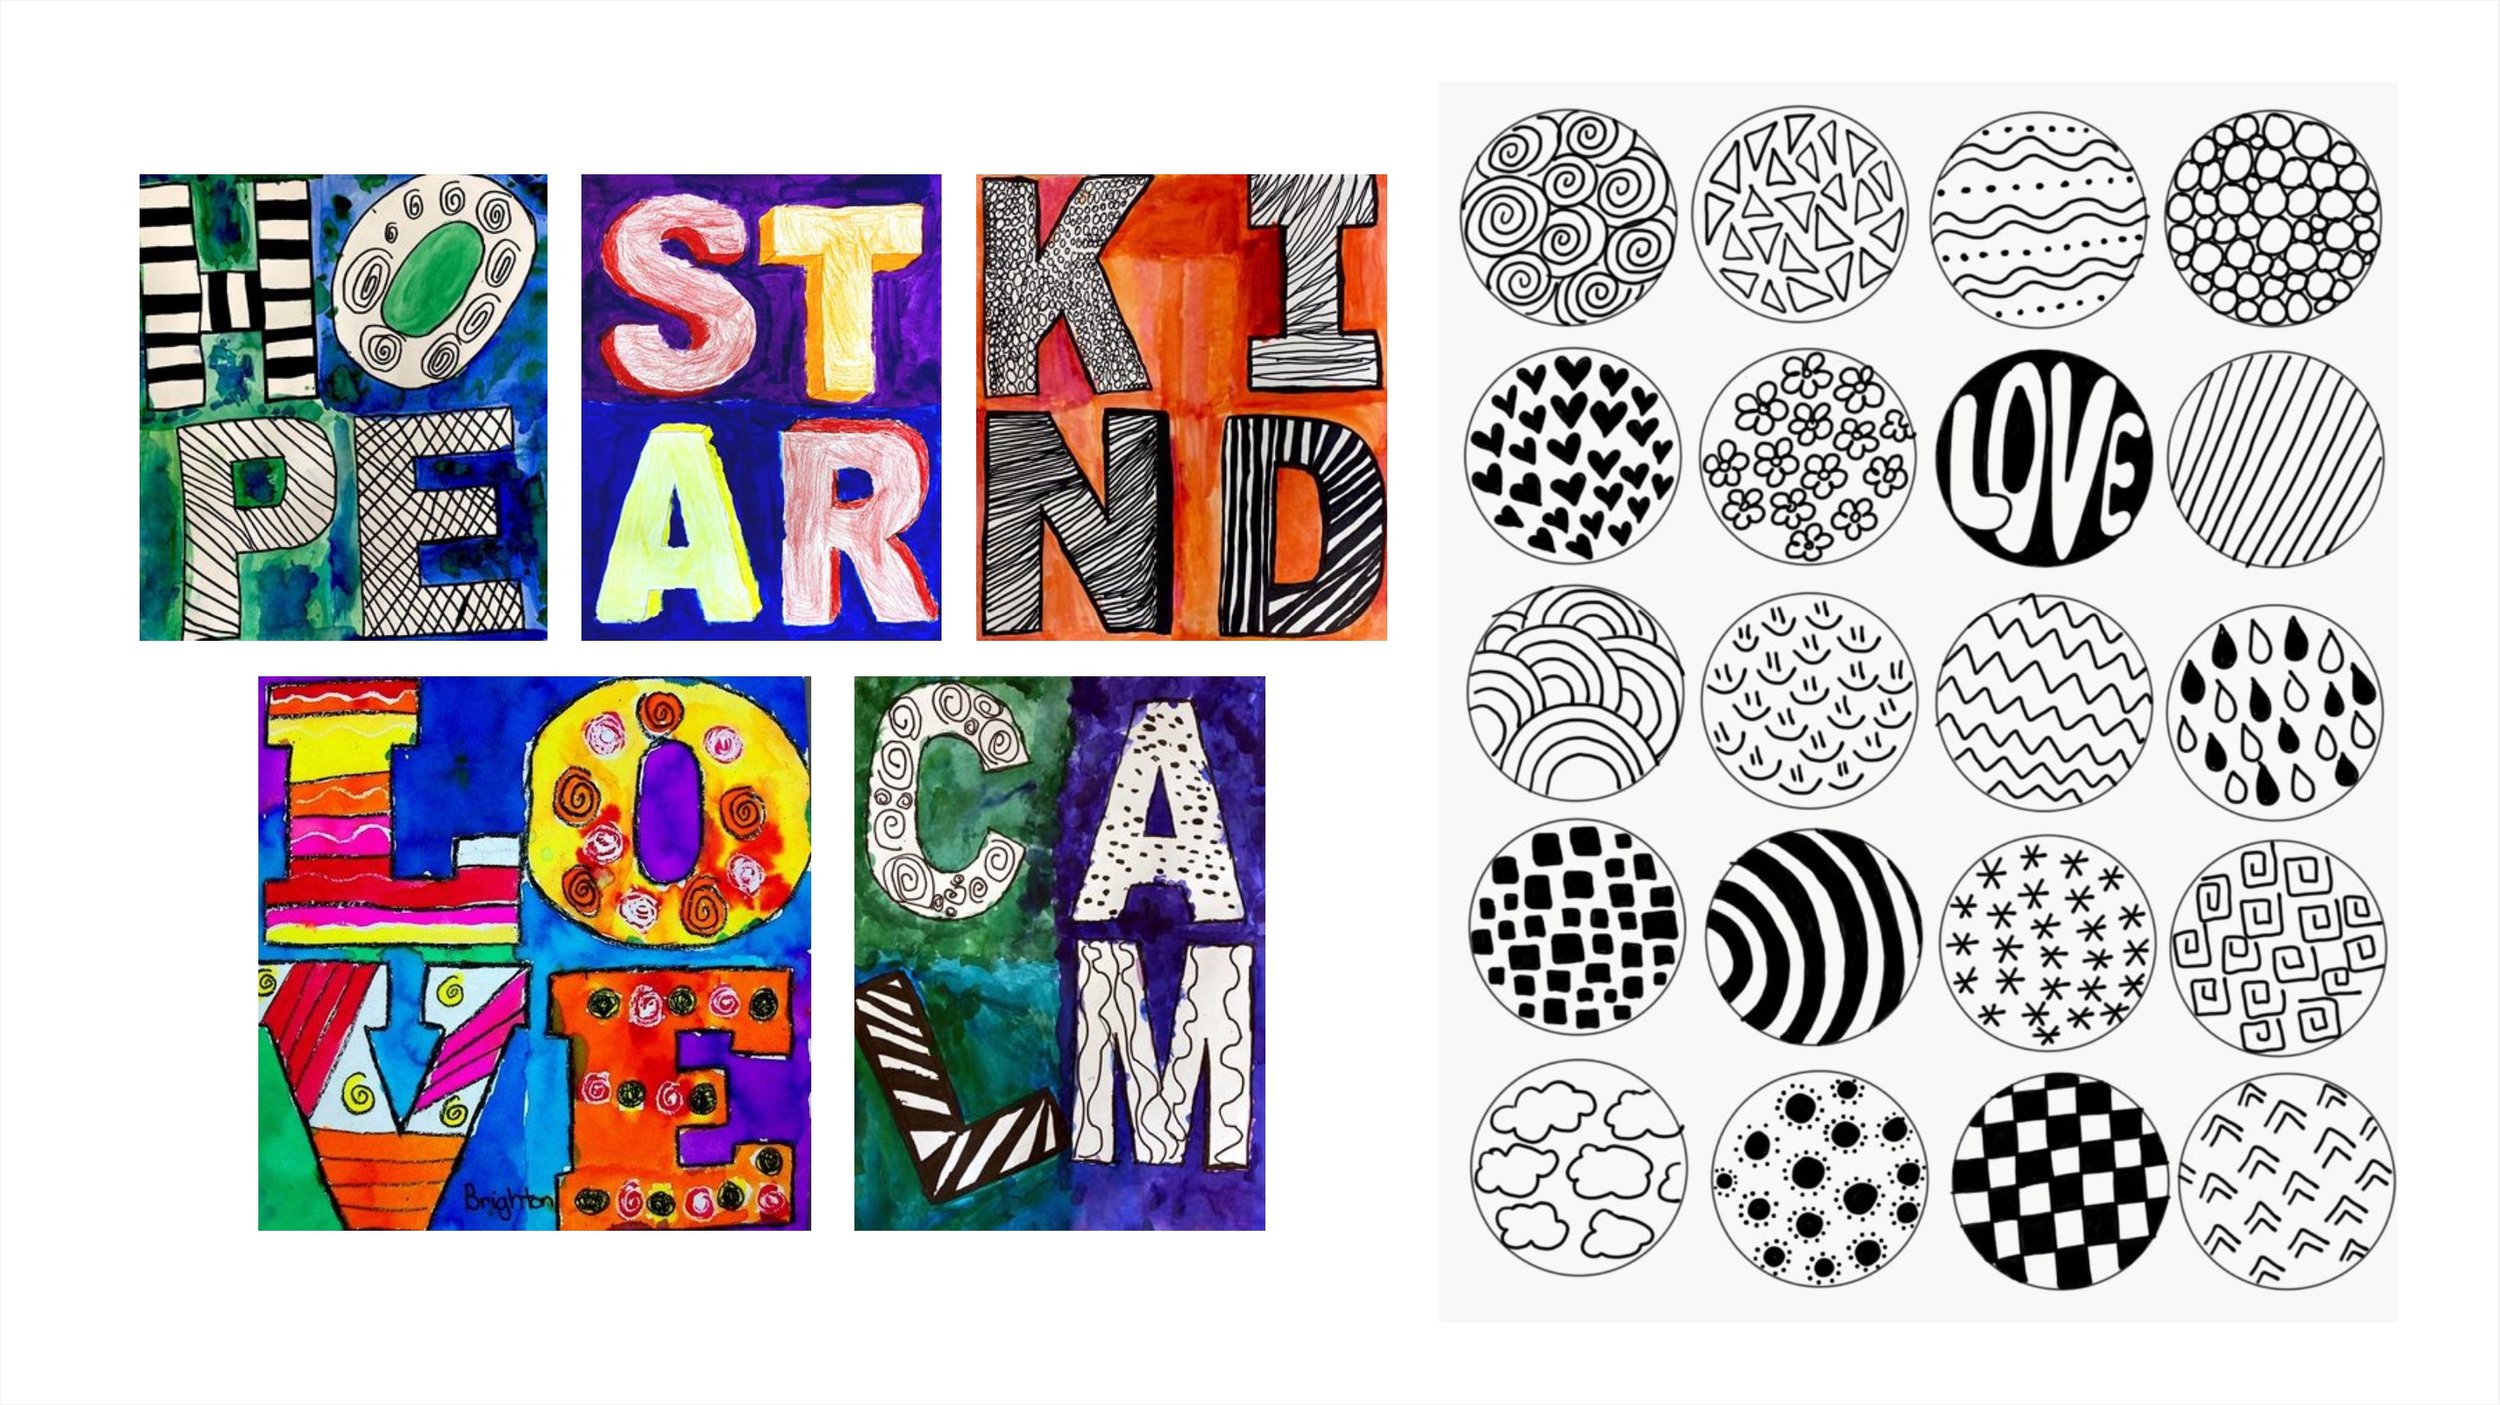
Then, you can briefly introduce famous pop artist, Robert Indiana, as the visual inspiration for today’s art activity. You can show photos of his iconic LOVE pieces and comment on how Robert Indiana thought most people never stopped to think about the beauty of words and numbers.
Wrap up with the idea that imagination is powerful and words are powerful! With John Lennon’s Imagine song, as well as Robert Indiana’s powerful word art, we’re going to all imagine a better word together using words.
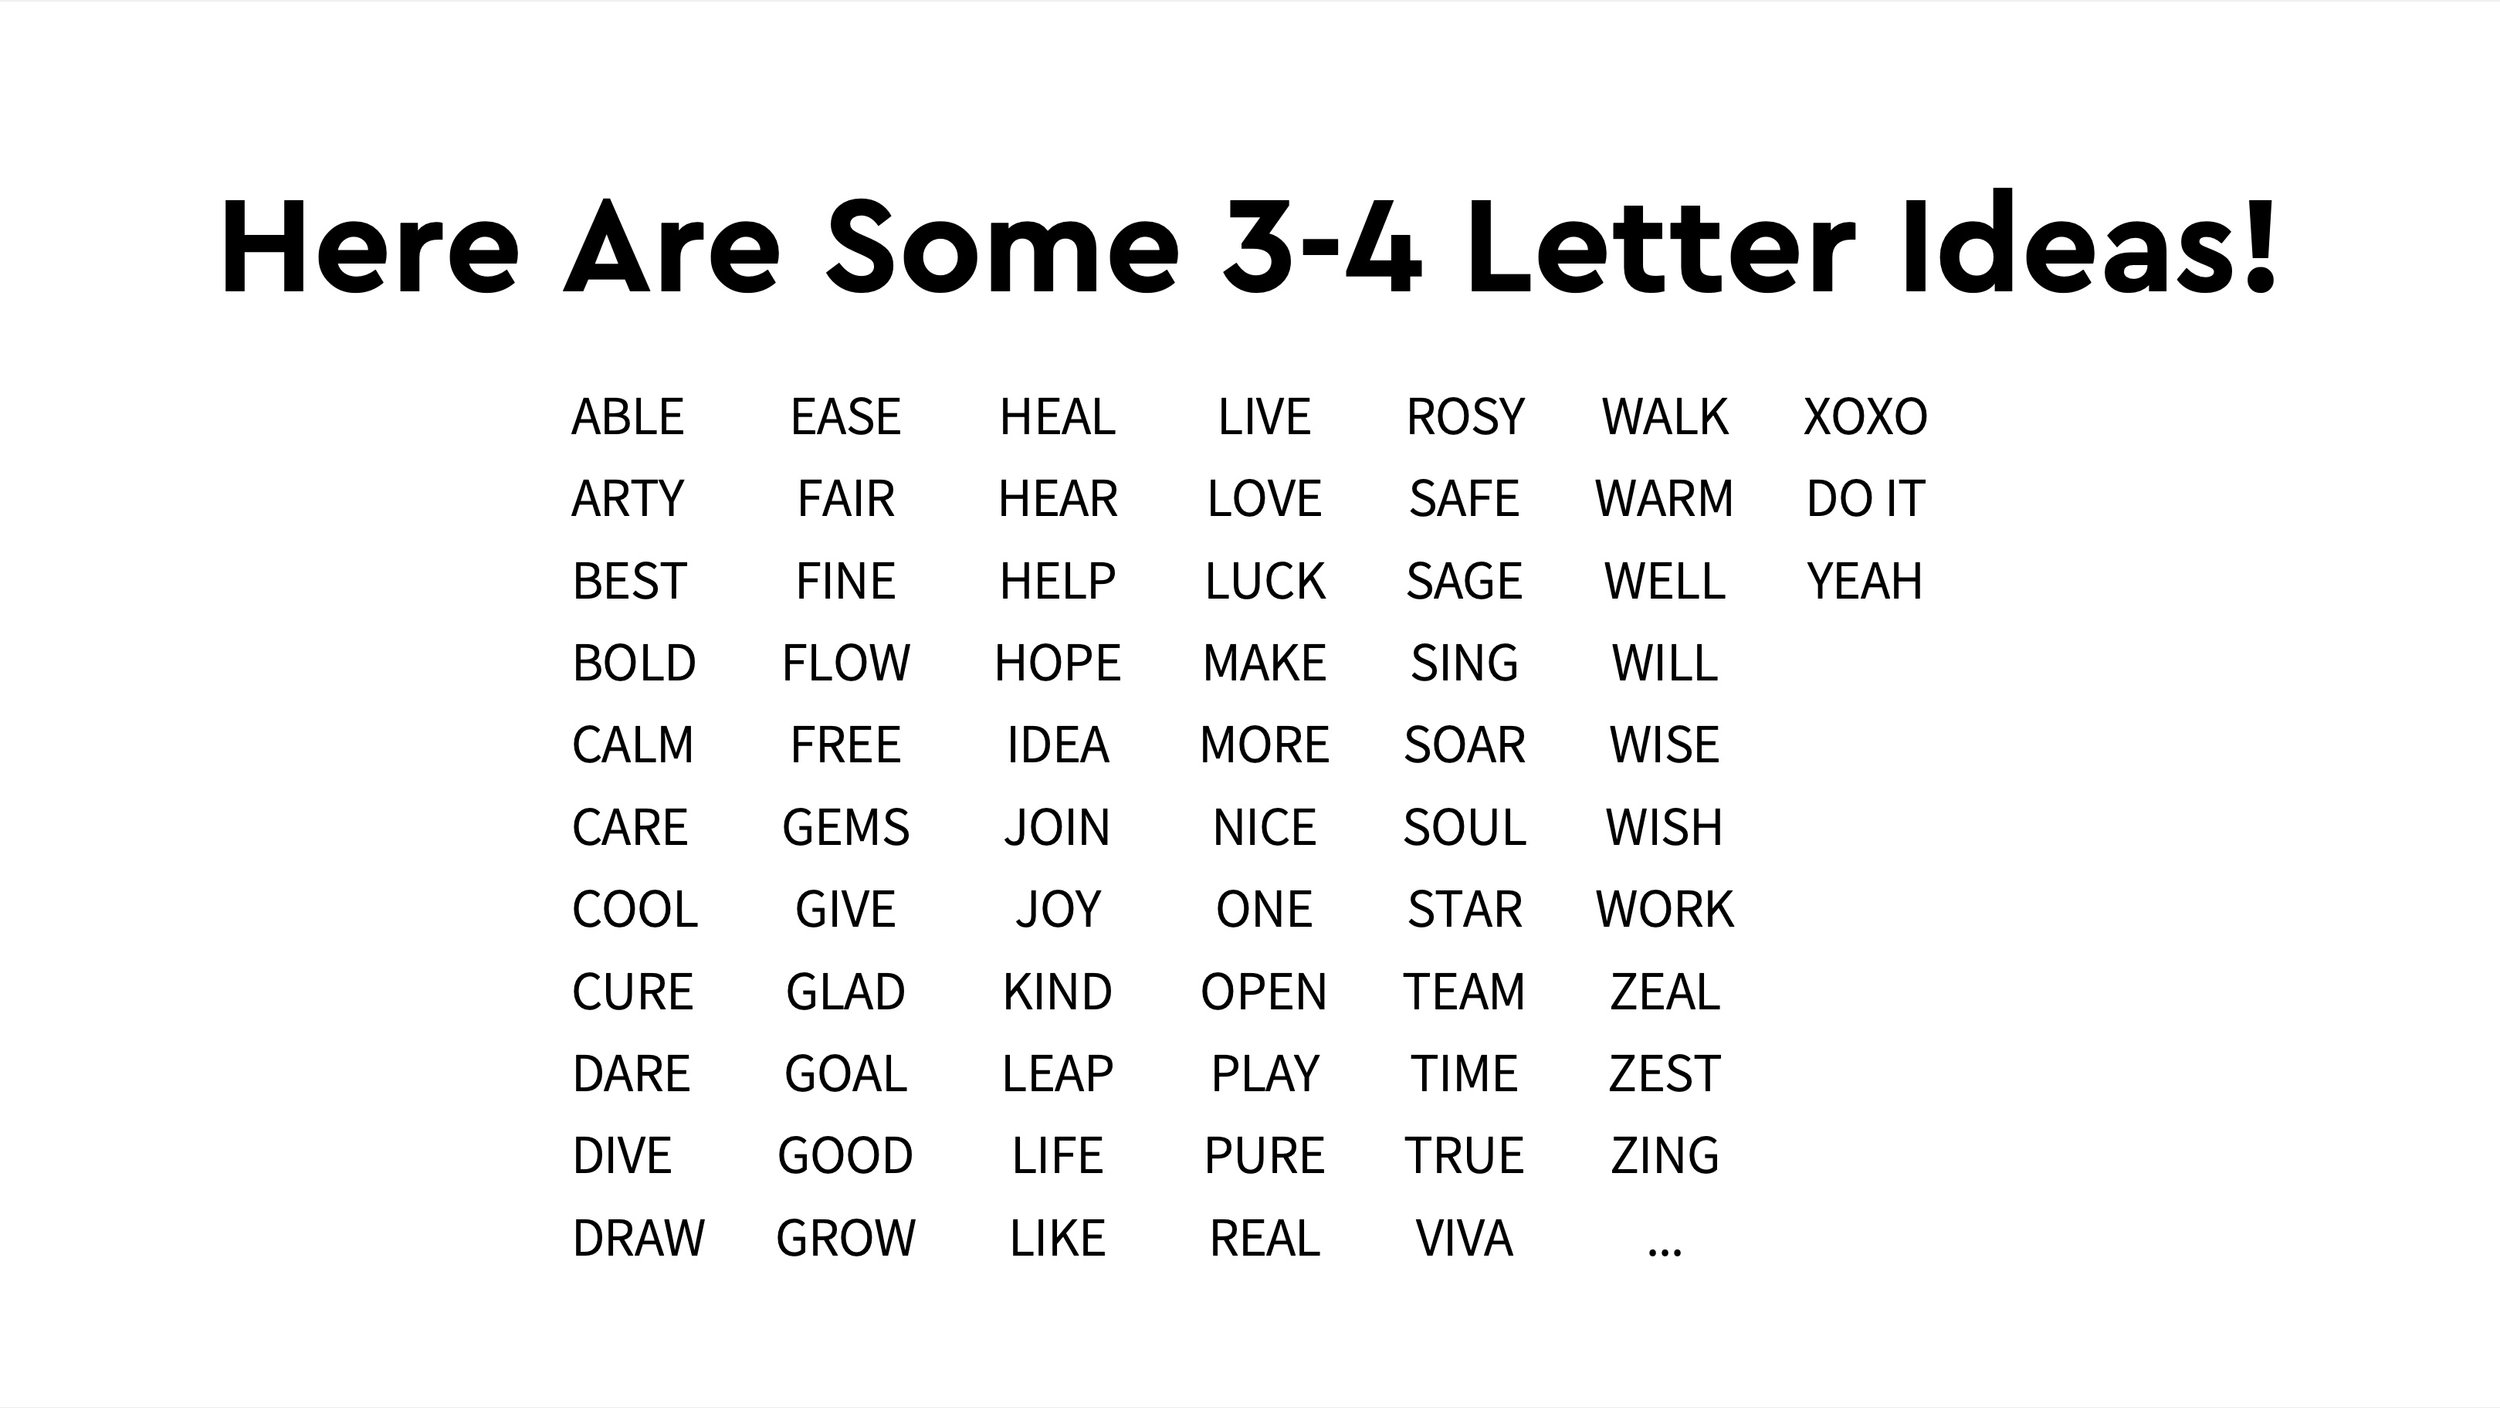
Pull out one piece of watercolor or mixed media paper (regular paper is ok too if that’s what you have!), and tell yourself or your participants that you’re going to each think of a word that ignites positivity and inspiration for a better world for everyone. Imagine… what if one word could change the world for the better. What would that word be for you? Proceed to follow the instructions in these slides:
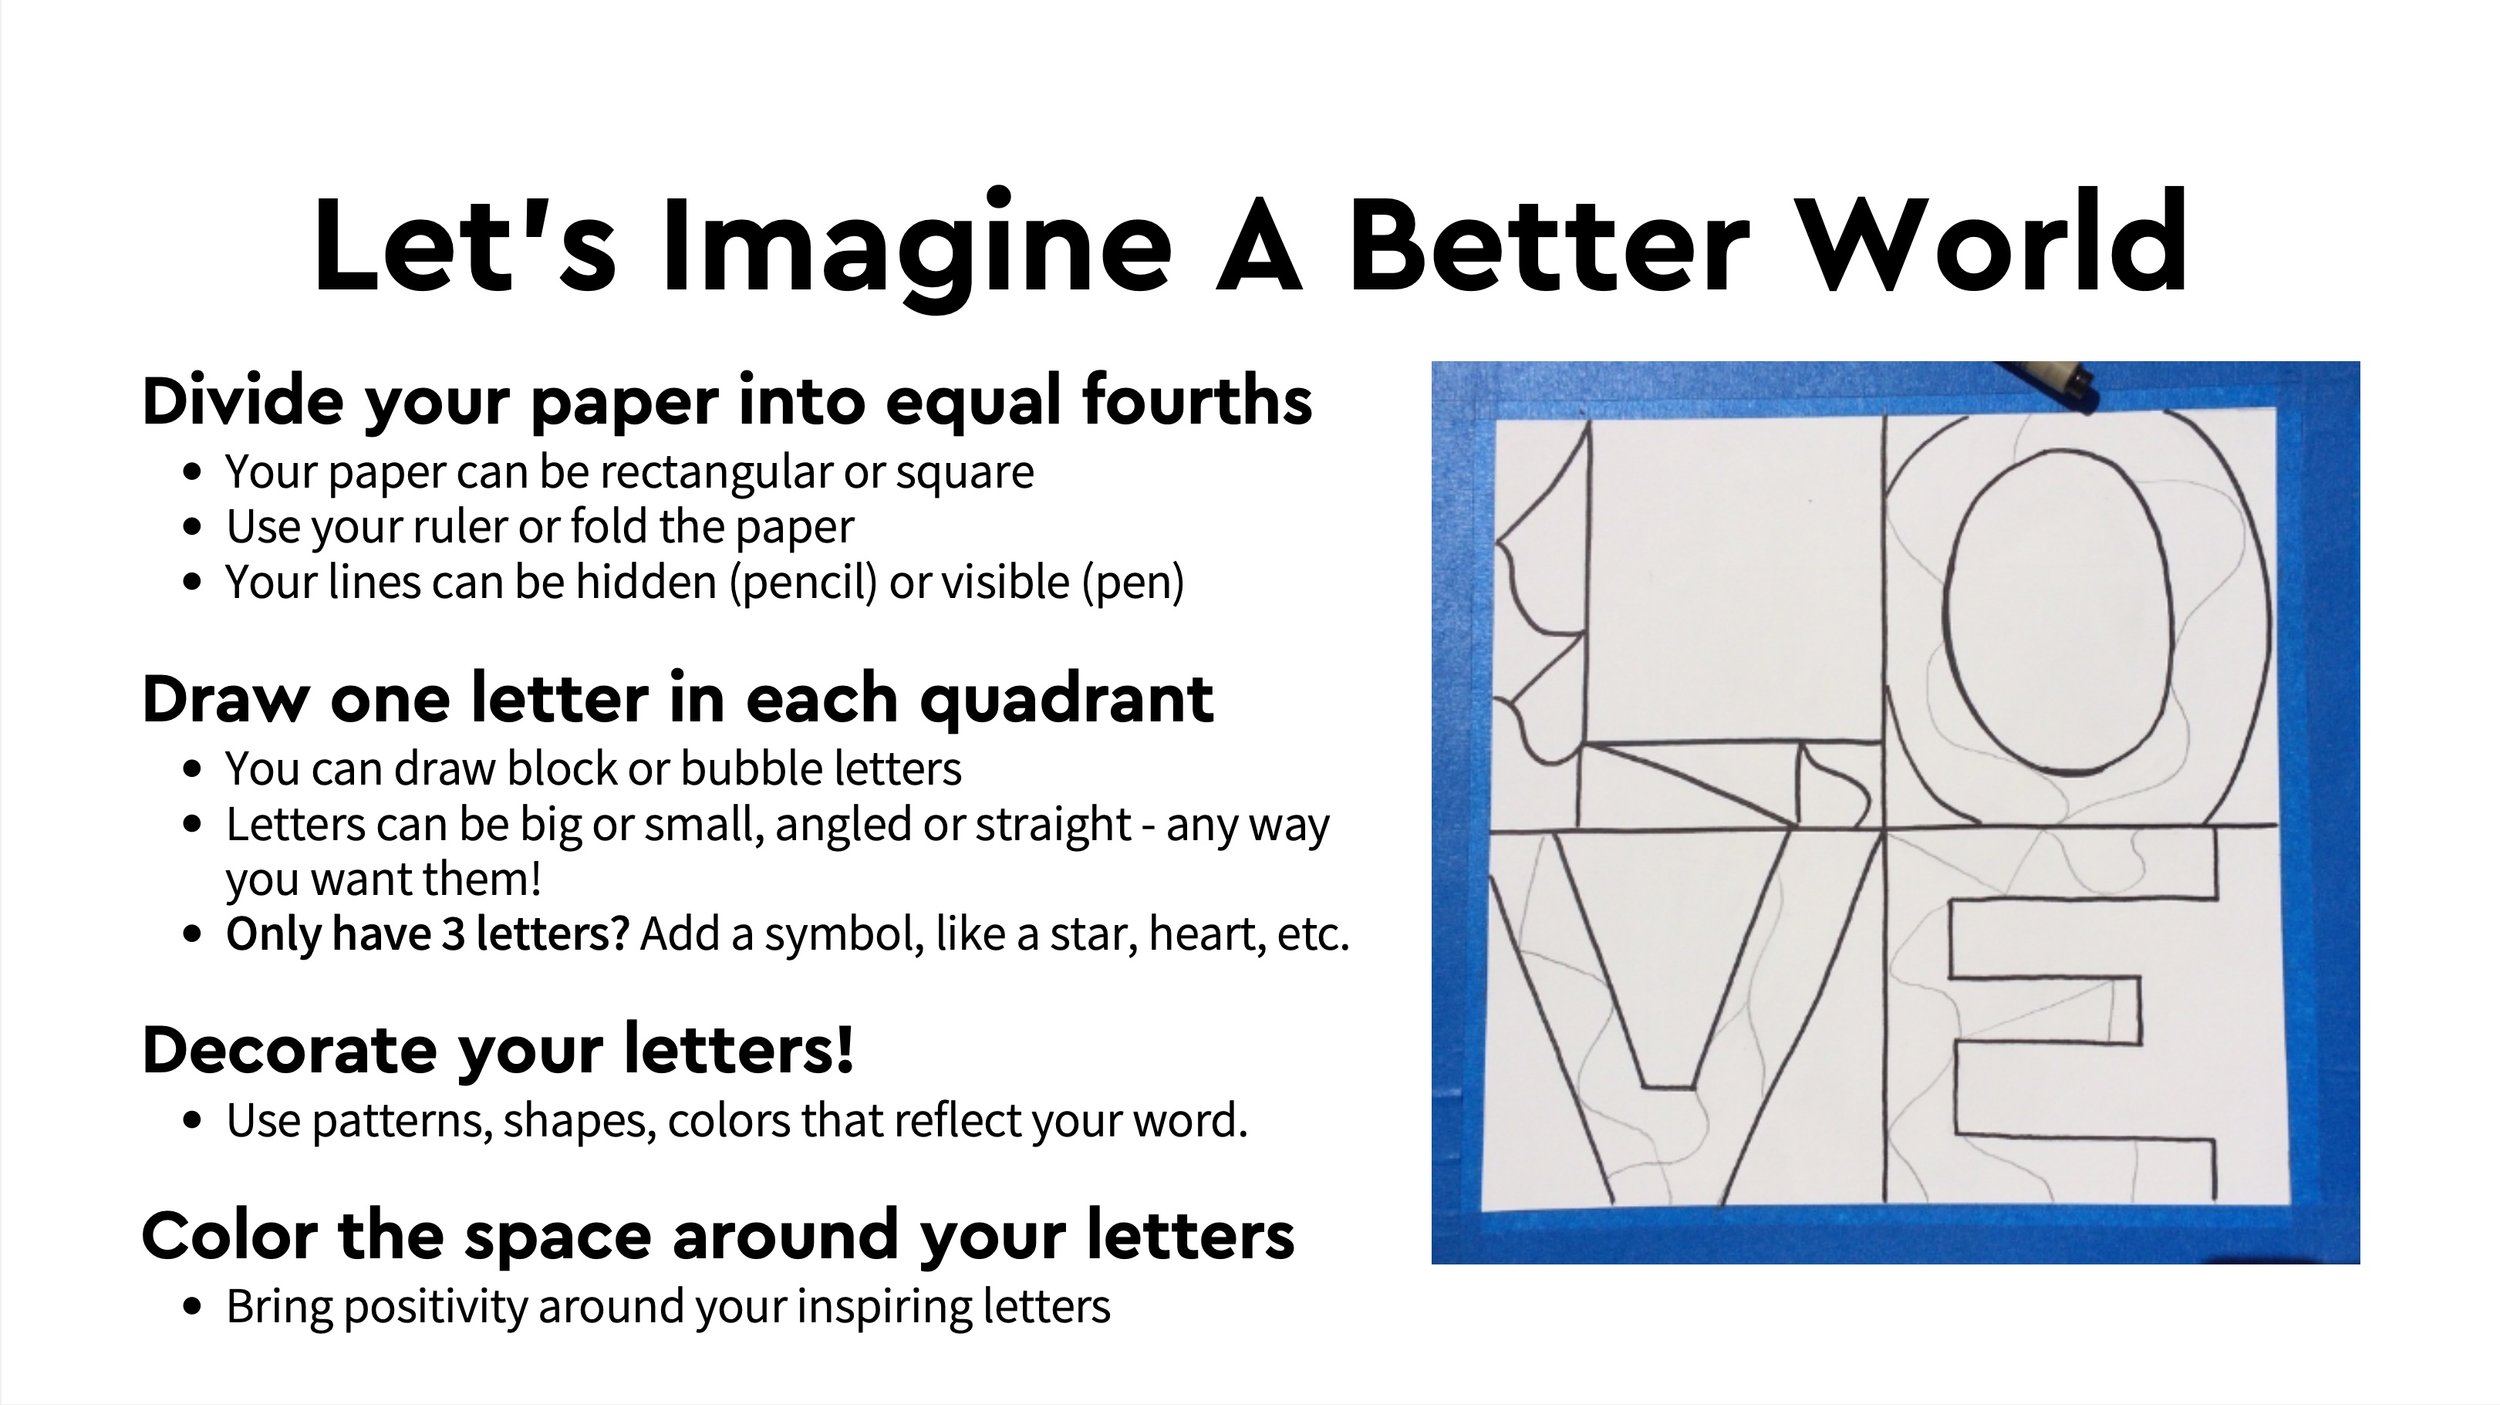
This activity has a lot of flexibility, so you can adjust the examples for younger or older children with different skill levels. You can also tailor it to teaching certain art techniques.
For older children, we like to introduce the concept of Zentangle, or drawing pattern designs, and the meditative and therapeutic benefits of this method. In this activity, the participants can create or use patterns that reflect their chosen word.
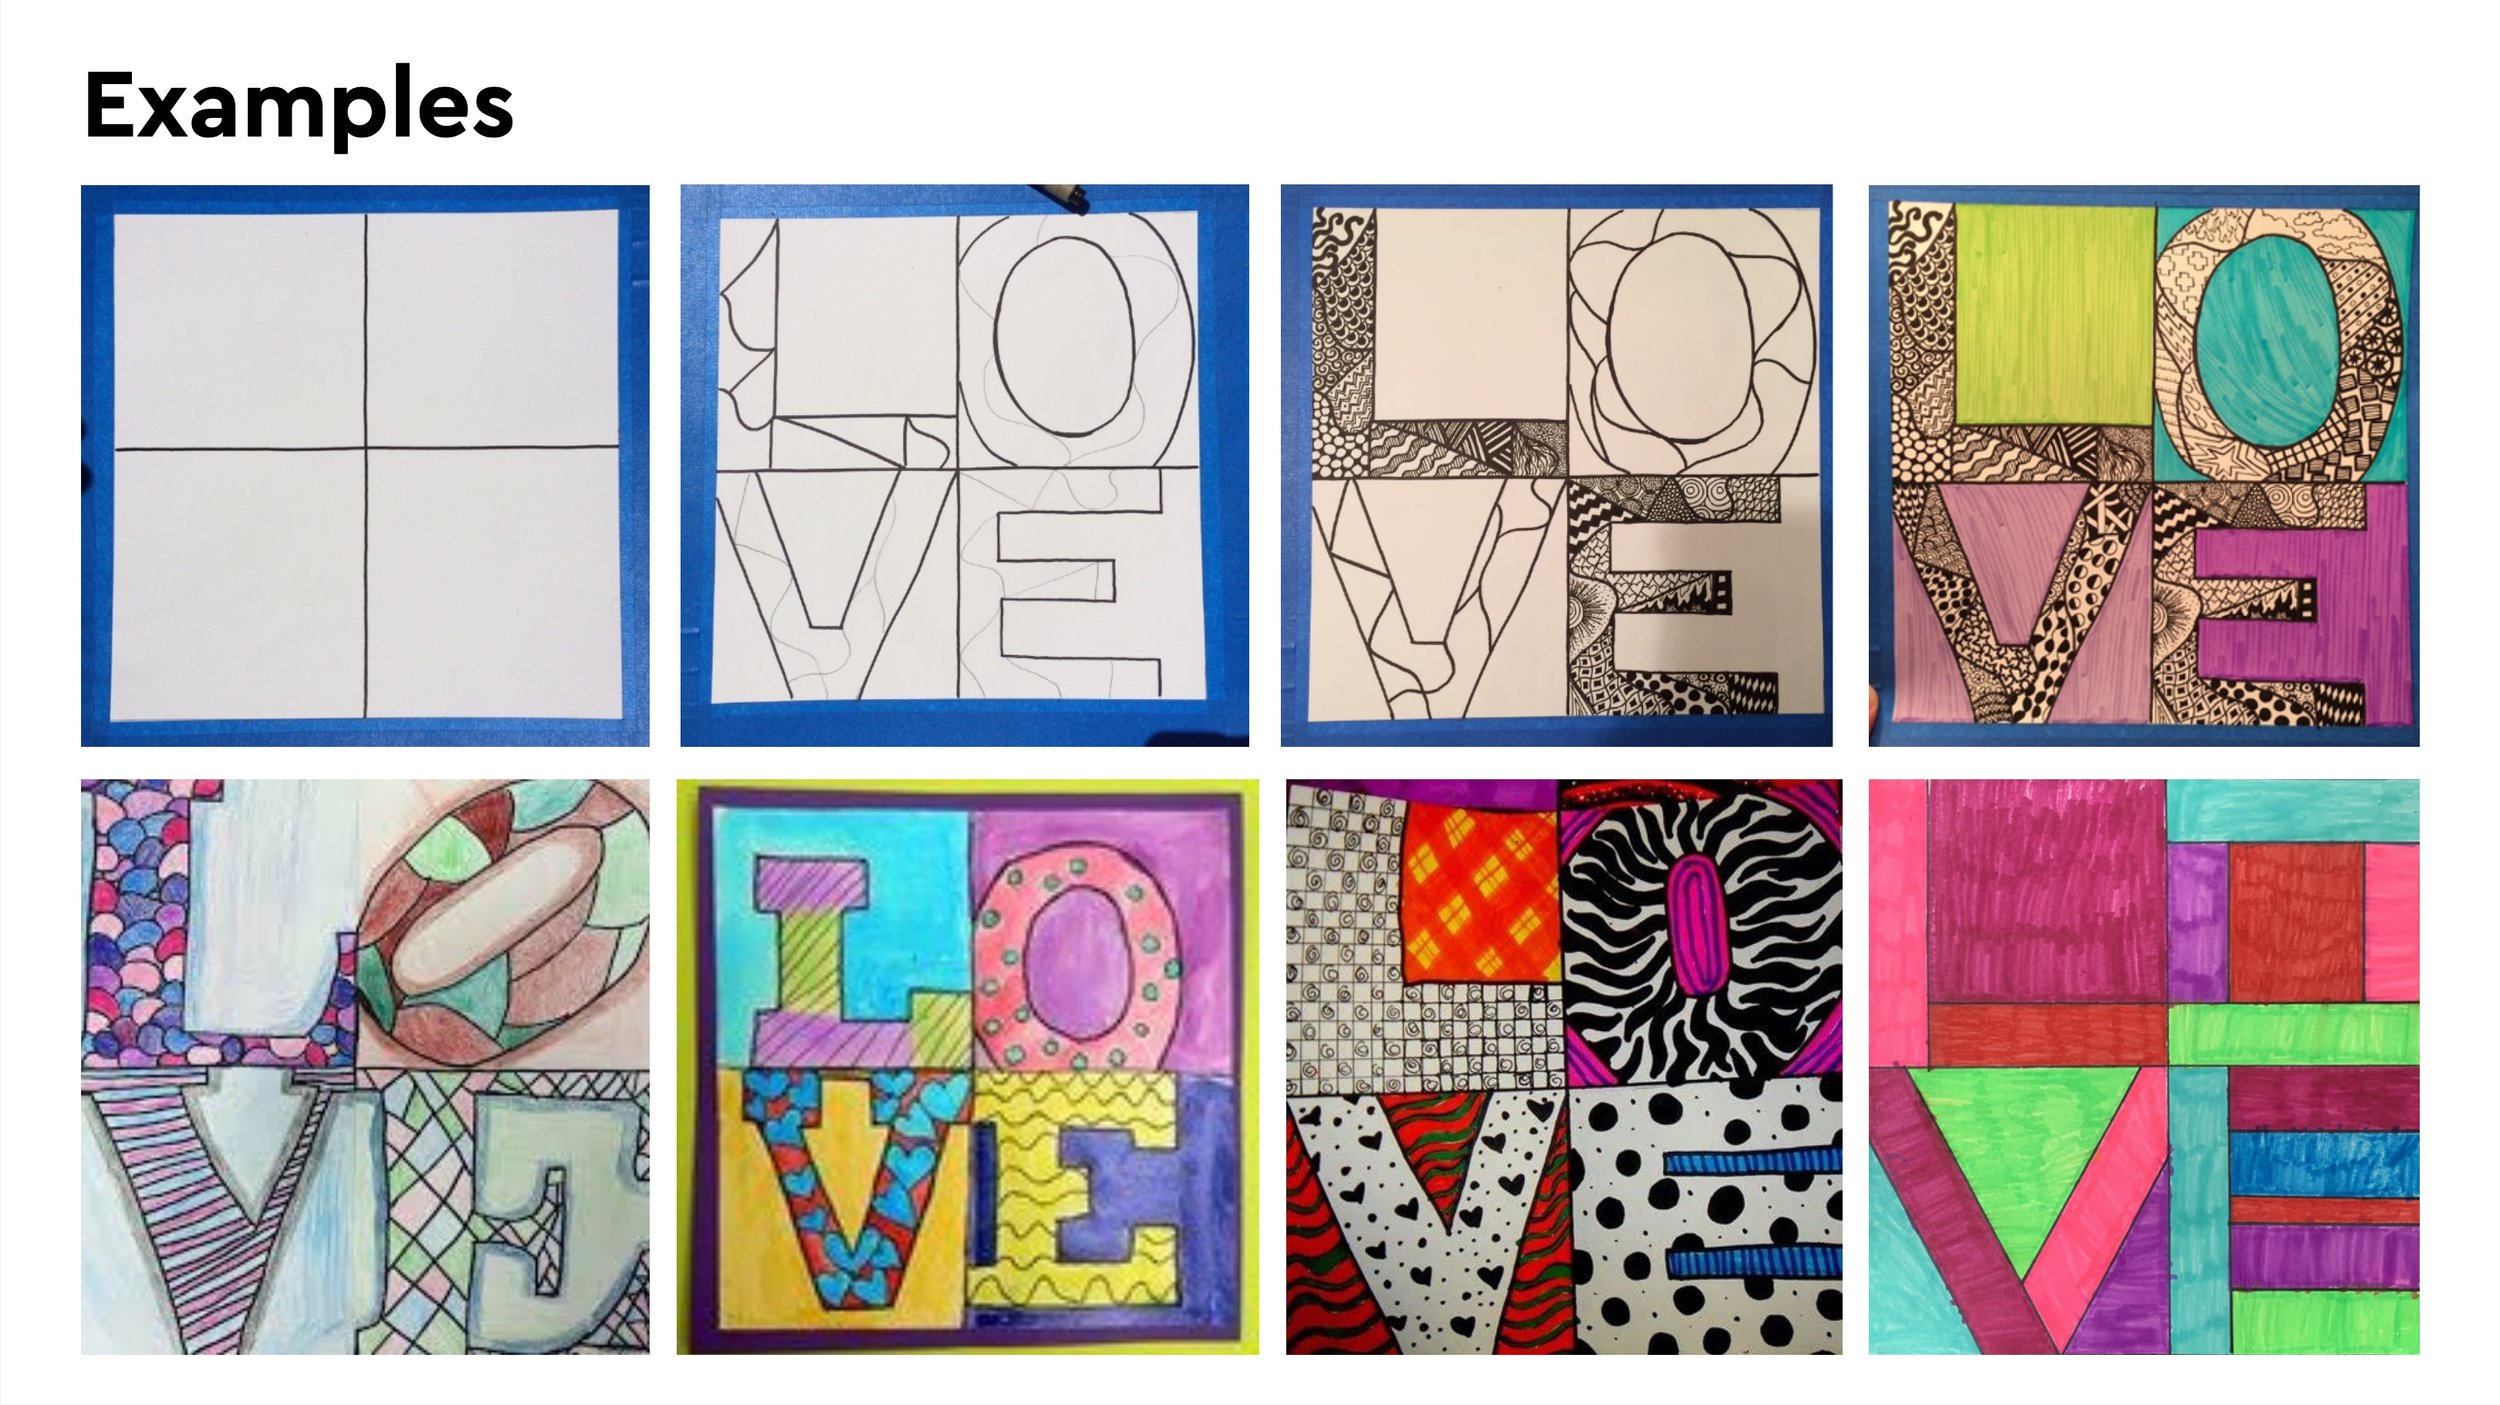
Here’s an example of one of the drawings from our workshop participants:

If participants finish early or you have more than one hour together, you can ask participants to also write a haiku poem to go with their drawing and chosen word. They can title the haiku with the word used for their artwork! For the haiku, they can think about what this word means to them in their own lives – maybe they have a specific memory that comes to mind.
When everyone is done with the activity, you can invite each participant to share their artwork and tell you about it, if they would like to do so. If they don’t feel quite comfortable sharing or are shy, you can propose they share just a glimpse of their artwork visually or their haiku in the chat. Or if they don’t want to share at all, you can ask them if they can simply share the word they chose, either verbally or in the chat (and you, the facilitator, can read it).
Once the artwork is dry, you can hang or frame it to inspire you and remind you to live your word for a better world! If you’re working with a group of participants, ask everyone to hold up their artwork, even if it’s not complete, so that you can imagine a better world together, with all of our words, and take a photo! It’s fun to see all the different words chosen to ignite positivity in our world. You can also have participants send photos of their artwork or upload it externally to create a digital collaborative piece.
Try this activity for yourself, with your kids at home, or those children that you support through volunteering or your work endeavors. Comment below to let us know how it goes. You can also post and tag us in your drawings @GiveKidsArt – we love to see their creations!
We love using Color Swell art materials in our Art Kits and for our art programs, especially their watercolor paint sets. We originally found them on Amazon and have ordered their crayons, markers, paints, and oil pastels. They are great quality, while also being affordable and they offer bulk quantities. Plus, it’s a better deal to purchase on their website.
While we’re on a short break from programming, we’re still brainstorming fun activities for the kiddos! We tried this one during our holiday workshop with Human Rights First and thought we would share it with you! You can do this activity using any type of supplies – crayons, markers, watercolor paints, acrylic paints, etc. – but we recommend using crayons and watercolor to incorporate the fun Crayon Resist Technique!
To warm up to the main activity, you could use the time to first reflect on the past year. Allocate 10 minutes for the warmup. The specific recommended warm-up activity will depend on the age of the children, their needs, etc. However, here are some quick ideas for groups of kiddos:
Go around your group (create a virtual or visual circle) and ask each child to share one word for how they feel about the past year.
Give each child a paper plate, and ask them to fill it with words, colors, feelings, etc. for how they feel about this past year. Or, ask them to quickly draw a favorite memory from this past year.
Reflect with the group on the year collaboratively, using a physical or virtual whiteboard! Kids can volunteer answers. Ask, how did 2020 make you feel? what did you do that you didn’t expect? etc.
Then, you can use this main activity as an opportunity to talk with the kids about the approaching new year and setting wishes or goals for what they would like to happen this coming year.
Pull out one piece of watercolor or mixed media paper, and tell your child or children that you are all going to make wishes upon the stars for the new year.
Tell them to think about what they hope for this new year – what they hope to accomplish, or what they hope to do, to see, to visit, etc. Tell them to think about all the wishes they have for this coming year and then to draw a star for each wish, using crayon!
You can tell them that they can use any color crayon they want, or even a different color for each star. They can draw bigger stars for big wishes and smaller stars for smaller wishes. They can draw a shooting star too!
Once they’ve drawn their stars, they can use their watercolor paints to paint the sky! The sky can be any color or colors they want to use. They can paint over the crayon. You can explain that the wax in the crayon will resist the watercolor paint – this is why it’s called the Crayon Resist Technique.
Here’s an example of one of the drawings from our Human Rights First workshop participants:

You can ask each child to share their painting and tell you about it, if they would like to do so. If they don’t feel quite comfortable sharing or are shy, you can propose they share just one wish or write it out and have you, the facilitator, read it. Or, if they don’t feel comfortable sharing their wishes for the new year, you could ask them about the colors they chose for their sky!
Once the painting is dry, you can hang or frame it. Tell each child they can keep their painting by their side to always remind them of their wishes. They can even change their wishes and wish upon their stars each night.
This activity also opens a doorway for you to reflect with your child or children on wishes and have a conversation about positive thinking, hopefulness and patience. For instance, our wishes might not always come true right when we want them to, but we can put them out in the universe, stay positive, and be patient. Sometimes wishes come true years and years later!
Try this with your kids at home and those that you support through volunteering or your work endeavors. Comment below to let us know how it goes. You can also post and tag us in your kid’s drawings @GiveKidsArt – we love to see their creations!
So this year, I attempted to test the famous Salt Dough Ornaments that are known to be extremely cost effective and fun to make with kiddos of all ages — and for adults! All you need is All-Purpose Flour, Salt, and Water to make the dough for the ornaments. This is the recipe that we followed: View Recipe.
We made nearly 40 unique ornaments with this recipe! Here is a set of five ornaments we created as a gift:

After all our hard work, here is everything to know before you make your Salt Dough Ornaments! P.s. It’s a fun affordable alternative to air-dry clay too, so it doesn’t just need to be for the holidays.
1) You can get everything you need at the Dollar Tree! I made sure each item was there. Since I had or found some items around the house, the following bolded items were purchased to make this set of ornaments:
All-Purpose Flour - $1
Salt - $1
Cookie Cutters - $1 per set (this product is occasionally found at Dollar Tree)
Note: You don’t need cookie cutters; you can also hand cut designs using a sharp utensil or shapes found around the house, like using a bowl for a circle. Cookie cutters are easy and helpful for working with children.
Rolling Pin - $1
Here are some rolling pin substitutes you might have at home.
Cookie Sheet - $1
Parchment Paper - $1
Sand Paper Set - $1
Note: check the auto section at Dollar Tree
Wood Cutting Tool Set - $1
For use by adults or older children only. You can find this in the craft section; one of the tools in the set of four is like a less sharp exacto knife and can help with cutting custom ornament shapes.
Mod Podge Matte (2 fl oz) - $1
Decorating Supplies - $1 each
Craft Paint Set or Watercolor Paint Set
Liquid Glitter Marker - Loved using this pen; it dries very quickly!
Glitter Set or Faux Snow - Use the glitter with Mod Podge
Sharpie Pen
Glue Gun & Gold Glitter glue inserts - $2 Total
Twine or String - $1
Note: check the craft section at Dollar Tree
Plastic Table Cloth for a Tarp - $1
Grab a white table cloth so kids can paint and decorate freely


2) It takes longer than you think with cook time, dry time, etc. so allocate one day to make the ornaments and at least one day to sand and decorate them.
3) After you bake your ornaments, you can sand them using Sand Paper to smooth the edges!
4) If you want to paint all the ornaments white to have a base coat, I recommend using spray paint… otherwise, it will take several hours and layers of white paint to get a good base. I tested using Acrylic paint and didn’t like the aesthetic or texture of it on the dough. I preferred using craft paint or watercolors, depending on the look I wanted.
5) If you have pets (especially dogs), they love to eat these ornaments - DO NOT LET YOUR DOG get a salt-dough ornament. The salt content can be lethal. Not to mention if they eat an ornament that has been decorated with paint, glitter, glue, etc., you may need to call poison control.
While following the recipe provided, I noticed that the longer the dough sat out in between bake times (as I didn’t have enough cookie sheets to bake all ornaments at once), the more the ornament had a cracked look or finish to it after baking. The newer and fresher dough produced an ornament that was more smooth in appearance. Depending on the look you want for your ornaments, you may want to leave the dough out longer for a more cracked, ceramic, or worn look.
Make sure you keep the dough even as your roll it out using your rolling pin. The more even the dough, the less likely it will bubble and possibly crack when baking. Thinner rolled out dough works better (about 1/8”).
Make sure the edges of your dough ornament are cleaned up before you bake them – it will save you time on sanding later.
I used a wood cutting tool that I found at Dollar Tree (similar to an exacto knife, but not as sharp) to cut custom shaped items, like the leaves and rainbow (shown below). For the circular pendant ornaments, I used a tiny shot glass to stamp out the circle shape. The stars were created using a cookie cutter. You can use whatever you find around the house to make designs in your ornaments – I used a plastic fork and knife to make some designs and a wood skewer stick to make the holes in the ornaments. Many people use plastic straws to make the hole for the string. Make the hole a little larger than you would want it as it will likely get smaller when the dough bakes.
Add two holes to your ornaments if you want to hang them together – then you can thread them in a row and they’ll hang facing forward! Here’s a good example. One hole works nicely if you’re making individual ornaments.


Natural Ornaments:
If you would like to keep the organic, natural look of the dough ornaments - they kind of look like ceramics after being baked! - then just apply one layer of Mod Podge to your ornaments, one side at a time. Make sure you don’t let the Mod Podge cover the hole. Also, the Mod Podge will be white when you apply it, but dries clear. You can use the Mod Podge to cover any cracks on the side or edges or your ornaments too.
Glitter Ornaments:
If you plan to only decorate using glitter, apply a layer of Mod Podge, then sprinkle or dip in glitter. You will need to do a few layers. Don’t cake on too much Mod Podge, as it can dry white if applied too thick. The best result will be by doing layers of glue with glitter which will require waiting in between.
Painted Ornaments:
If you would like to paint your ornaments, you can either paint them before OR after you apply Mod Podge. If you use craft paint, tempura paint, or watercolor paint before you Mod Podge, you will likely need to apply a few layers of paint to the dough and allow for drying time in between. I’ll cover both approaches blow and here is an image comparison:

Rainbow = Mod Podge First, Paint Second (few layers); Star = Paint First (few layers), Mod Podge Second
Mod Podge First, Paint Second Approach:
For a nice ceramic look, here’s the process used for my Evil Eye ornament gift. After sanding, I first applied Mod Podge to the ornament, then used a Black Sharpie to color in the initial design. I then applied a thin layer of blue watercolor over the eye. Then, I applied Mod Podge again to the front. The Sharpie lost its initial shinny, metallic look after the Mod Podge was applied. Then I used the Liquid Gold Marker (pictured above) to decorate the sides and the back of the ornament.
Paint First, Mod Podge Second Approach:
I also decorated some ornaments by applying watercolor right after sanding. The dough absorbs the watercolor more fully this way and the color will be more saturated. Depending on the color of watercolor paint you use, you may need a few layers to get the vibrancy you want. Let each layer dry in between. If you try to coat it again too soon, you risk the water on your paintbrush pulling up the previous layer of paint. In the ornaments pictured below, I applied watercolor first (in layers) then Mod Podge, then added the gold accents using the liquid marker. Be careful when you apply Mod Podge over the watercolor as it may lift the paint slightly.


There are so many great resources for Salt Dough Ornament inspiration. Here's one article full of 11 fun ornaments that kids can make. I’m excited to try the Holiday Spice Garland and Melted Bead Suncatcher Ornaments.
As of September 8, Give Kids Art started its virtual summer programming in proud partnership with the Boys & Girls Clubs of Santa Monica. We are happy to announce that The Boys & Girls Club in Mar Vista Gardens has again safely reopened its doors to participants, while outside partners and volunteers are remote. We are running our art programs on Zoom with the kids from all B&GC Santa Monica branches every Tuesday for the next ten weeks. The children who have signed up for our program are joining us by tuning in from the local branch art room or directly from home. It’s wonderful to see old and new faces from various locations come together for more fun and creativity.
Thanks to your donations, Give Kids Art continues to make and provide the kids with Art Kits filled with a variety of materials, so they can continue creating fearlessly from home as well as with us on Zoom. The Art Kits that we deliver are distributed at the Grab & Go Meal center and are given to children, whether they participate in our programs or not. The latest round of custom Art Kits contain: watercolor paper, crayons, colored pencils, colored markers, watercolor paints, an extra paint brush, a canvas panel, one pair of scissors, one Elmer’s glue stick, and one No. 2 pencil.


If you or your little ones have paper (or old cardboard to draw on) and some crayons, pencils, or markers at home, you can participate in the fun, too. We will share our weekly Zoom art projects so you can join us! We’ll be adding new projects every week. If you have any questions, comment below.


“You have two hands: one for helping yourself, the other for helping others.”