
“We delight in the beauty of the butterfly, but rarely admit the changes it has gone through to achieve that beauty.”
We adjusted one of our favorite springtime art activities to incorporate an easy, fun art technique for kids to explore – aluminum foil marker printmaking! This process can also be used to introduce conversations on metamorphosis, change, and what we can and cannot control. The aluminum foil marker printing technique also helps us immediately practice and embrace this process of change!
At minimum, you will need a piece of paper, pencil, permanent marker (Sharpie recommended), washable colored markers, a sheet of aluminum foil, and a spray bottle! Ideally, the spray bottle needs to be able to mist water. You can recycle old cleaning supply spray bottles that have been thoroughly cleaned and rinsed. We have also found that travel-sized spray bottles, which can be purchased at CVS or Dollar Tree, work well.
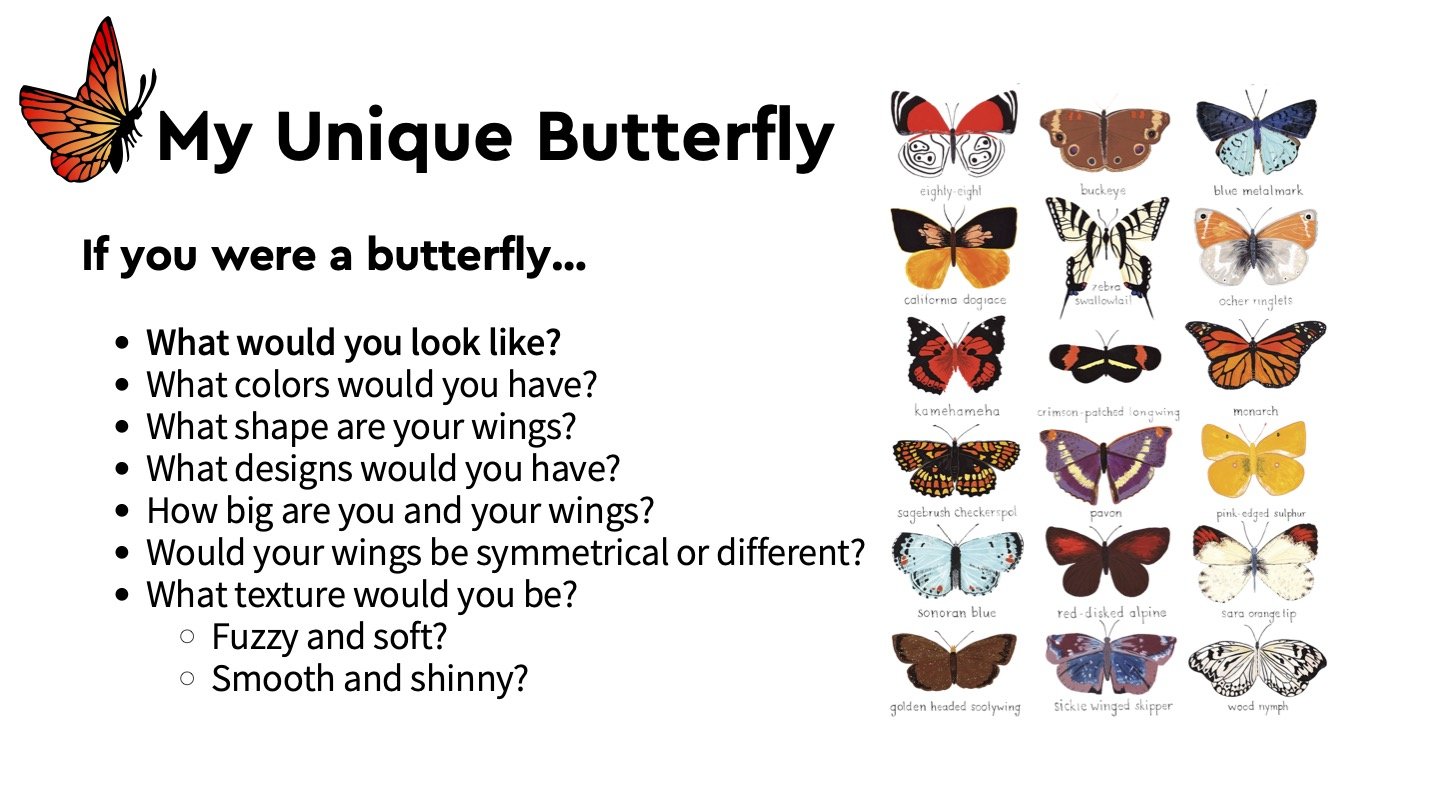
If you’re trying this with a group, allocate 10-15 minutes for the introductions, warm-up, and art activity discussion. The specific recommended warm-up activity will depend on the age of the children, their needs, etc. as well as how often you’ve engaged with them. However, if it makes sense, you can try a quick feelings check-in with your participants. Ask your artists to take a moment to check-in with themselves: “How are you feeling? If you were a butterfly right now, what colors would you be?” (Hint: they can use the color(s) later in their art!).
In-Person Option: Go around your group and ask each participant to share their butterfly color(s) for how they are feeling today. Let them know that they can always “pass” and share later. You could pass a ball, stuffed animal, talking stick, etc. or simply sit in a circle and share clockwise.
Zoom Alternative: If not everyone can share their screen or use the microphone, you could have each participant edit their Zoom name to include their first name, color(s).
Both: You can also present an image or chart of various colorful butterflies and ask the artists to pick a butterfly (or butterflies) for how they’re feeling, by sharing verbally or pointing to the images.
If you’re trying this activity for yourself, check in with yourself too!
After your initial introductions and warm-up, you can transition into a conversation about butterflies, including some fun facts. For instance, did you know that “no two of the world's more than 12,000 butterfly species look quite alike” (source)? Then, you can move onto their various symbolic meanings. If you’re working with your kids or a class, open up the group for brainstorming and discussion. Ask the participants,“Do butterflies mean or represent anything special to you?” Try writing down all the thoughts on a physical or digital board for all to see. For our group, we brainstormed and shared different meanings and then focused on the process of metamorphosis and change. We walked through the stages of metamorphosis for a butterfly: Eggs > Caterpillar > Chrysalis > Butterfly. With certain groups, after explaining the process, we collectively try a movement activity where the participants mimic the facilitator growing from an egg through the metamorphosis stages and into a big, beautiful butterfly.
We also introduced some inspiring quotes on change, including one by Maya Angelou, to emphasize that while change is constant and scary, it also can lead to unexpectedly beautiful outcomes. So we must embrace the change and the journey because we never know where it will take us. It might turn us into a beautiful butterfly!
Wrap up with the idea that we’re now going to create our own unique, beautiful butterflies and explore change through a fun print-making process using aluminum foil.
Here Are The “My Unique Butterfly” Art Activity Instructions:
Pull out one piece of watercolor or mixed media paper (regular paper is ok too if that’s what you have!), and tell yourself or your participants that you’re going to first draw using pencil. The paper can be oriented vertically or horizontally.
Proceed to follow the initial drawing prompt and activity instructions in the slides below:
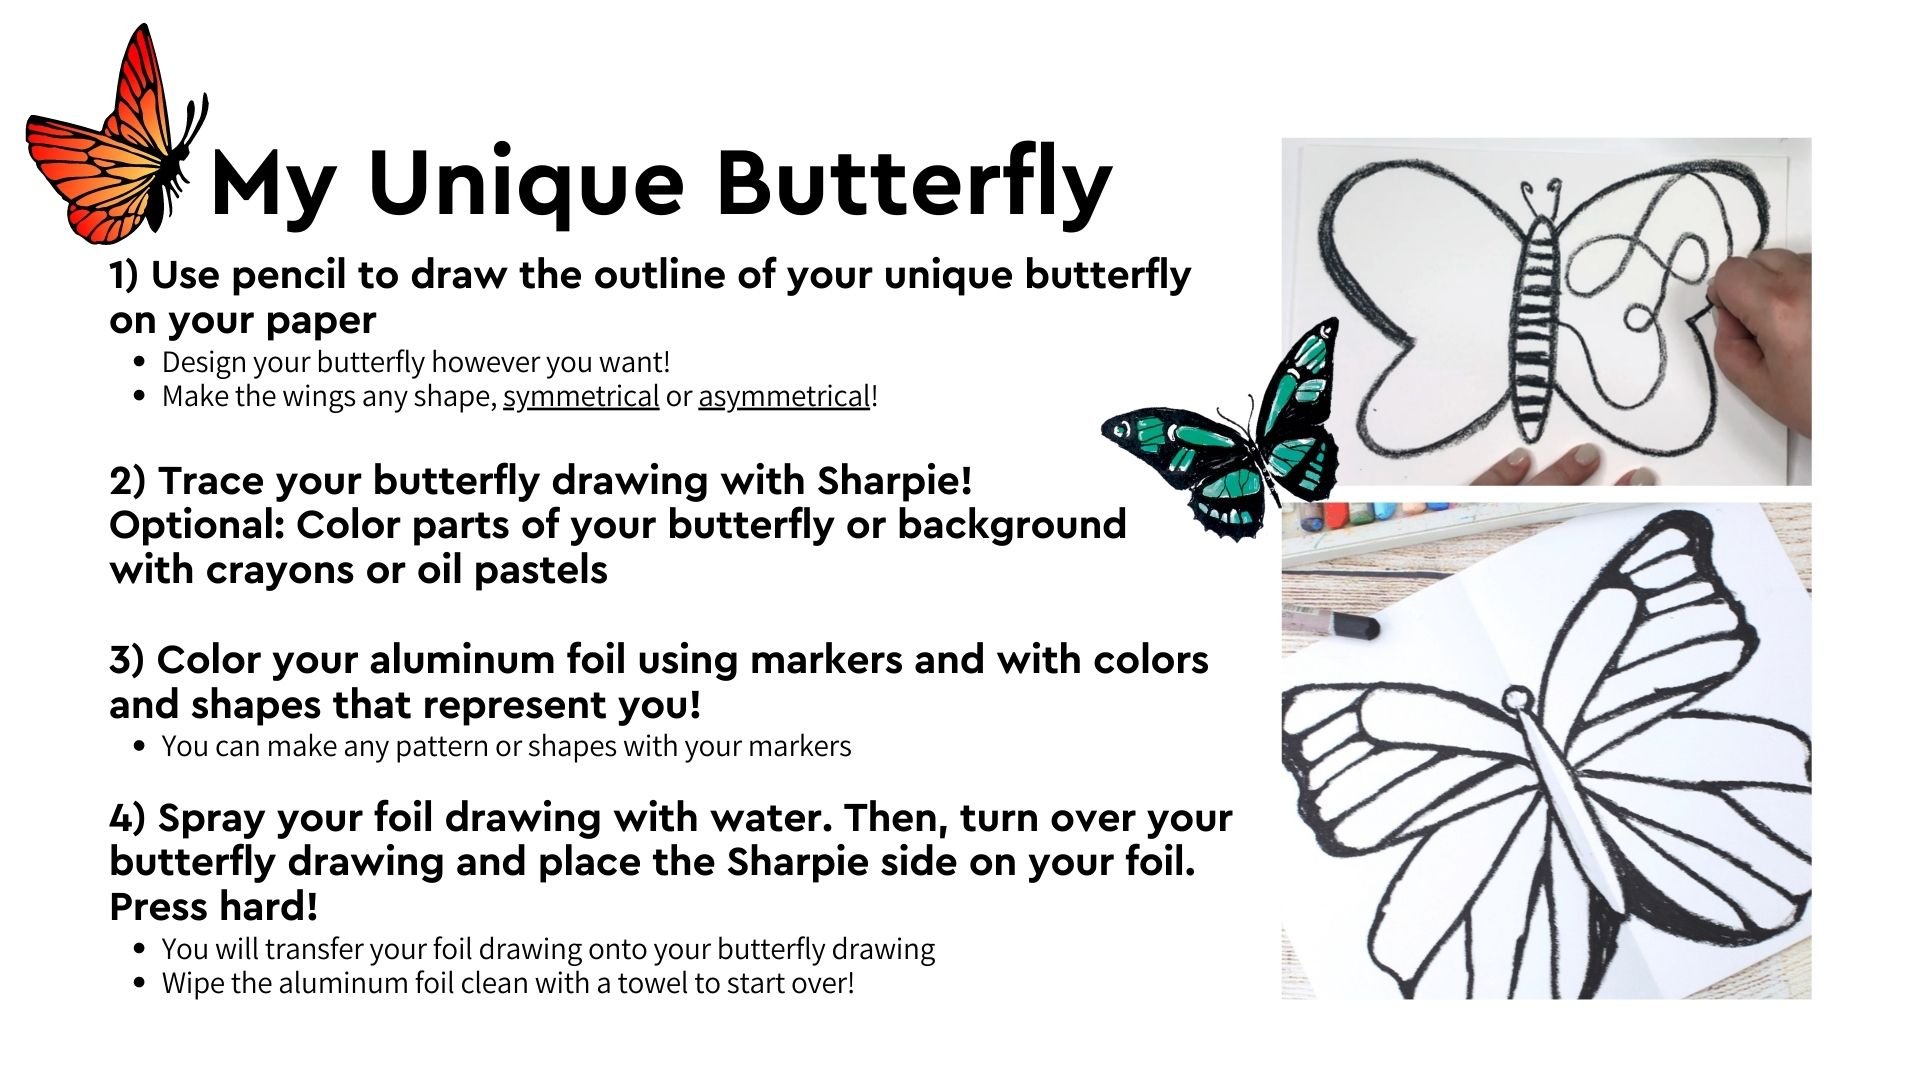
As the artists draw their unique butterflies, the facilitator can introduce the terms of symmetry and asymmetry and give the artists the option of drawing their butterfly wings the same or different on both sides.
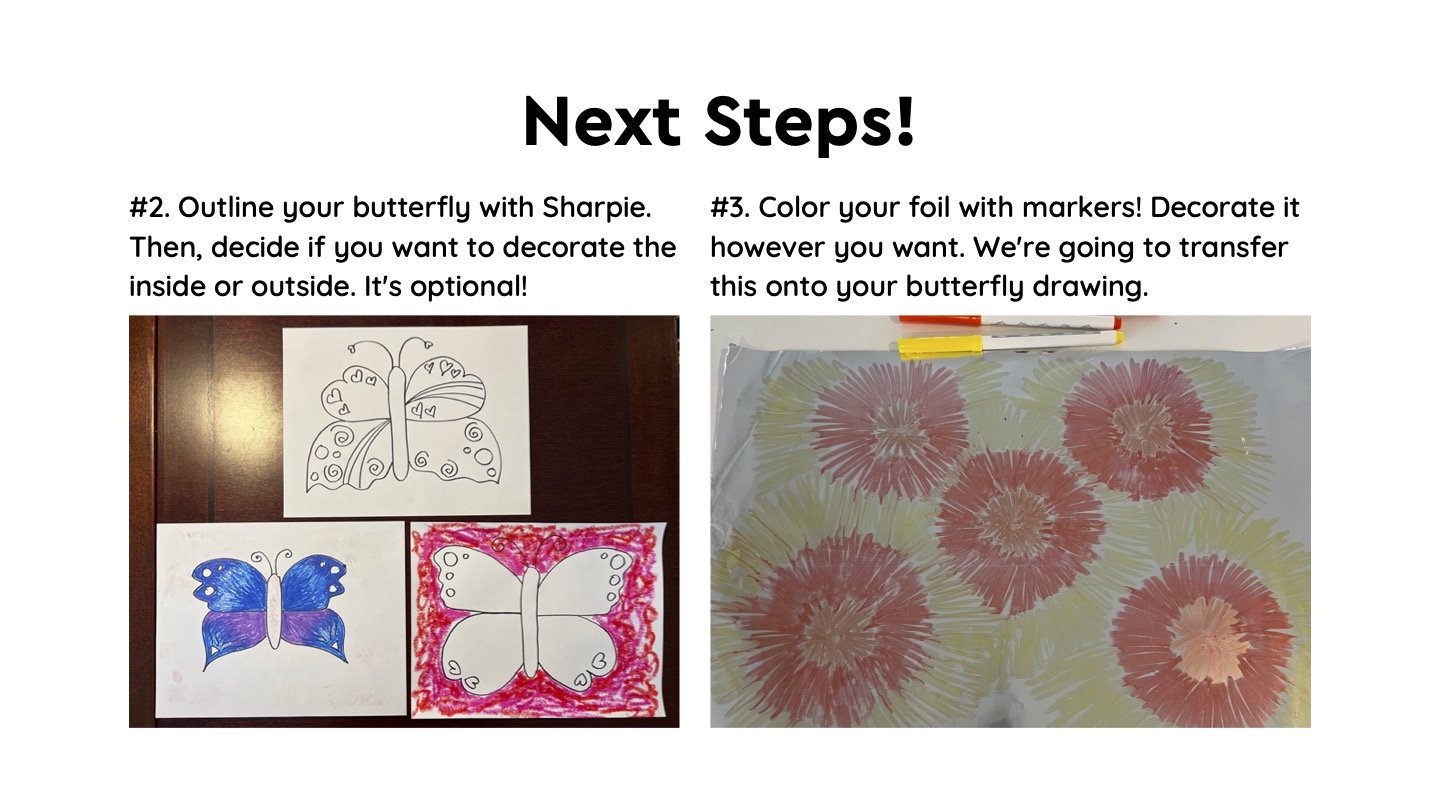
Once the artists look like they are wrapping up their drawings, the next step is to outline their butterfly with a permanent marker or pen (Sharpie recommended). For young ones, “outlining” can be explained as tracing or drawing over the pencil with the permanent marker.
For older artists, we also give them the option of coloring inside and/or around their butterfly using crayons or oil pastels. By integrating these other drawing materials, you can combine the activity with a discussion on Crayon Resist Technique (see here for details) or Wax Resist Technique.
If artists are insistent on not wanting to draw a butterfly, see if they might be interested in drawing a “robot butterfly” or creating another type of bug.
If an artist finishes the drawing quickly or feels lost in what to do or where to start, take a look at what they’ve done so far and ask them questions! For instance, “I see that you really put thought into what your butterfly looks like, and I’m wondering if you would like to try one of the options and decorate the area around your butterfly to show where your butterfly is? Where does your butterfly want to live or like to go?”
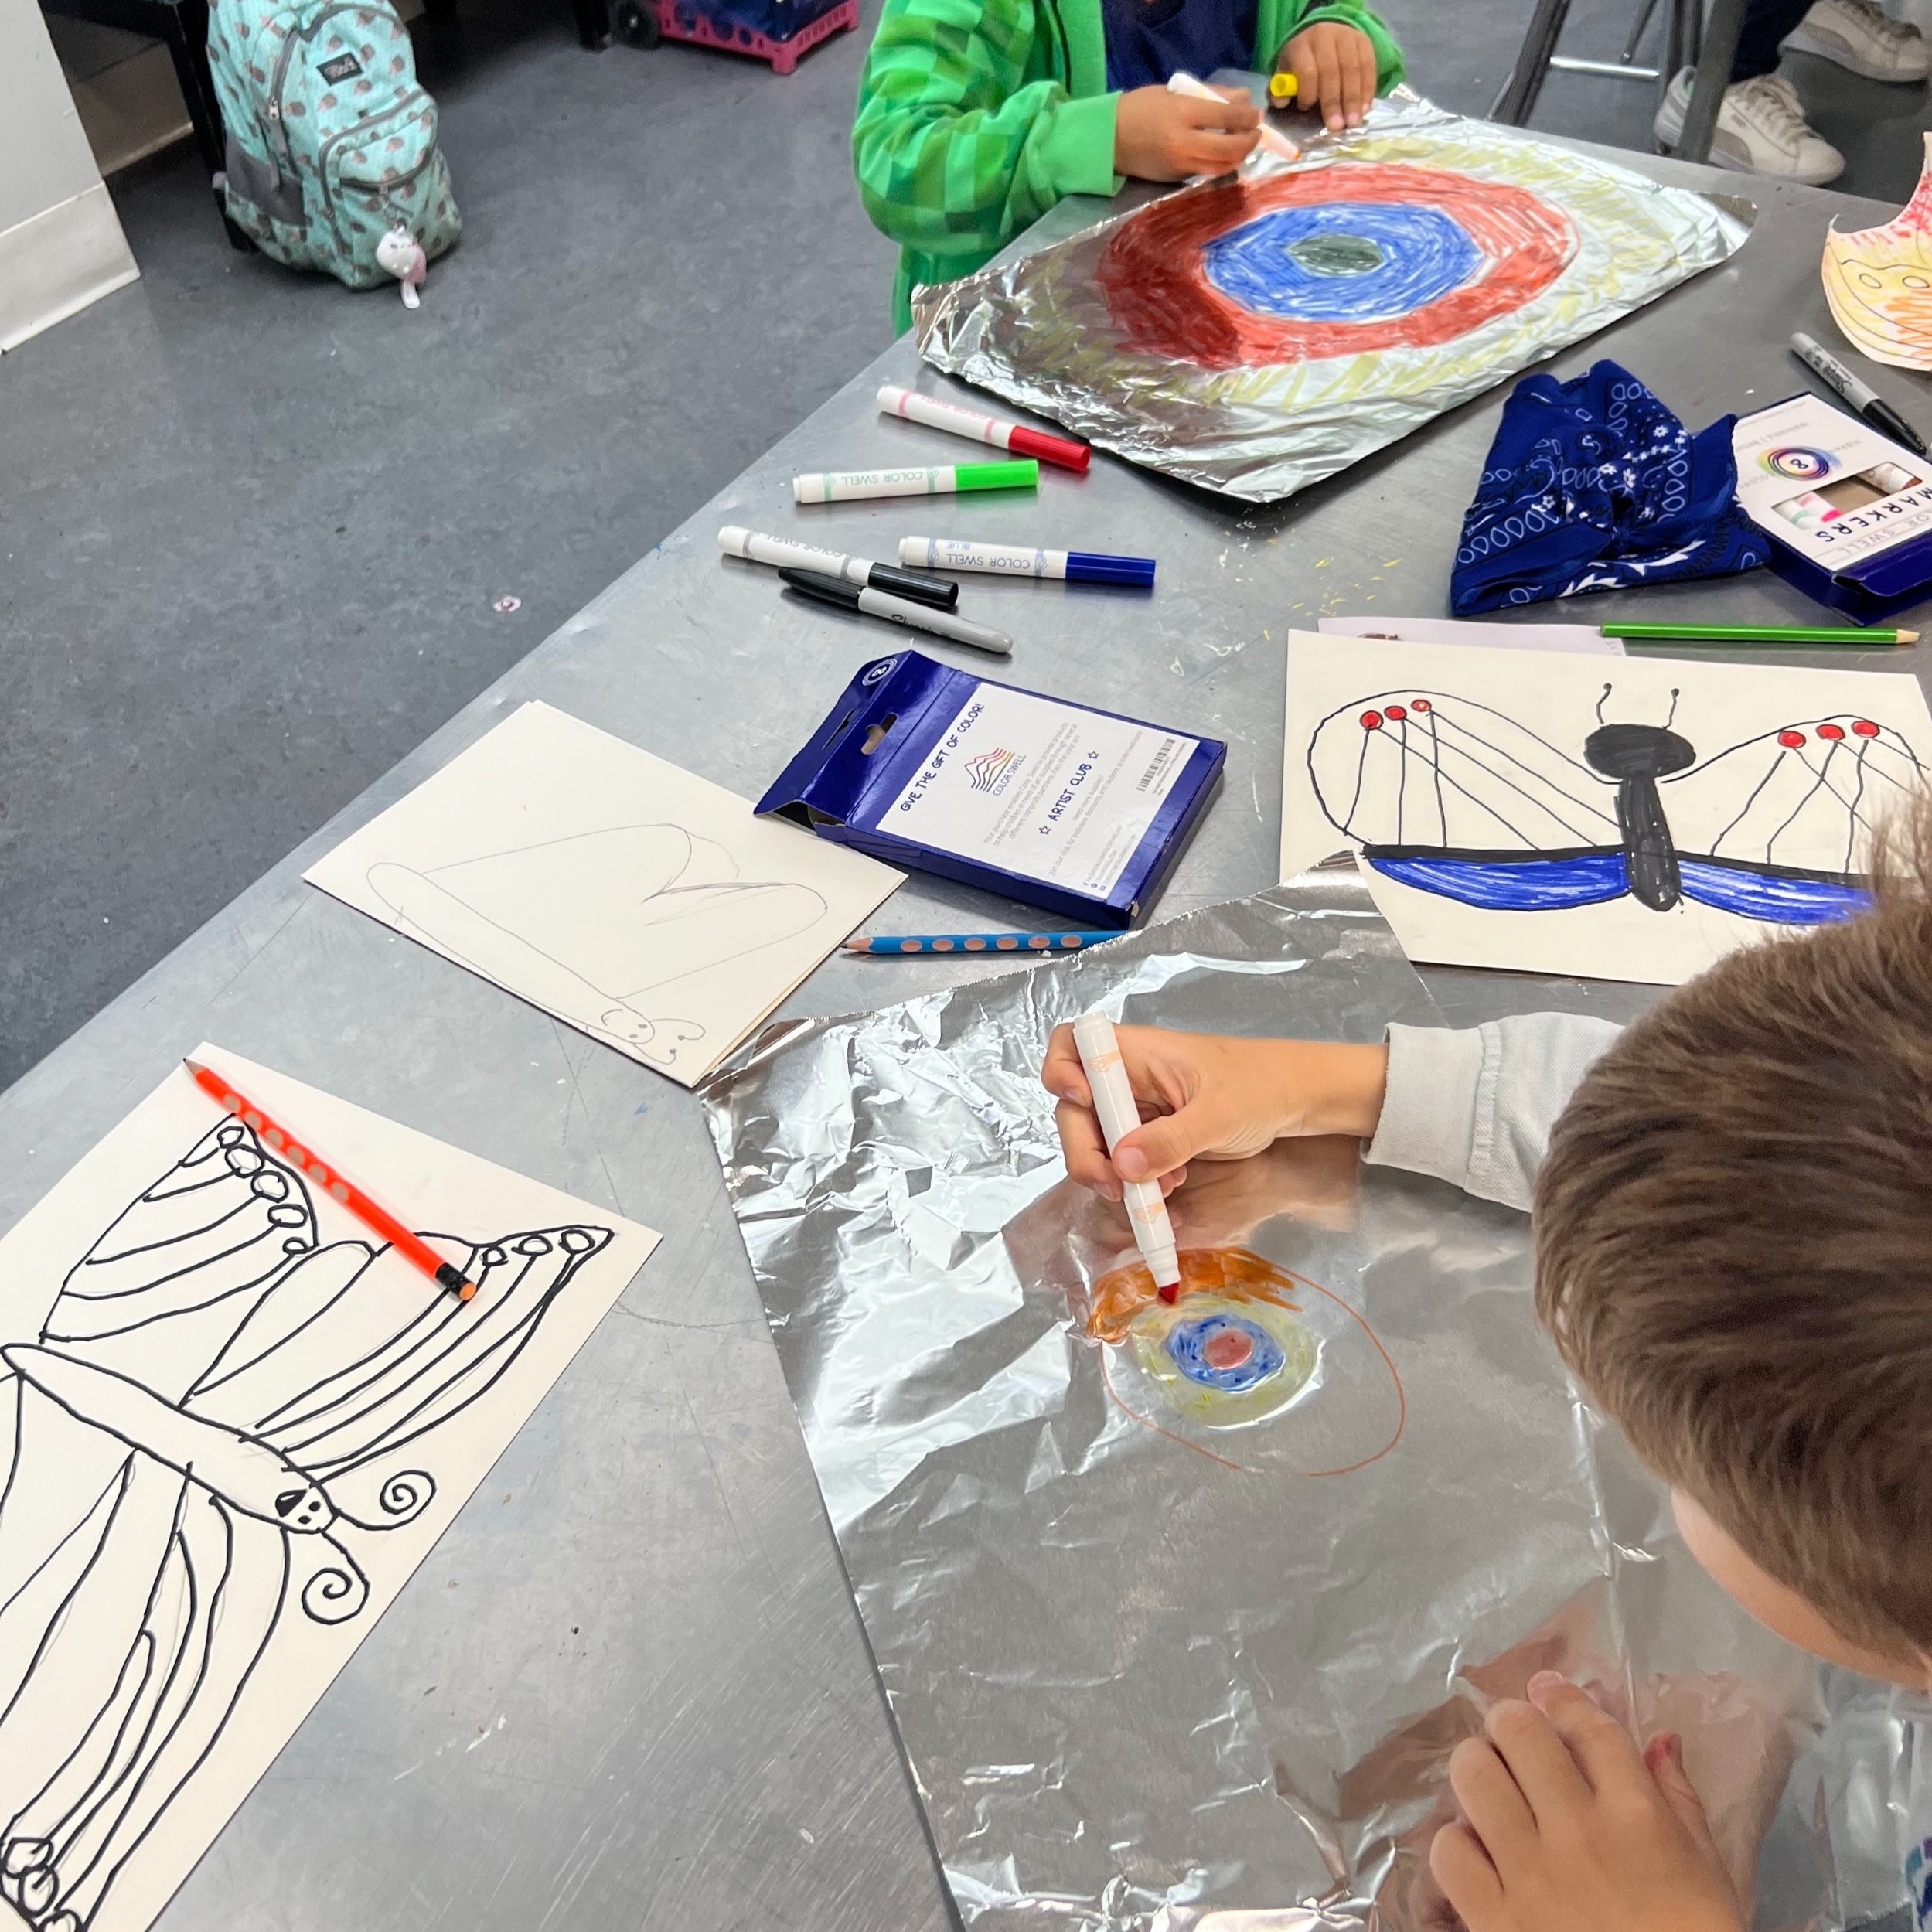
Once the artists look like they have finished, take a moment to have all artists look up, so the foil printmaking process can be explained with image examples. It’s recommended that the facilitator demonstrate the foil marker transfer process quickly for them in person too.
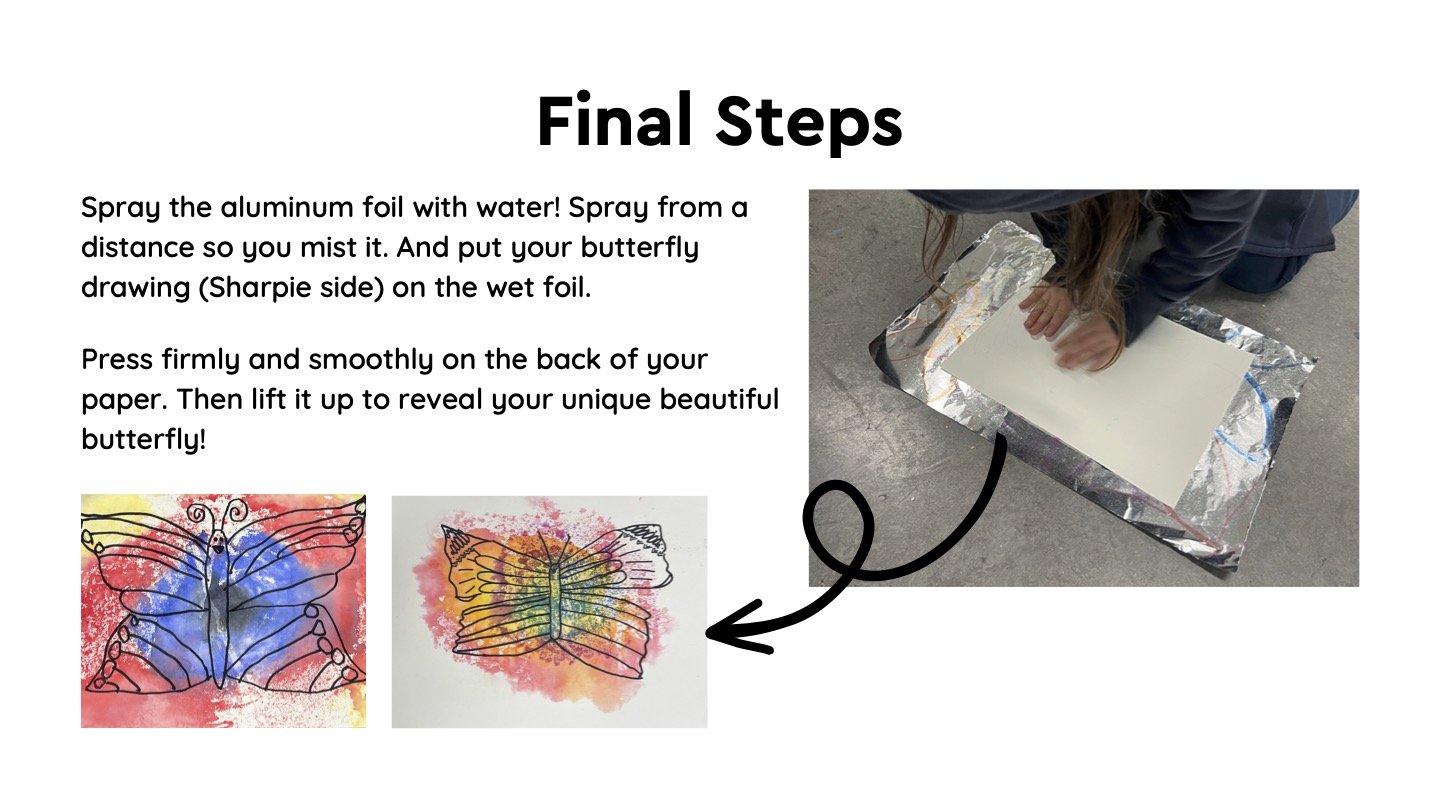
For the next step, the artists must use washable markers to decorate their aluminum foil. Encourage the artists to cover an area, larger than the size of their drawing paper, with colored marker. When they are ready for the transfer printing process, the facilitator can decide if they will be the ones to mist the aluminum foil with water or if the artists are capable of trying it themselves. If you allow the artists to try it themselves, let them know first that the closer they spray, the more their colors will mix together to create a tie-dye effect.
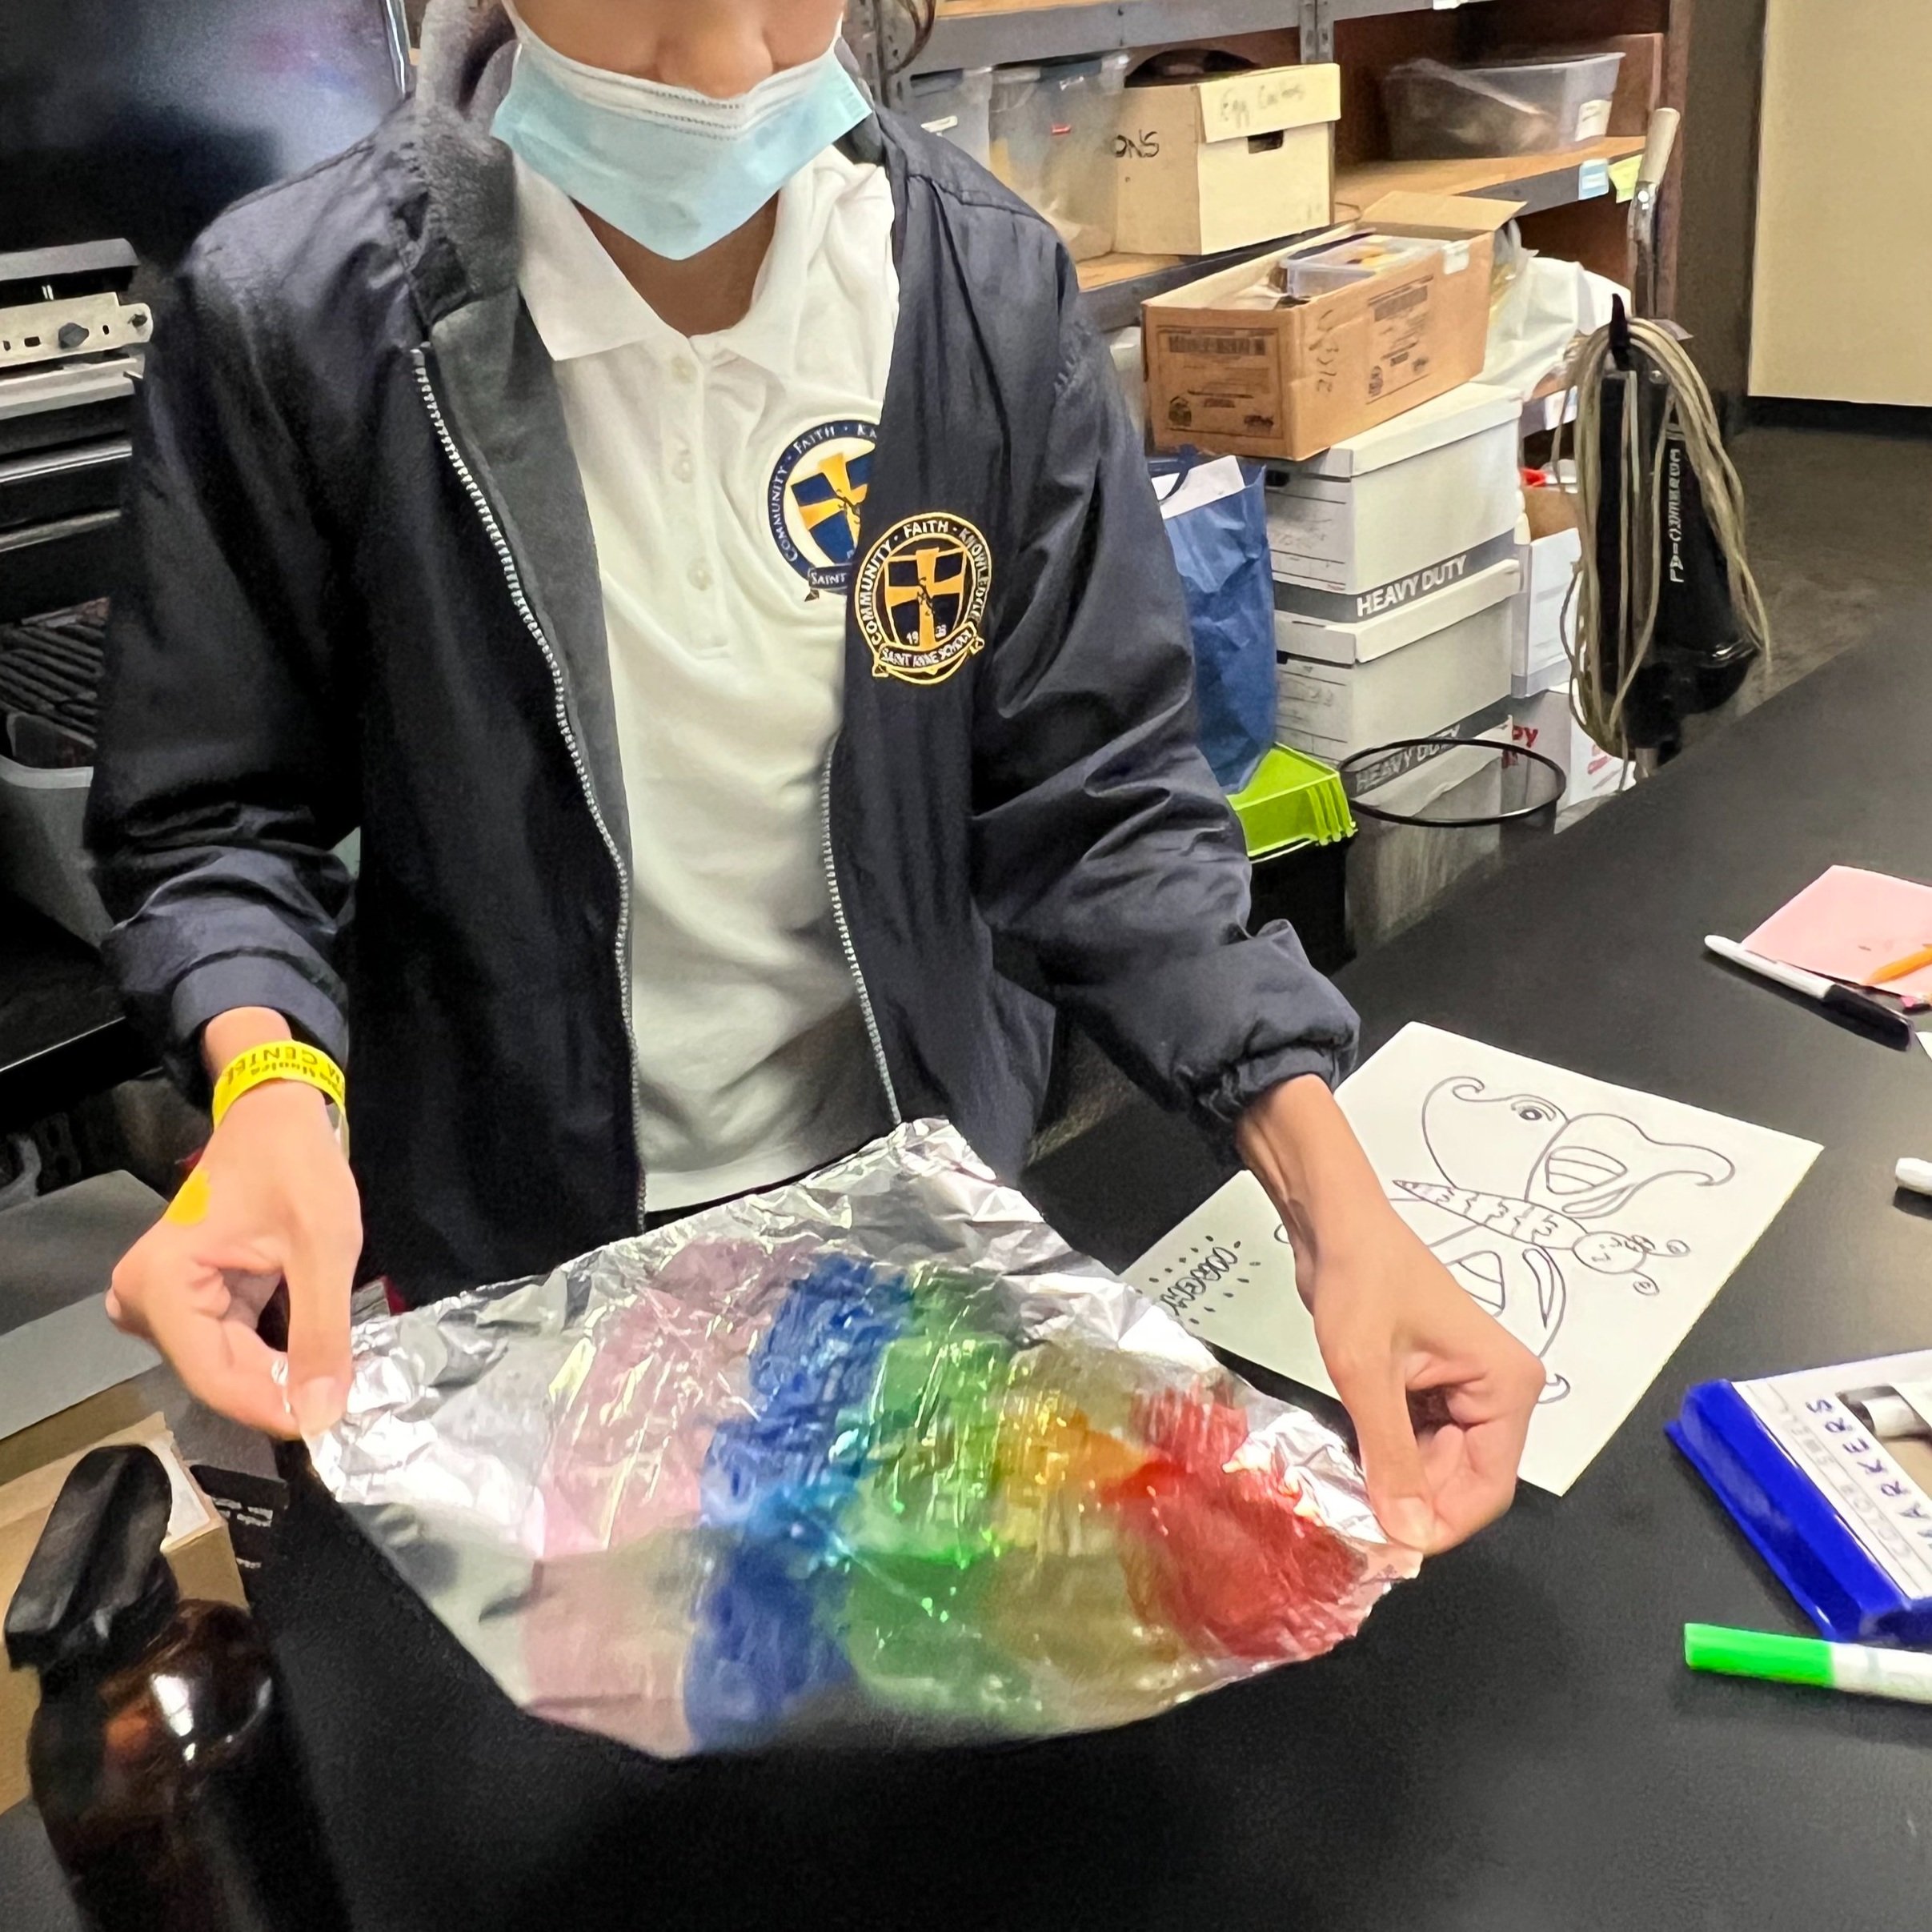
Here is an example of one artist showing the foil marker transfer printmaking process:
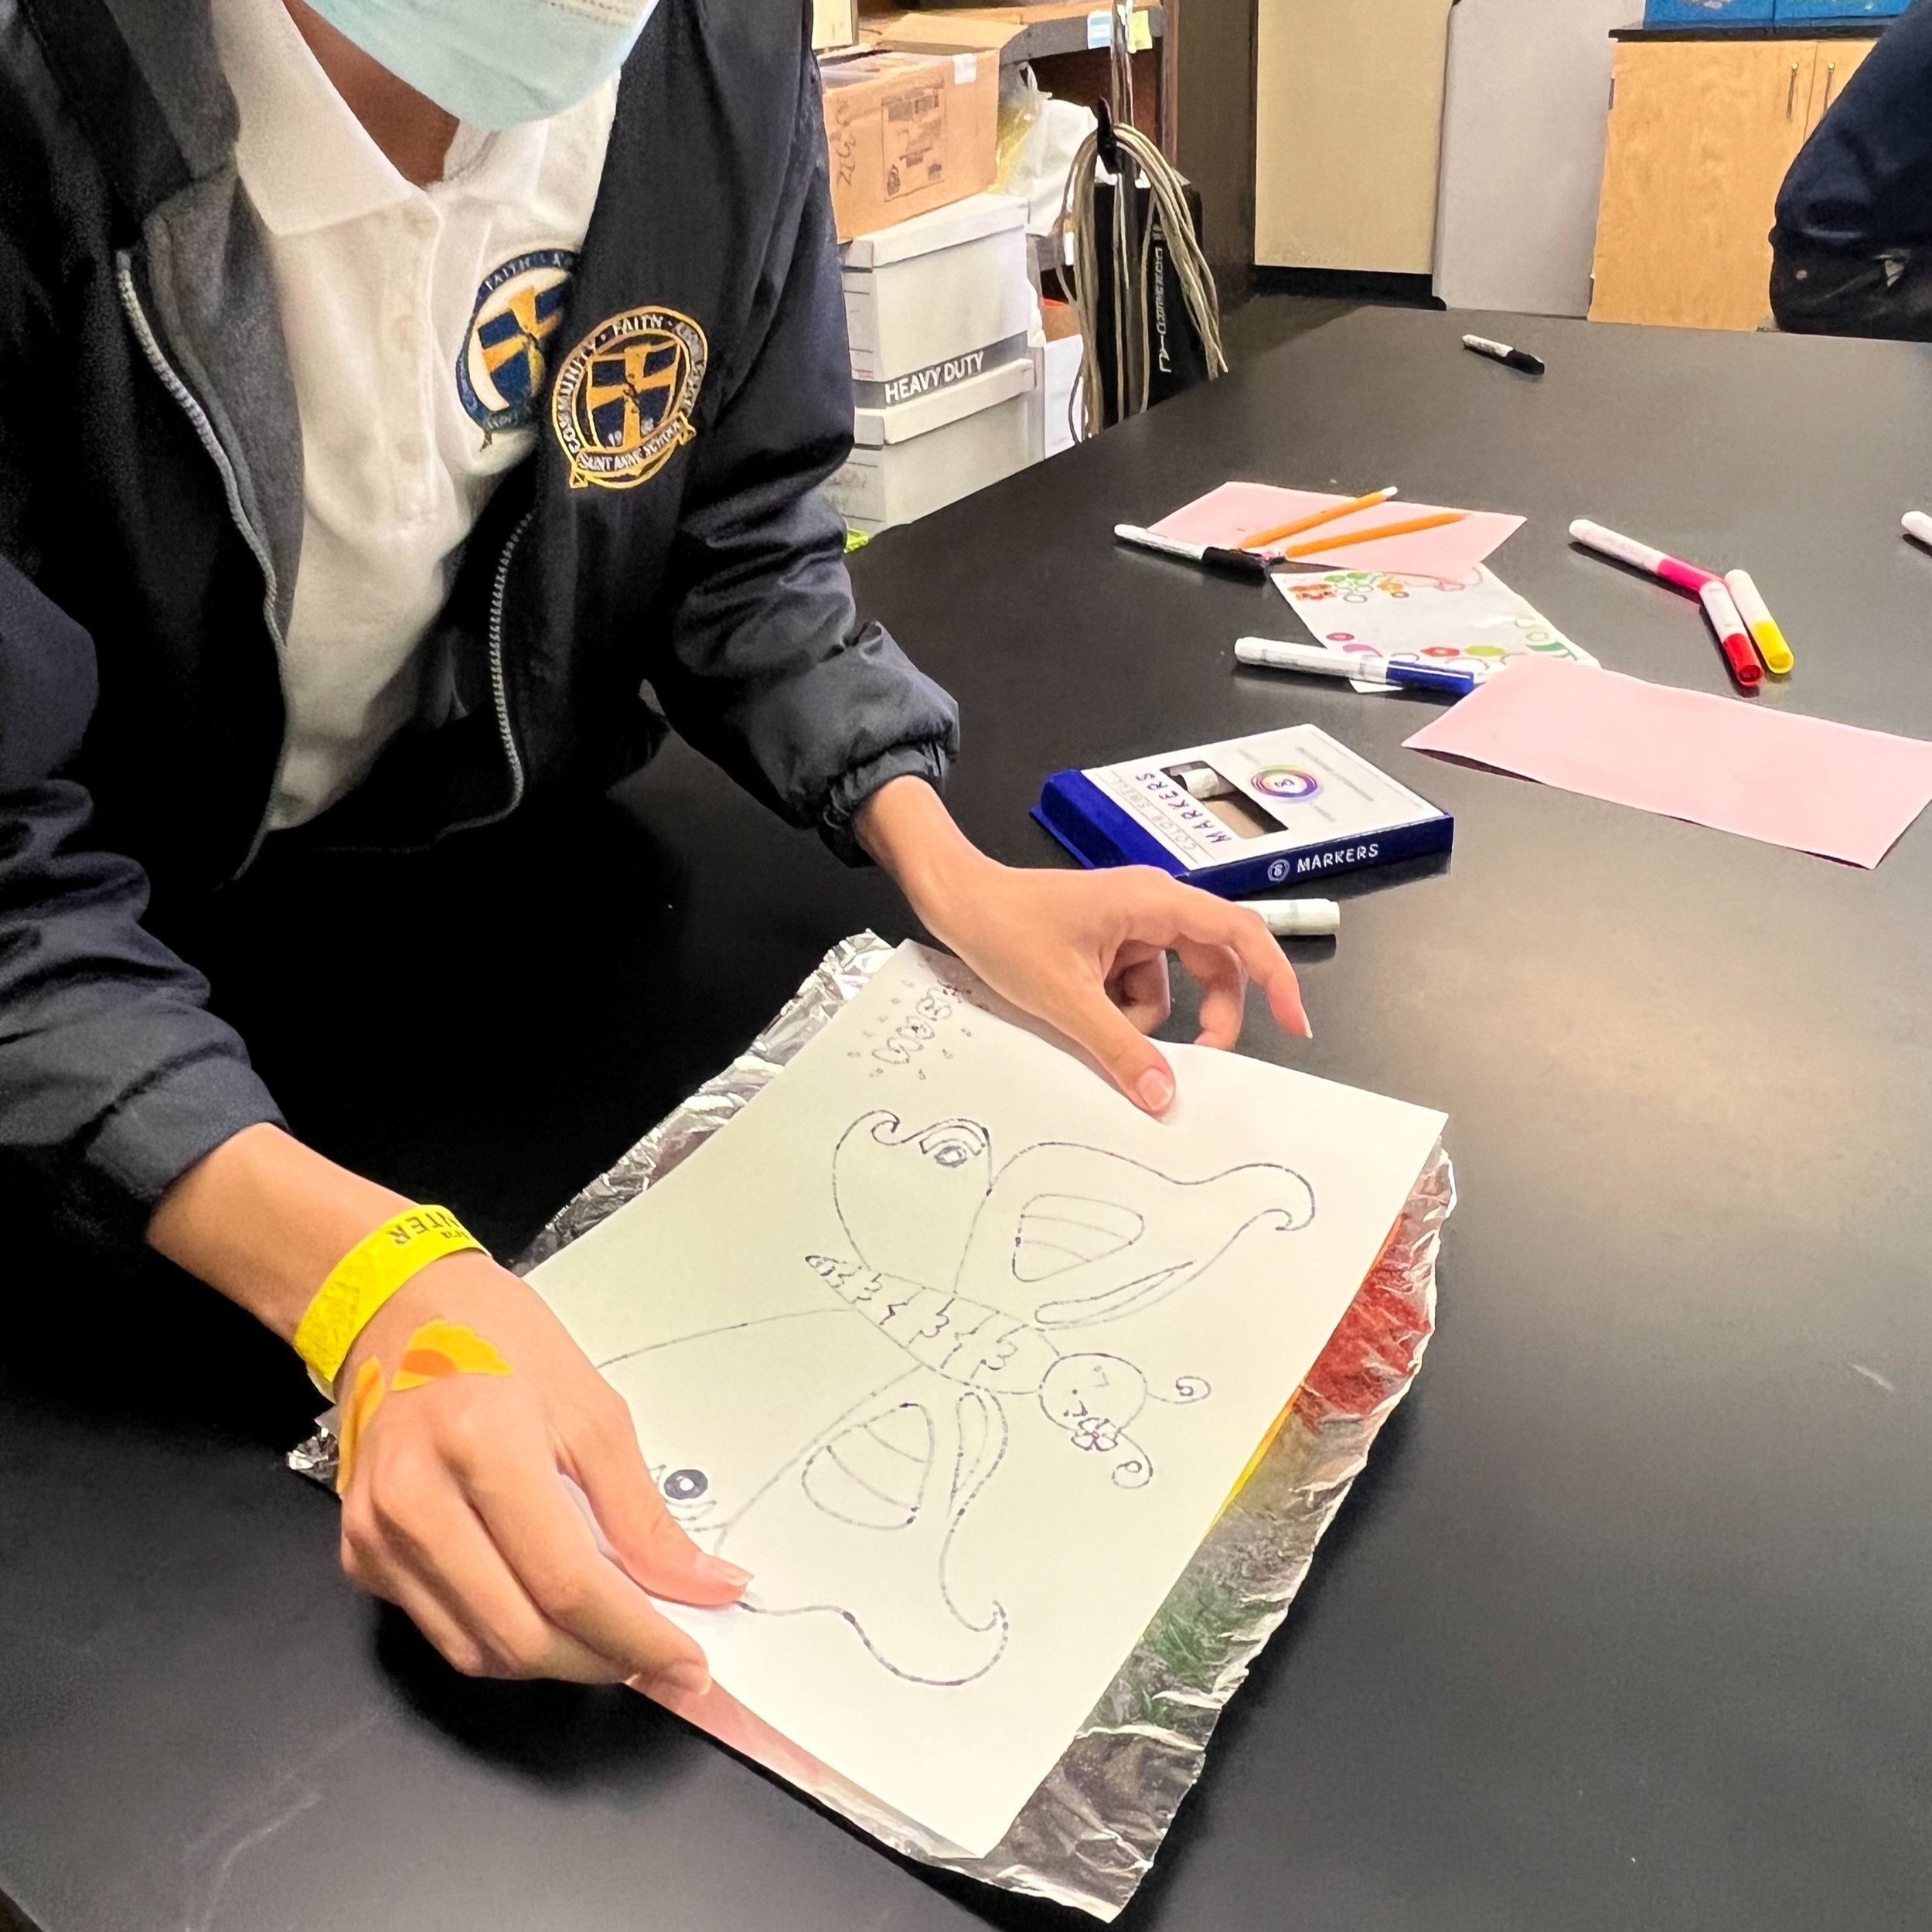
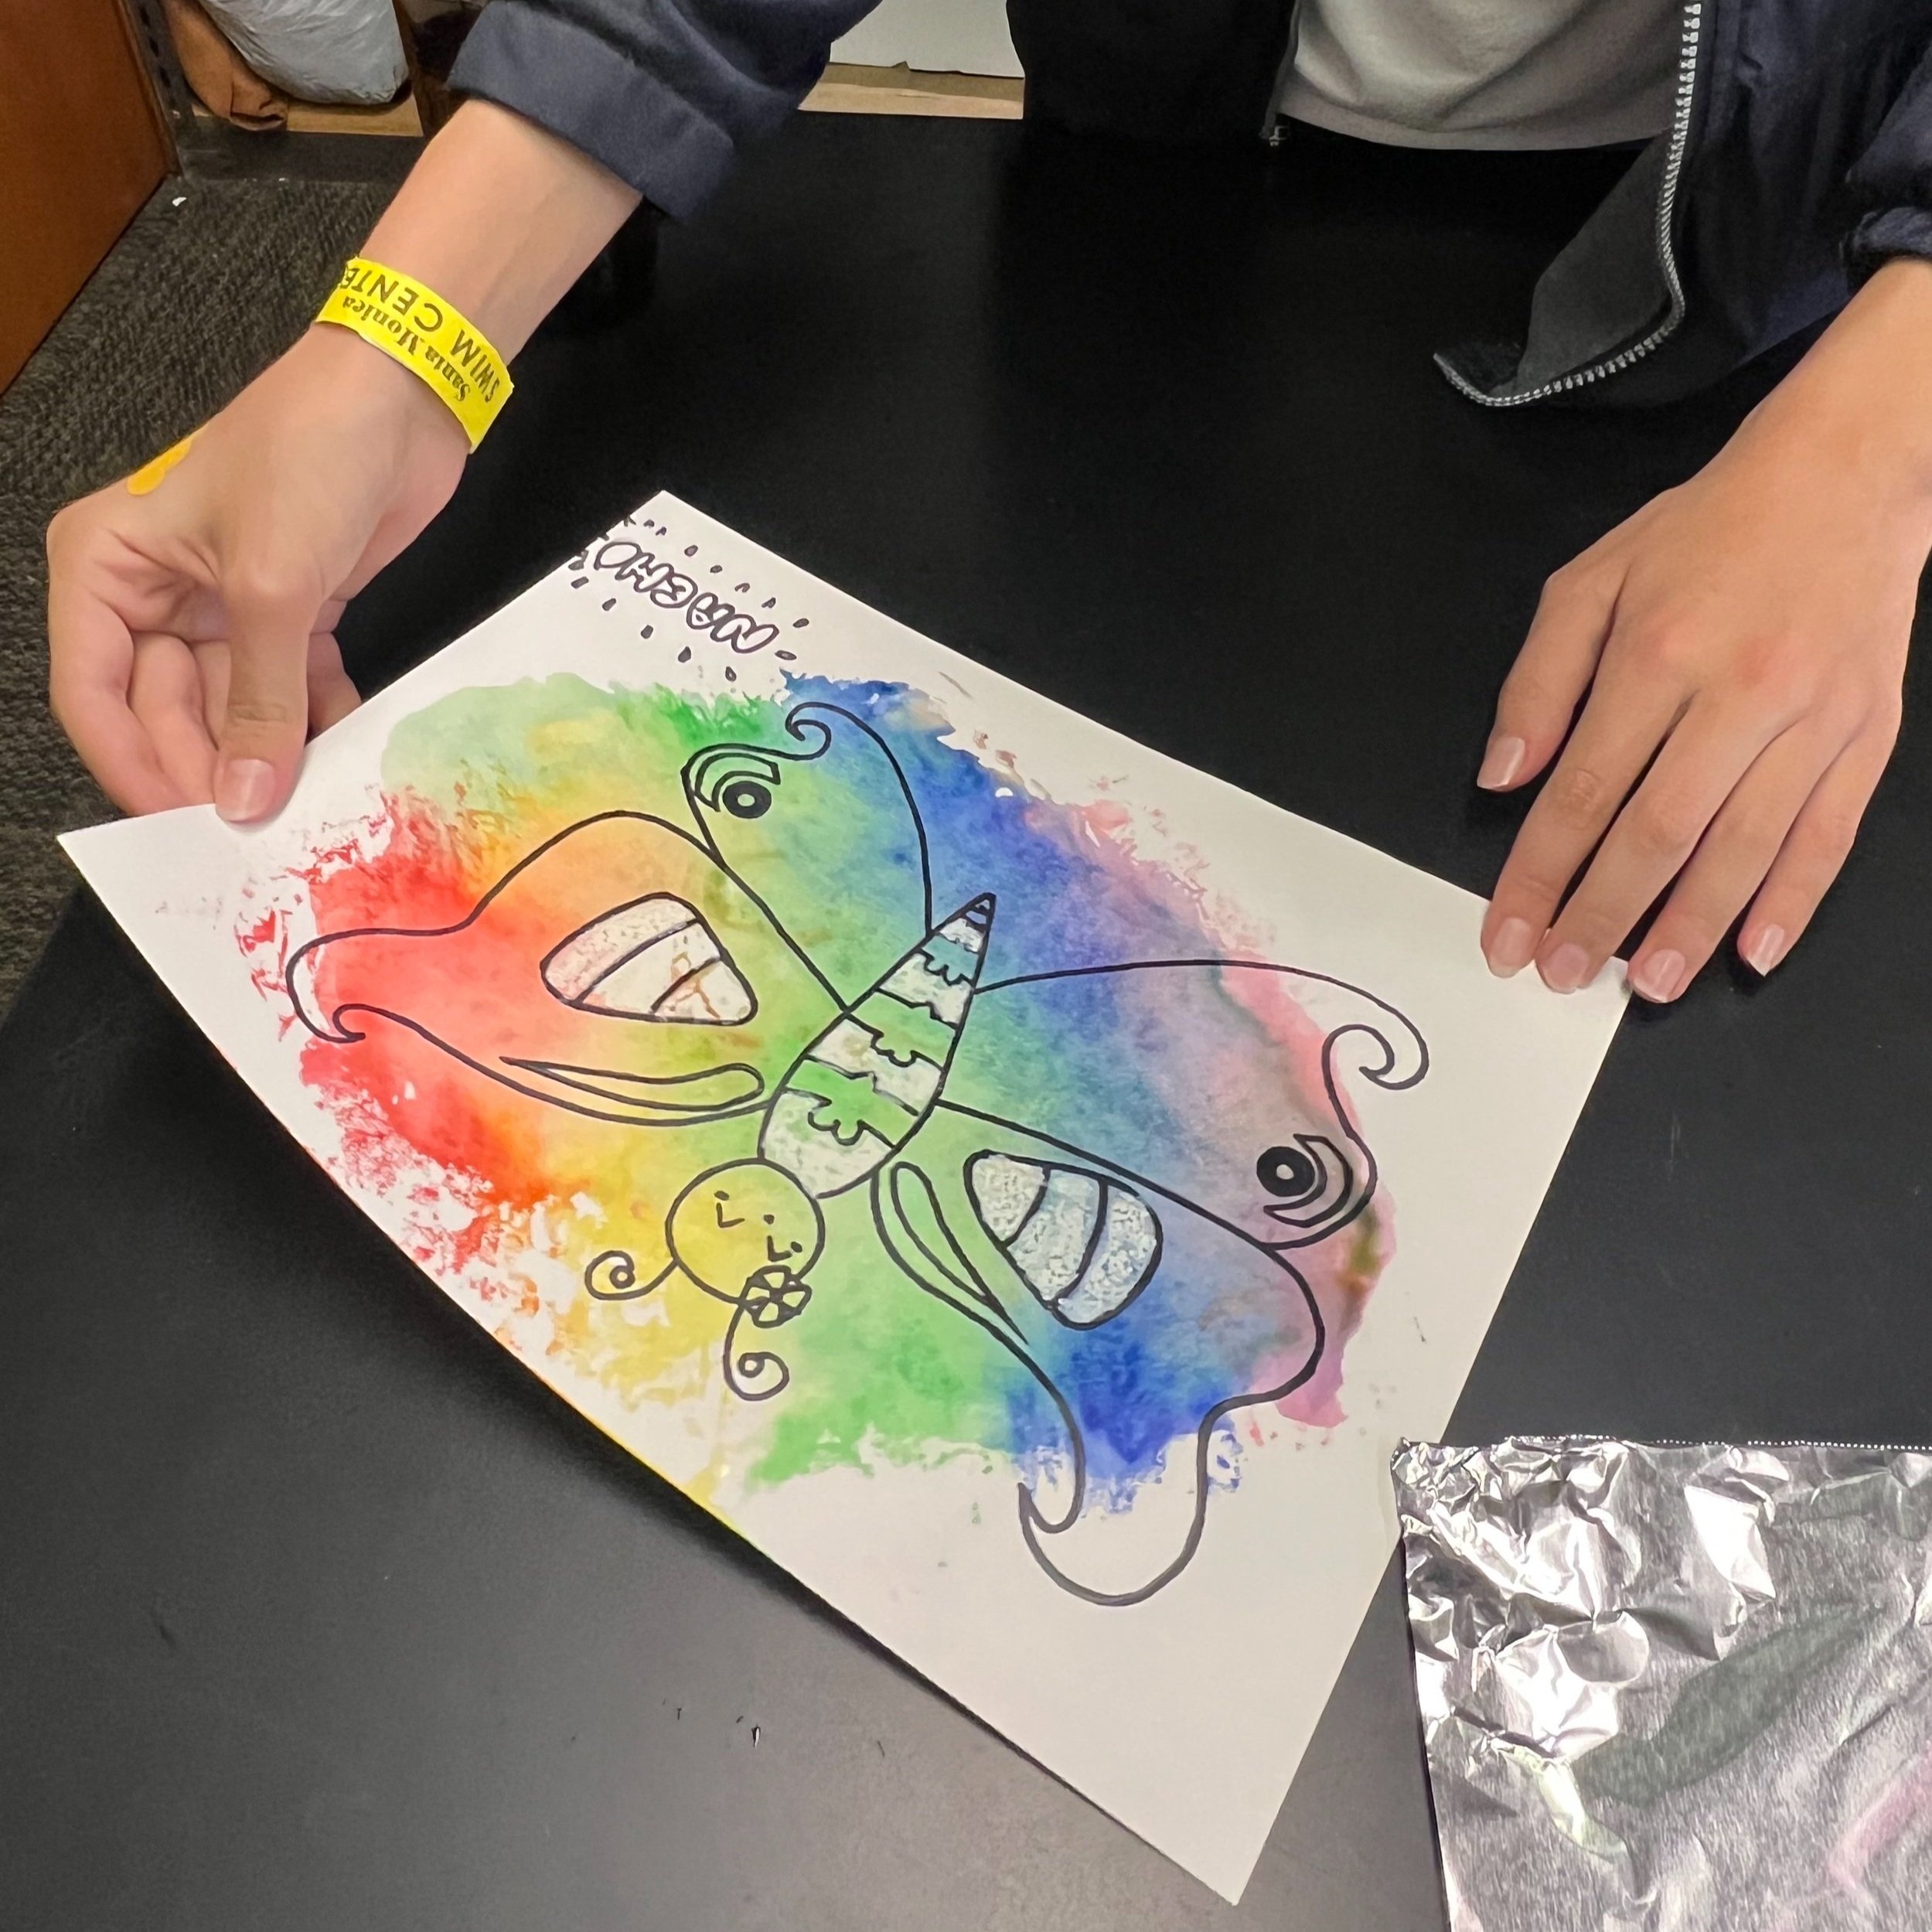
As each butterfly is revealed, notice the artist’s reaction and ask them, “How do you like your butterfly? Did it turn out how you thought it might look? Would you do or try anything differently?”
For some artists, you may suggest the option of cutting out their butterfly (after the foil marker transfer), and then gluing it onto another piece of construction or printed paper.
If artists finish quickly, they can try creating another piece of art by playing with the foil transfer printmaking process. They can simply wipe their aluminum foil clean and start over!
This art activity has a lot of flexibility, so you can adjust the examples for younger or older children with different skill levels.
You can also adjust this activity to work during another time of year by switching out the subject. For instance, in the fall season, you can follow a similar prompt, substituting butterflies for fall foliage leaves.
Once You’re Done…
As artists wrap up their creations, ask them to take a quiet moment, observe their artwork, and see if they notice or learned anything. You can also take time now to ask, “How do you like your unique butterfly? What did you learn during the foil printing process?”
When everyone is done with the activity, you can invite each participant to share their artwork and tell you about it and what they noticed or learned, if they would like to do so. If they don’t feel quite comfortable sharing or are shy, you can propose they share just a glimpse of their artwork visually. Or if they don’t want to share at all, you can ask them if they can simply share what colors they used to create their butterfly or if they did or did not enjoy the foil printing process, either verbally or in the chat (and you, the facilitator, can read it).
Once the artwork is dry, you can hang or frame it to remind you of the beautiful process of change! If you’re working with a group of participants, you can ask everyone to hold up their artwork, even if it’s not complete, so that you can share all of your unique butterflies. It’s fun to take a moment and observe all the different colors, shapes, and designs used too. You can also have participants send photos of their artwork or upload it externally to create a digital collaborative piece.
Try this activity for yourself, with your kids at home, or those children that you support through volunteering or your work endeavors. Comment below to let us know how it goes. You can also post and tag us in your drawings @GiveKidsArt – we love to see their creations!
Need art supplies for your home, classroom, or organization?
We love using Color Swell art materials in our Art Kits and for our art programs, and we used their washable marker sets for this art activity! We have tried most of their art materials and love them all. They are great quality, while also being affordable and they offer bulk quantities. Plus, it’s a better deal to purchase on their website.